All posts by admin

Different Ways to Handle QuickBooks Not Responding Error

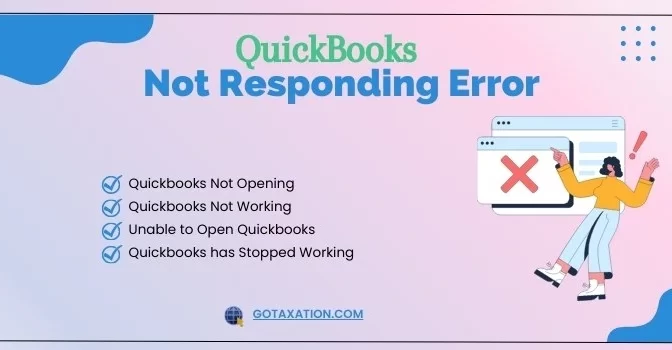
QuickBooks not responding error can prevent users from running QuickBooks Desktop smoothly. QuickBooks provides incredible features for the management of personal, business, and tax-related financial matters. It is a downloadable desktop software that offers different versions you can choose from based on your business accounting needs. However, QuickBooks has stopped working issue can prevent users from using these amazing features of the program.

Need our experts to guide you with the QuickBooks not responding issue? Get instant help by dialing our helpline number +1-844-508-2335.

About QuickBooks Not Working Error

QuickBooks Not Responding error could have been caused by a number of different factors. As a result, there are different ways to troubleshoot this problem. When the error takes place, it hinders an ongoing task in the program and makes it sluggish. If you follow the instructions described in this post, you will eliminate the risk of the software displaying the QuickBooks is not responding issue. Carry out the steps outlined for you so that you can get rid of this error.

Also Read – Fix QBCFMonitorService Not Running On This Computer Error

Underlying Causes Behind the Error That Says QuickBooks Isn’t Responding?

If you are having an issue that is comparable to the one described above, it could be because of one of the following reasons:

  • Sometimes, the length of your company name exceeds what is required.
  • The data on a hard disc has been corrupted.
  • Corrupted program files or an improper installation of QuickBooks Desktop
  • Windows OS may be damaged.
  • Inconsistency among various programs.
  • Sometimes it can be an installation error promoting program issues.
  • Some program files are damaged.
  • First of all, you need to restart your computer.
  • Relaunch the accounting software QuickBooks.

Symptoms of QuickBooks Is Not Working Error

When you can immediately identify an error in QuickBooks, it becomes easy for you to resolve the error with ease. Below are some of the main symptoms of QuickBooks not responding issue: 

  • QuickBooks becomes non-responsive as soon as you open the program. 
  • The program lags when it needs to respond to the mouse or keyboard inputs. 
  • QuickBooks closes abruptly without giving any error message.
  • QuickBooks stops without even loading the dashboard, giving a warning message text on your screen.
  • Slow performance of other Windows-based applications on the machine.

Also Read – Fix QuickBooks Outlook Is Not Responding Issue

How To Eliminate The QuickBooks Is Not Opening Issue?

Now that you know the possible reasons behind the error, follow the below-explained solutions to eradicate them:

Method 1: Run QuickBooks Install Diagnostic Tool

QuickBooks Install Diagnostics Tool can find and fix common installation issues in the program. To run it, you need to download the QuickBooks Tool Hub.

  • Download QuickBooks Tool Hub and run the installer file.
  • Install the tool by implementing the given instructions and agree to the terms to make it work.
  • When in Tool Hub, select Program Installation Issues, and it will enable you to run the QuickBooks Install Diagnostic Tool.
  • When you run the tool, it may take up to 20 to 30 minutes, depending on the severity of the damage.
  • Once the installation error is resolved, your computer and then open QuickBooks once more. If QuickBooks is not responding at this point, move on to the next step in the troubleshooting process.

Method 2: Delete the File Titled “Entitlement Data Store.ecml.”

If the information that was entered during the process of installing QuickBooks is incorrect or if the file that contains the information is corrupted, QuickBooks will display the error message. The error message reads – Delete Entitlement Data Store.ecml file. To get the job done, you will need to open the file in order to get rid of the error. Follow the steps below in order to successfully delete the Entitlement Data Store.ecml file:

  • It is necessary for you to close the QuickBooks file in the first place.
  • Then go to the Windows Start menu and select the Run option.
  • Make sure to copy and paste the information into the box labeled “Run.”
  • Right-click the EntitlementDataStore.ecml file, and select “Delete” from the menu that appears.
  • If removing the EntitlementDataStore.ecml file does not fix the problem, you should try the third solution method instead.

Also Read – QuickBooks Error 1646

Method 3: Start-Up The Refresher Tool For QuickBooks.

If the QuickBooks not responding error continues, you need to start the Refresher tool by implementing the below-explained steps: 

  • Put an end to your work in QuickBooks and close the program before you begin.
  • After that, you will need to download the QuickBooks refresher tool and then store the file on the computer.
  • When the download is finished, you can now proceed to the next step by selecting the “Run” option to launch the QBRefresher tool.
  • Simply select “Fix my QuickBooks” using a single mouse click. The troubleshooting tool will now automatically diagnose the problem and then attempt to fix it on its own.
  • The final step is to launch QuickBooks and check on the problem.

You have just read the three methods to resolve the error along with the causes. If you can’t fix the issues using this method, try the next one.

Method 4: Scan & Repair Bas Sectors On Your System’s Hard Drive 

Bad sectors on the hard drive are also one of the main reasons behind the arrival of the error. In such a case, you need to scan and repair it to get rid of the error by following the below-given steps:

  • Open Windows File Manager (Windows + E) and then right-click the C drive.
  • Here, you need to select Properties and then click the Check now option located underneath the Tools.
  • Mark the checkboxes against the “Automatically fix file system errors” and “Scan for and attempt recovery of bad sectors” options.
  • In the end, click Start and wait until Windows finishes the scan and repair process.

Ending Words!

The solutions discussed in this post can help you to troubleshoot the QuickBooks not responding issue. For further assistance, you can chat with us or get a call back by sending us an email. Our experts will respond to you in a prompt manner and let you run QuickBooks smoothly.

Simple Solutions To Fix QuickBooks Outlook Is Not Responding Issue

Most often, the users might come across QuickBooks Outlook is not responding due to improper email configuration. In other instances, it may arise because of the inappropriate installation of the QuickBooks application. Whenever the issue occurs, users won’t be able to send emails through Outlook in QuickBooks.

However, if you are looking for a guide that contains all the relevant details to resolve the QuickBooks outlook not working issue. In this post, you will get to know all the details required to eradicate the issue immediately.

Are we stuck with QuickBooks Outlook not responding issue? Dial @ +1-844-508-2335 and connect with our experts to grab quick assistance.

Why Do Users Encounter QuickBooks Unable To Send Your Emails to Outlook?

At times, users might get QuickBooks Outlook not responding when Outlook and the accounting software are incompatible. However, there are other reasons also that may give rise to this issue; have a look at them. 

  • Misconfiguration of the email settings within QuickBooks. 
  • Sometimes, it may arise due to inappropriate installation of the QBDT on the system. 
  • It might be caused due to corruption or damage to the MAP132.dll file. 
  • You haven’t installed the Outlook application successfully on your device. 
  • When Outlook is already running in your device’s background, you attempt to send an email via QuickBooks. 

Also Read – Fix QuickBooks Error Code 401

How can you verify if Outlook isn’t responding while trying to send from QuickBooks?

Below are some signs and symptoms to identify the QuickBooks Outlook is not responding issue. 

  • You might experience this error when Microsoft Outlook starts reconnecting. 
  • It may occur when the QuickBooks screen turns white and becomes unresponsive while attempting to send emails through Outlook. 
  • In other instances, it may occur when some buttons in both Outlook and QuickBooks don’t work properly and eventually turn gray.
  • Your QuickBooks and Outlook applications begin to crash and then reopen automatically. 

What Should You Do To Resolve QuickBooks Outlook Not Responding Issue?

After understanding all the possible reasons that trigger the QuickBooks Outlook is not responding issue, move ahead to the next section. Here, we have described some quick and easy tricks to handle the issue seamlessly. We ensure you implement the steps in the same pattern as written below to avoid discrepancies. 

Fixation Method # 1: Verify That You Run QuickBooks With Proper Admin Rights

  • Primarily, right-click on the QuickBooks icon on the Desktop and then pick the option of Properties.
  • Move to the Compatibility tab and place a tick mark beside the “Run this program as Administrator”. You will get this option beneath the Privilege Level section.
  • If you notice that the checkbox is already marked, tap on Apply and then OK.
  • Relaunch your system and verify whether the problem still exists or not. 

Also Read – Fix QuickBooks Error 6176

Fixation Method # 2: Rectify the Damage Within the MAPI32-DLL file 

As stated above, the presence of damage in the MAPI32-DLL file might give rise to Outlook not working issues. Therefore, to rectify the damage within the file, you must perform the following steps closely.

  • Initially, exit from any application running in the background.
  • Now, launch the Windows File Manager and then move to the C: > Windows > System32 folder.
  • Soon after this, search and tap on the file named “Fixmapi.exe” twice.
  • If you can not locate the file within Windows Explorer, you can find it manually through Windows Search.
  • Once you have successfully repaired the MAPI32-DLL file, launch QuickBooks and try sending an email.

Fixation Method # 3: Send the Emails Via Webmail from QuickBooks

If you face issues while sending emails through Outlook, you can also try sending them via Webmail. Doing so, will help you in fixing the issue and thus you can continue sending your emails via Webmail in QuickBooks.

  • Firstly, move to the Edit tab and then opt for the Preferences tab.
  • Now, you must choose the Send Forms option followed by the My Preferences tab.
  • After this, look for the Webmail Providers option beneath the Send Email Using section.
  • Next, select the Add option and insert all the details to add your email account.
  • Afterwards, hit on OK to save the email information you have entered. Later on, tap on OK to make changes to email preferences.
  • Finally, you must try to send an email and add the Outlook email password whenever asked.

Also Read – Resolve QuickBooks Error Code 1926

Fixation Method # 4: Examine the Internet Explorer’s Email Preferences 

  • To initiate the process, close the QuickBooks application and then exit from all the company files.
  • Afterwards, run Internet Explorer and select the Gear icon.
  • Following this, hover your cursor over the Internet Options from the preferences available.
  • Go to the Programs tab and ensure you set Outlook as the default email program.
  • Proceed further by clicking on the Apply option followed by OK.
  • You have to shut down Internet Explorer and then send an email using the QuickBooks application.
  • If you see that QB starts freezing due to some reason while sending an email, set Outlook as the default email.

Wrapping It Up!!

We have made all the efforts in providing you with all the best possible solutions to resolve QuickBooks Outlook is not responding issue. But, still, if you are hunting for any expert’s help, consult with our professionals through live chat for instant help. Another way to contact our professionals is by dropping an email and then explaining your query to get the proper resolution.

DIY Hacks to Resolve QuickBooks Error Code 1926

QuickBooks error 1926 is a common error that generally arises when a user doesn’t have enough access to some specific folder. QuickBooks stores your company Data securely, and that’s the reason why every user doesn’t have permission to modify the files and folders. Admin files are needed to access particular files.

Apart from this, there are various other reasons behind the errors in 1926. Read this article to acquire more knowledge about the error and its troubleshooting ways.

Wondering how to fix QuickBooks Error Code 1926 and need expert’s help? Dial @+1-844-508-2335 and get the best assistance instantly. 

What is QuickBooks Error Code 1926?

When you try to open a company file, you get an error 1926 notifications alert on your screen, saying:

“You do not have sufficient permissions to the specified folder. To use QuickBooks in a multi-user environment, you must have read/write access and create/delete rights to the folder where the company file is stored”.

This means you need permission to make any kind of modification to the company file. So, in such cases, you have to ask the System Administrator to give you the authority to open the specific folder.

Also Read – Resolve QuickBooks Error H202

What triggers QuickBooks Error 1926?

Below, we have mentioned the list of possible reasons that are promoting QuickBooks Error Code 1926:

  1. Insufficient permission to access files from the System Administrator
  2. If the QuickBooks file is saved in a protected location, i.e., Program files or the root of Drive C.
  3. The file is saved in a password-secured location.
  4. Your Company File is stored in a damaged or corrupted folder. 
  5. If the permission to access a folder is incorrect.

What are the steps to troubleshoot QuickBooks Error Code 1926?

After having clear knowledge about the possible causes that promote the error, let’s take a look at the solutions that you can follow step-by-step to resolve QuickBooks error 1926;

Solution 1: Use QuickBooks Desktop with Admin Rights

Running QuickBooks without Admin credentials can stop you from accessing many features of the software. So to avoid any kind of obstacle, use QuickBooks as an Administrator. To do so, follow the given instructions:

  1. Initiate the process by clicking the QuickBooks software icon present on your desktop.
  2. Now, hit on the Properties tab.
  3. Thereafter, go to the Compatibility option, and choose the Run as Administrator tab.
  4. Now, select the Apply option to implement the changes.
  5. Then, hit the OK button to end the process.

Also Read – Fix QuickBooks Desktop Error 15107

Solution 2: Download the QuickBooks Tools Hub

The QuickBooks Tool Hub is a great feature from QuickBooks that helps the user in resolving various common errors. To utilize this program, you have to follow these steps carefully:

  1. Initiate the process by closing QuickBooks software.
  2. Now, Install the QuickBooks Tool Hub in your System.
  3. Next, navigate to the Downloads option, then look for the Tool Hub folder, then double click on the “QuickBooksTooHub.exe” file.
  4. Thereafter follow all the instructions available on your System’s screen.
  5. A new window will appear showing all the Terms and Conditions of the Software; accept it.
  6. Now you are done, open your System, and run the QBS Tool Hub.

Solution 3: Shift your Company File to the Default Location

At this point, you have an idea that the QuickBooks error code 1926 triggers due to insufficient authority of some folder or file. This means your file is saved in a secured location. Thus, to eliminate the error, you have to move your company file/ folder to the default location:

  1.  Close QuickBooks software.
  2. Thereafter, go to the location of your Company file.
  3. Now right-click on the company file (.qbw), and click on the Copy button.
  4. Next, go to the default location, i.e., Location: C://Users/Public/PublicDocuments/Intuit/QuickBooks/Company Files
  5. Right-click and hit the Paste option.
  6. Now, access the company file from the default location.

Also Read – Fix QuickBooks Point of Sale XML Errors

Solution 4: Verify and Set the Folder Permission

If the first three methods fail to bring the desired help, check if the next solution can resolve the error 1926:

  1. Open Microsoft word or notepad.
  2. Now in the Text field, you have to enter a Test.
  3. Thereon, Save the file in the same directory as your Company file.
  4. Now, go to the start menu.
  5. Search for the folder that has the Company file.
  6. Next, navigate to the Properties option.
  7. Check the drop-down menu and select the Sharing option.
  8. Now, click on the Share Add icon.
  9. Select the preferred QBs Data Service user., and click on the Full Control tab.
  10. End the process by clicking on the Share option.
Solution 5: Generate a New Folder for Company File

If QuickBooks error 1926 continues to annoy you even after trying all the above-mentioned procedures, follow these steps:

  1. Click on display and select the New folder option. Verify again that you are creating the new folder in the same directory.
  2. Now, use the right-click button to copy the company files.
  3. Thereafter, navigate to that New folder and Paste the company file.
  4. Now, set up the correct folder permission to share your Company files with anyone.
  5. Next, You have to start the QBs Desktop and select the File menu.
  6. After that, hit the Open or restore a company option.
  7. Now, to go further in the process, select the Open a company file tab.
  8. At last, Click on the Next button.

Also Read – Resolve QuickBooks Error 6123

Conclusion!

QuickBooks error code 1926 can take place when you fail to access some files due to insufficient authority. The solutions given in this post can help you with the error resolution. For further assistance, you may chat with us or email us your Queries.

Easy hacks to fix QuickBooks Point of Sale XML Errors

Looking forward to a way to fix QuickBooks POS XML Errors? Go through this blog to get the best help possible.
A user can encounter an XML error in QuickBooks POS, while using QuickBooks Point of Sale. XML files are needed by the QB application to support its functionality. It is also used to store, move or share different data. If QBPOS faces a problem with some file or folder containing a damaged file, then it means the QuickBooks software is experiencing XML Errors.

Whenever a user faces QuickBooks Point of Sale XML Errors, a message will pop up on their screen as:

“Error: Process could not access file C:\ Program data\ Intuit\ Entitlement Client\v(x)\SessionData. XML because it is being used by another process” or “There is an error in XML document (0, 0)”.

Further, to know more about the causes and troubleshooting ways, you can read this blog.

Want to fix QuickBooks Point of Sale XML Errors instantly? Dial @1-844-508-2335 and get assistance from our professionals as early as possible.

Also Read – Fix QuickBooks Error 1328

Reasons that promote QuickBooks pos XML Errors 

Below we have mentioned the reasons that trigger the XML error in QuickBooks POS.

  • If your SessionData.xml  file is corrupted or damaged.
  • If the QuickBooks POS is partially installed.
  • Due to damage in the QuickBooks Point of Sale Entitlement Client folder.

Key Points to keep in mind prior to Troubleshooting XML error in QuickBooks POS

The steps you must follow before proceeding with the troubleshoots of QuickBooks pos XML Errors are:

1. Unhide all the hidden Files and Folders

  • To initiate the process, Press Windows+R; this will open Windows File Manager on your screen.
  • Now, select the Organize option and click on the Folder and Search buttons.
  • Thereafter, check the View tab to find the Show hidden files and folders option, and select it.
  • Next, un-mark the checkbox that says Hide protected system operating files.
  • At last, click on yes, followed by clicking on Apply and ok.

2. Get the latest maintenance patch of QuickBooks Points of Sale

  • Launch QuickBooks Point of Sale
  • Now, in the help tab, look for the About QuickBooks Point of Sale option, and select it.
  • Now, review if the installed version is the latest version of QB POS; in case it is not the latest version, then follow the given steps to update the app.
  • Select the Help menu, and now click on Software Updates.
  • Next, hit the check for updates option, and select the Update Now tab.
  • Click on Ok.
  • Now, Once you see the Complete Update window, close the app and then restart your system.

Also Read – Resolve QuickBooks Error 12007

3. Configure the QuickBooks Point of Sale Settings

  • Open the Run window by pressing the Window+R key.
  • Now, write appwiz.cpl and hit the enter button.
  • Select ok and reach for QuickBooks POS from the list and select it.
  • Thereafter, click Uninstall/Change. 
  • Hit the Next tab and then choose Repair.
  • Now, wait for some time for the repair process to get finished, and then reboot your system. 

What are the methods to Fix QuickBooks Point of Sale XML Errors?

Now that you know all the important aspects of the error let’s learn and follow a few tried and tested solutions to troubleshoot it.

Solution 1. Modify the name of the Entitlement Client Folder

When you Change the name of the Entitlement Client Folder, it causes QuickBooks to create a new one. Thus if the error is due to corruption or damage in the folder, it will be fixed.
So to change the name of the Entitlement Client Folder, you can follow the given steps:

  • Launch Window File Manager and then go to  C:\ProgramData\Intuit\ Entitlement Client\ v(xx). 
  • Thereon, modify the name of the Version 12.0 folder to V8, Version 10.0 to V6, and Version 2013 to V8.
  • Now, check if no folders are displaying on your screen, then unhide the hidden files by following the process mentioned above.

Solution 2. Make changes in the name of the Session Data File

If you are changing the name of a session data file, it will also create a new one and eliminate the error, it is same as the folder option.

  •  Open the Run window by pressing the Window+R option.
  • Now, In the run window’, write down services.msc.
  • Click on ok, and search for Intuit Entitlement Service.
  • Next, right-click on the service and click on the Stop option.
  • Go to the C:\ProgramData\Intuit\Entitlement Client\v  folder, and look for the SessionData.xml file.
  • Now, right-click on the file option and click on Rename.
  • Enter OLD in the file name as SessionDataOLD.xml.
  • At last, Launch QuickBooks POS and verify if the XML error is eliminated now. 

Also Read – Troubleshoot QuickBooks Error 7149

Solution 3. Remove the files from the Entitlement Folder

If the reason behind the error is damaged or corrupted files in the Entitlement Client folder, then by deleting them, you can prompt QB to generate a new file, which is free from all the errors. To do so, you have to follow the given steps:

  • Launch Window File Manager
  • Now, go to C:\ ProgramData\ Intuit\Entitlement Client\v folder.
  • Thereafter, to choose all the files present in the folder, press the Ctrl+A keys.
  • Next, you have to Press the Delete option.
  • Select Yes for the configuration.
  • Now, open the QuickBooks software again and check if the QuickBooks pos XML Error is resolved now.

Ending Note!

After trying all the mentioned solutions, if you are still facing the QuickBooks POS XML Errors, then it might be possible that your system is having some kind of technical problem that is creating issues in fixing the error. In that case, you need to get in touch with the QuickBooks professionals Team to your time in the error resolution process. Email us your Queries or use the live chat option for better assistance. These experts are available 24*7.

Effective Methods to Troubleshoot QuickBooks Error 7149 Instantly

QuickBooks Error 7149 is the most common runtime error that users might face while opening the accounting software. Sometimes, it may also occur due to data damage in program files. Whenever the users encounter this error, the following error message strikes their computer screen indicating:

“Error 7149: QuickBooks has encountered a problem and needs to close. We are sorry for the inconvenience”. 

However, when the error occurs, the system begins to crash when you attempt to open or close the application. Furthermore, we recommend you go through this entire post to know more about this issue in detail. 

Are you facing issues while resolving QuickBooks Error 7149? If yes, then consult with our experts by placing a call at @+1844-508-2335 to figure out the issue immediately. 

Also Read – Recover QuickBooks Admin Password

Reasons That Lead to the Occurrence of QuickBooks Error Code 7149 

The users might end up with QuickBooks Error 7149 due to issues with the Windows registry. Also, it may appear due to multiple other reasons. Therefore, to let you understand all the probable causes, we have listed some of them below. 

  1. QuickBooks Error 7149 might occur when your company file might get damaged because of malware or virus attacks on your system.
  2. It may occur when the third-party application has accidentally deleted some essential QuickBooks data. 
  3. The antivirus software may be obstructing the functionality of the QuickBooks application.
  4. Unfinished or corrupt QuickBooks installation may also be one of the reasons. 

Scenarios When You Encounter QuickBooks Runtime Error 7149 

Here, we have mentioned some of the scenarios when you might discover QuickBooks Error 7149. Follow the steps listed below to identify the error. 

  1. You might see the error message on your computer screen on the occurrence of the error.
  2. Windows started working slowly or sluggishly.
  3. Sometimes, it may occur when you discover that an active program window crashes.
  4. Also, this error might trigger when your system starts freezing regularly. 

Also Read – Fix QuickBooks Error Code 15212

Reliable Solutions to Rectify QuickBooks Error 7149 Hassle-Free 

This blog section will provide you with the step-by-step instructions required to eliminate Error 7149 in QuickBooks. Make sure you must go through this section thoroughly and apply the solutions in the same manner as instructed. 

1st Measure:- Configure or Install QuickBooks Once Again

  1. In the preliminary stage, hit the Windows key and then access your system’s Control Panel. From there, opt for the highlighted Add or Remove /programs option.
  2. Next, look for the QuickBooks icon, right-click, and choose the Repair option. 
  3. Following this, head towards the Uninstall tab to remove the QuickBooks application and install it again. 
  4. Finally, relaunch your system and try to open the QuickBooks application once again.

2nd Measure:- Switched Off the Antivirus Software for some time 

For instance, if you notice that your antivirus software is affecting the QuickBooks functionality, then disable it for some time. Perform as per the instructions given below. 

  1. In the initial stage, you must look for the antivirus software from the Taskbar.
  2. When you find it, right-click on the antivirus icon and opt for the Disable option. 
  3. Next, try opening the QuickBooks application in safe mode and then update it to the latest version. 

Also Read – Resolve QuickBooks Banking Error OL-334

3rd Measure:- End the conflicting programs 

At times, the users might encounter QuickBooks Error 7149 when one or more third-party applications are running in the background. Thus, it might interrupt the QuickBooks processes. So, to resolve the issue, it is necessary to end the background processes by implementing the instructions as follows: 

  1. To start the process, you first need to launch the Task Manager by simply hitting the Ctrl + Alt + Del keys together.
  2. Consequently, it will show you the list of programs running in the background.
  3. Navigate and go to the Processes tab and stop the process one after the other by highlighting every program. Later on, opt for the End Processes tab and move further.
  4. You must look attentively at the message when it pops up on stopping a certain process.
  5. Once you know which process is hampering QuickBooks processes, proceed to the next resolution method. 

4th Measure:- Remove trojans, viruses, and Malware from your system 

As mentioned earlier, the users might come across QuickBooks Error 7149 because of malware issues. Thus, it is mandatory to run a complete scan of antivirus software. However, if the antivirus software detects any threat or malicious content, it will wipe out all the viruses. 

Once you have successfully removed the malware or other online threats, start your device again. Hence, launch the QuickBooks application to check if the error still exists. 

Also Read – Fix QuickBooks Unrecoverable Error

The Final Verdict!!

Dealing with QuickBooks Error 7149 isn’t a tough deal, as you can fix it by following the resolution methods explained above. However, there might be the chance that you get stuck at any of these steps and couldn’t proceed further.

In such a scenario, we would advise you to take help from our QuickBooks experts through a live chat facility. Our QuickBooks customer support team is available round the clock to deliver the required assistance quickly. 

How to Fix Quicken Error OL-293?

Usually, the users might experience Quicken Error OL 293 while attempting to update the accounts using online services. However, there are multiple other factors that lead to the error, such as bank server issues, incorrect login credentials, or internet connectivity issues.

Whenever the error appears, it prevents the users from accessing the online banking services in Quicken. Thus, users won’t be able to download the latest bank transactions, and it leads to delays in the bank-related tasks.

If you are searching for the right techniques to troubleshoot Quicken error code OL-293, go through this entire post attentively.

Are you hunting for instant help to eliminate Quicken Error OL-293? If that’s the scenario, then connect with our professionals to overcome the issue instantly.

Probable Root Causes Behind Quicken Error OL-293

Let’s look into the root causes that may trigger Quicken Error Code OL-293 to figure out the issue as soon as possible.

  • Entering inappropriate or outdated bank login credentials.
  • It may also trigger due to a temporary server outage.
  • An unsupported version of Quicken may also be responsible.
  • Sometimes, it may occur when Quicken services need to be activated properly.

Also Read – Resolve Quicken Script Error

Essential Points You Must Consider Before Resolving Error OL-223 in Quicken

Before moving further with the troubleshooting part, it is essential to know some of the key points in mind. This will help you resolve the Quicken Error OL-223 without much effort.

1. Prepare a Quicken Data File:-

It is advised to prepare the Backup of the Quicken file so that if you come across any fallback while performing the troubleshooting process, you can return to its original place. To prepare the Backup, implement the steps listed below.

  • Initially, launch the Quicken application and then move to the Backup and Restore option.
  • Following this, choose the highlighted Backup Quicken file.
  • Eventually, opt for the Backup Now option.’

2. Disable the Automatic Download Transactions into Register

To rectify the Quicken Error OL-293, you must deactivate an account in Quicken before that. Moreover, it is perfect to disable the automatically added transactions to the banking register feature. Thus, it will help you prevent duplicating transactions in the Account.

  • The first and foremost step is to move to the Edit option, followed by Preferences.
  • Soon after this, hover your cursor over the Downloaded Transactions option.
  • Afterwards, unmark the checkbox next to the Automatically add to banking registers option.
  • In the end, hit the OK button to accomplish the process.

Also Read – fix Quicken Error CC 501

Easy Ways to Handle Error OL-223 in Quicken Instantly

Go through the below-listed resolution methods to overcome Quicken Error OL-223.

1st Fixation Method: Confirm Your Quicken Update-

Sometimes, the users might come across Quicken Error OL-223 while accessing the obsolete version of Quicken. Therefore, to figure out the issue, look for the Quicken update; implementing the steps as follows:

  • Initially, access the Quicken application on your Windows PC.
  • Afterwards, hover your cursor over the Help menu, followed by the Check for Updates option.
  • Next, if your Quicken software isn’t updated, you will receive a notification to get the latest version of it installed on your device.
  • Ultimately, hit the Yes option to initiate the installation process.

2nd Fixation Method : Reload the Data For Online Banking-

For reloading account details, follow the steps listed below.

  • Initially, tap on the Account option present at the left side.
  • Once the Account Register is open, head towards the top-right gear icon with a drop-down menu.
  • Afterwards, choose the highlighted Update Now option.
  • You are supposed to add the bank password correctly into the required text fields.
  • Now, you must try updating the accounts once again.

3rd Fixation Method: Review Your Account Services in Quicken-

  • In the first step, move to the Tools option, followed by Accounts List.
  • After that, tap on Edit next to the Account that contains this error code.
  • Now, beneath the Accounts Detail section, you must cross-check all the Account information. Therefore, you must make the necessary changes if required.
  • For instance, if you have modified the information, you must try connecting with the bank again.
  • Next, move to the Tools option and hit the One Step Update option.

Also Read – Resolve Quicken Error CC-501

4th Fixation Method: Cross-Check Your Bank Login Password-

  • In the initial phase, move to the Tools option and then opt for the One Step Update option.
  • You must look for the Account with this error code and unmark the other one.
  • Next, you must tap the Key icon and insert the correct password into the required text field.
  • In the end, hover your cursor over the Update Now option.
5th Fixation Method: Remove and Re-Add the Account Once again

Even after implementing the above solutions, you still discover Quicken Error OL-293, then try to reactivate and deactivate the Account. Here, we have listed the steps for both procedures below; check them out.

Remove an Account
  • Move to the Tools option, followed by the Account Lists option.
  • Select the Edit option beside the Account that is generating the issue.
  • Afterwards, head towards the Online Services tab and pick the Deactivate option.
  • Thereafter, choose the Deactivate option and click Yes for confirmation.
  • End the process by choosing the OK option followed by Done.
Re-Add an Account 
  • Initially, opt for the Tools option and then Add Account.
  • You are supposed to choose an account like Savings, Checking, etc.
  • Afterwards, go to the Advanced Setup option and add the name of your financial institution.
  • Move further by hitting the Next option.
  • You must pick a suitable connection method and add the bank Username and Password.
  • Next, hit the Connect option, and with this, Quicken starts searching for the Account at a bank.
  • After getting the lists of all your accounts, you must try to reactivate the accounts.
  • Rather than adding the accounts again, you must connect an existing account in Quicken.
  • Then, select the Next option and hit the Finish option.
Wrapping It Up!!

We hope this context has shed some light on resolving Quicken Error OL-293. However, if you are still struggling while operating online banking services in Quicken, contact our experts. Our Quicken Customer Service experts are available round the clock to guide you in the best possible manner at the earliest.

Troubleshooting Steps To Fix QuickBooks Error Code -6177, 0

If you are facing the QuickBooks  error 6177, 0 in desktop version, and are looking for solutions to help terminate the error, then you are at the right place. In this article, we will cover the solutions you can easily execute step-by-step to eliminate the error.

“Save your time by speaking live with a QuickBooks expert to get quick assistance in eliminating error code -6177, 0. Place your call now at 1(844) 508-2335”

Main Reasons Behind QuickBooks Error 6177, 0

The several reasons why a user may encounter QuickBooks error code -6177, 0 are as follows;

  • QuickBooks desktop must use the correct path/ location to access the company file.
  • Corrupted downloaded files or incomplete installation can lead to QuickBooks error -6177, 0.
  • An outdated version of QuickBooks desktop or a weak internet connection can also lead to errors.
  • Malware or virus has damaged the QuickBooks accounting software.
  • Firewall settings block the QuickBooks desktop software from connecting with the server and working smoothly. 

You, can also read – Fix QuickBooks Error H202

Methods of QuickBooks Error  6177, 0 

As there can be multiple reasons you may encounter the issue, we will only be able to list a single solution that will work in some circumstances. Therefore, below are going to cover the tested solutions that you can execute step-by-step to eliminate QuickBooks error code -6177, 0;

Solution 1. Transferring the Company File to Hard Drive

  • Firstly, move the company file from the server to the C drive.
  • After that, launch the company file on the QuickBooks desktop.
  • Thereon, create a portable file, and save it to the local C drive.
  • Moving ahead, close the QuickBooks company’s file.
  • Followed by the above steps, restore the portable file from the C drive and then save it to the server.
  • At last, end this process by collecting your company file and opening it on the same server.

Once you are done with this method, check whether the QuickBooks error code -6177, 0 has been eliminated. In case, the error code 6177 still exists, then try the next solution.

Also Read – Resolve Quicken Script Error

Solution 2. Manually Fix The File Path

  • Launch the windows file explorer on your device by pressing the “Windows + E” keys together.
  • After that, navigate to the QuickBooks folder and search for the network data file. You may find this file by searching for an extension ending with “.nd.”
  • Thereon, do a right click on the ND file, and select the “Delete” option. 
  • Followed by the above steps, launch the QuickBooks database server manager on your device. (Note: Users can freely download this tool from the official website of QuickBooks products.)
  • You must select the QuickBooks folder, which includes the company file, and click on the “Start Scan” button.
  • As the scanning process ends, click on the “Close” option, and permit the folder permissions to share company files.
  • You must enable and disable hosting if the application is already installed on the server. 

Read Also – Fix QuickBooks Error 102

Solution 3. Download New Updates of QuickBooks Desktop

The next solution we recommend you implement to eliminate QuickBooks error code 6177 is updating the QuickBooks desktop accounting software to the latest release

An older version of QuickBooks may include various small bugs which can lead to various technical issues/ errors prompting the error. Updating the QuickBooks desktop application to the latest release will fix these bugs and help users use the software smoothly. 

Solution 4. Reset Multi-user Hosting

Given below are the steps that you can follow to reset the multi-user hosting feature on your QuickBooks account;

  • Firstly, launch the QuickBooks desktop on your server computer.
  • Thereon, click on the “File” menu option available at the top left side of the screen.
  • As the drop-down menu list appears on the screen, click on the “Utilities” option. 
  • Now, select the “Stop Hosting Multi-user Access” option, and click on the “Yes” option.
  • Followed by the above steps, again go to the “File” menu, and select the “Close Company” option.
  • This feature will automatically reset all of your hosting settings.
  • Thereon, again launch the QuickBooks desktop application on your device, and navigate to the “File” > “Utilities” tab option. 
  • Select the “Host Multi-user Access” option, and confirm it by clicking on the “Yes” option. 
  • At last, end this process by navigating to the file menu option and selecting the “Quit QuickBooks” option. 
Ending Note

In this post, we have mentioned several methods you can execute to eliminate QuickBooks error 6177. However, if you still need help with this error, you can connect with  QuickBooks experts through the chat box or email at info@gotaxation.com. Our experts are available 24/7 around the clock to provide the best possible assistance in using the QuickBooks software smoothly and hassle-free.

How To Download TurboTax (Get Complete Information)

TurboTax is leading as the top-class tax filing software that makes the tax preparation and filing process much more convenient. Moreover, it also provides an easy-to-use interface to file taxes without much guidance. However, to operate this software, getting  download TurboTax on your preferred operating system is mandatory.

Moreover, before proceeding further with the download and installation of TurboTax, verify the system requirements to run the software flawlessly. This explanatory guide contains all the essential facts required to download TurboTax hassle-free. 

Finding it difficult to download TurboTax on your device and need instant help? Call at +1-844-508-2335 right now and get your issue resolved under the experts supervision within the shortest time possible.

System Specifications Required to Download TurboTax 

For installing the TurboTax software smoothly on your operating system, it is mandatory to fulfill the basic system requirements. Go through the below-listed pointers to run the software hassle-free on your device.

Windows PC Users 

  • TurboTax works best with Windows 8.1, 8, and with Windows 10 operating systems. 
  • Your system must contain at least 2 GB RAM to run the application flawlessly.
  • Ensure that your device must have a Pentium 4 or Athlon processor.
  • The disk space required for the 2020-2021 versions must be 1 GB, 2GB for the 2019 version, and 650 MB for the 2018 version. 
  • Moreover, for product activation and software updates, it is essential to have 1 Mbps speed internet connection.
  • Additionally, it is suggested to use a monitor with a screen resolution 1024 X 768. 

For Mac Users 

  • The users can easily download TurboTax on these Mac operating systems macOS Catalina 10.15, macOS Mojave, macOS High Sierra 10.13, and macOS X v.10.12. 
  • It has been suggested that the users must have a minimum of 2 GB of RAM to run the software smoothly. 
  • In addition, a minimum of 1 GB of hard disk space RAM is required for the perfect TurboTax download.
  • Verify that your system contains the Multi-Core Intel processor with 64-bit support. 
  • Moreover, 1 Mbps of internet connection is required to activate the product and software updates.
  • Always verify that you are using a monitor with a screen resolution 1024 X 768.

Stepwise Instructions to Download TurboTax on your Device Instantly

TurboTax download is required to utilize the software’s unrivaled features and services. You must carefully follow the step-by-step directions provided below to accomplish this.

  • In the beginning, reach to installturbotax.com using the preferred web browser.
  • After this, log in if you have a Turbotax account earlier. Otherwise, opt for the Create Account option and then proceed further. 
  • You have to hit the highlighted Download option to initiate the download process.
  • Once the downloading is over, access the Download folder. Otherwise, you must open the exact location from where you downloaded the TurboTax installer.
  • Now, tap on the TurboTax installer twice and opt for the Install option.
  • After completing the TurboTax installation, hit the Finish option.
  • Subsequently, properly add the installation key within the respective text fields and select the Next option.
  • Finally, you must choose the Activation method and ensure that you are well-connected with a stable internet connection. 

Installation of the TurboTax Without CD or DVD Drive

  • Before starting the process, ensure you have closed all the background running processes. Also, verify that you have closed the currently running web browser.
  • After this, review that you have disabled all the antivirus programs running in the background as it might obstruct while installing TurboTax.
  • Now, reach TurboTax’s official website and opt for the Download link. Further, choose the TurboTax software you wish to purchase from the options available.
  • After choosing the appropriate version of TurboTax, you have to hit the Download button.
  • Now, you are required to act according to the instructions displayed on the screen to get the appropriate version of TurboTax Download
  • Relaunch your device after completing the installation. 

Installation of the TurboTax With CD or DVD Drive

  • First of all, ensure that you have properly inserted TurboTax CD into the drive of your device.
  • After this, access the Run Window by hitting the Windows + R keys simultaneously on your keyboard.
  • Click on Browse and then look for the TurboTax CD on your CD/DVD/RW drive.
  • You must tap on the setup.exe file twice to initiate the installation process. 
  • Next, you will get the screen representing “Your Product is installed, now let’s activate it”. Here, you have to add the License Code into the respective text field.
  • Once done, hit the Continue button to accomplish the installation task. 

From Where Do You Obtain the TurboTax License Code

The TurboTax license Code consists of mainly 16-character combinations of letters and numbers. You will get this activation code on the envelope of the CD or the packing slip. Alternatively, you can also obtain it from the Purchase Confirmation mail if you have bought the product online. After entering this code, you can easily activate TurboTax and then use it to file the tax return. 

Ending Note!!

After reading this entire post, we hope you have all the answers on how to download TurboTax and install it. If you are having trouble getting the latest TurboTax download on your device, verify your internet connection. For further clarifications or queries, you are free to talk with our TurboTax professionals via email. Alternatively, you may also contact them via live chat and get all answers to your queries within the least time applicable. 

How Do I Recover TurboTax Forgot Password?

At times, users may need to access their TurboTax user ID and password to sign into their TurboTax account. However, users might sometimes lose or forget their TurboTax account login password. As a result, it might interrupt the users while filing the taxes and thus lead to delays in the tax-filing process. 

Are you looking for the best method to recover TurboTax Forgot password ? If so, this is the place where your search ends. The information needed to rapidly reset the TurboTax password is provided in this page.

Need immediate help to Recover TurboTax Forgot Password? Receive immediate assistance to deal with the issue from our highly-certified experts by calling +1-844-508-2335. 

Key Points to Remember While Generating Your TurboTax Password 

Passwords play a crucial role while entering any online account, and so for the TurboTax account. Therefore, generating a strong and unique password for the account is essential, making it difficult for hackers to crack and keep your sensitive information safe. 

Below are some of the key points you must be aware of while creating the password.

  • Always ensure that there should not be any space within the password.
  • Make use of a complex password that contains 8-32 characters. Also, verify that your password must consist of one uppercase and one lowercase letter.
  • As the Passwords are case-sensitive, checking that your Caps Lock and Num Lock keys are turned off before typing the password.
  • Moreover, it is important to involve some letters, numbers, and special characters within your password. 

What should you do to reset password using a simple way?

Recovering the TurboTax password is a hectic and complicated process. Moreover, the users might find it hard to restore their password as they aren’t aware of restoring the password. Therefore, to help you out, we have explained the detailed instructions to do the same below. 

  • Reach the Account Recovery Page of TurboTax in the beginning, using your preferred web browser.
  • Afterwards, you must enter your personal information appropriately. This information consists of your phone number linked with the TurboTax, User ID, and email address.
  • Subsequently, act according to the on-screen directions to restore your TurboTax password. 
  • Consequently, TurboTax will automatically customize them as per the details provided by the users and whether they recognize your device or not. 
  • Finally, TurboTax will send you a Verification Code to reset TurboTax password. Otherwise, it will assign you the lists of the accounts associated with your information. 

Also Read – Fix TurboTax Error 1603

Stepwise Instructions to Change TurboTax Password 

In certain instances, users might have to change their TurboTax password due to security purposes. Have a look at the below-listed instructions to change the TurboTax password.

  • Initially, reach the official web page of TurboTax by accessing your preferred web browser. Then, click the Sign In option present at the top-right corner of the screen. 
  • This will redirect you to the Account Recovery Page itself. Locate and hover your cursor over the Try Something Else option on this page.
  • Consequently, it will open a new window on your screen. You must add crucial details like Last Name, Date of Birth, and Social security Number into the required text fields.
  • Once you have added all the details, hit the Continue button.
  • Next, you have to answer the questions prompted by the TurboTax to proceed further.
  • In the end, you must establish a new password and then add it to the respective text field. Re-enter the same password as mentioned above for confirmation. 

Steps to Restore Password in TurboTax Mobile Application 

Sometimes the users might need to remember their password in the TurboTax application due to failing to enter the account. So, doing the TurboTax Reset Password is essential using the simple steps below. 

  • In the preliminary stage, open the TurboTax Mobile application on your device.
  • You must add all the required information, such as phone number, User ID, or email. Then, proceed further by clicking on the highlighted Sign In tab.
  • For instance, if you have added your contact number or email address, you must type the Verification Code received. 
  • Furthermore, you must choose the User ID you want to use to enter the TurboTax account. 
  • Go ahead and continue by clicking on the highlighted “Sign in a different way” option.
  • After this, you will obtain the options per TurboTax’s information. 
  • For instance, you can acquire verification codes via email address and phone number linked with the account. Then, in that scenario, you can enter your account without the password.
  • Whereas if you encounter issues while accessing the email address and contact number linked to your account. At that point, opt for the Verify a different way, which will eventually redirect you to the Account Recovery Request Tool. 

Summing It Up!!

With this blog’s help, we present you with the different ways through which you can recover TurboTax forgot password. However, if you still have questions, you can connect with us through email. Alternatively, you can also talk to our representatives via live chat and obtain the required assistance within no time.

Best Ways To Overcome Quicken Script Error

Quicken script error can take place when opening the program, and it affects the performance of the program severely. This error can interfere with the task you are currently working on, and therefore, you need to choose the right course of action to fix the problem. It needs you to know the possible instances that can evoke the script error in Quicken application.

However, you can save time here as we have discussed everything from scratch, including the meaning, possible reasons, and troubleshooting solutions for the error. Follow this post until the end, and thank us later once the error is resolved.

What Does Script Error in Quicken Mean?

There is not a single scenario when a Quicken script error can come into existence. You can face it when downloading or opening your company data from within the program. Also, it doesn’t come alone but comes paired with different types of error messages.

If you are a regular user of the Quicken application, then you must be aware of the fact that program issues show some signs of their occurrence. Regardless of the possible reasons, the error will certainly harm your ongoing processes. The sooner you fix it, the lesser the impact will be. Navigating this post until the end can guide you through the procedures on how to fix Quicken script errors.

Why Am I Experiencing the Quicken Script Error?

It is obvious to be curious about the script error when it starts affecting your routine accounting processes. Therefore, we have listed them for you in the following pointers:

  • When you create your Quicken account, and it is activated for Quicken Connect but not available on the Quicken services, the error can take place.
  • The error sometimes occurs when you try to copy a file or try to restore a backup of the file and your account is not active.
  • Also, when the account is inactive, Quicken still tries to connect with the file located on the server, resulting in an error.

Is Script Error A Harmful Issue in Quicken Application?

The extent of damage caused due to the error can vary from one situation to another. However, if the error remains persistent for a long time, it will start affecting your processes, which can evoke monetary issues as well. It is better to fix this faulty situation as soon as possible to reduce the effects of the problem. You don’t need to look any further for the same, as this post has covered it all for you.

How Can I Resolve Script Error in Quicken Software?

The general solution to fix Quicken Script error is reactivating the program after deactivating it. Below, you can find the step-by-step assistance on this procedure:

Reactivate Your Account After Deactivating

You can perform this solution in two steps. In the first step, you need to deactivate the program. Thereafter, activate the program and run it smoothly. Below are the steps:

Step 1: Deactivate The Account

To deactivate: 

  • Open the Quicken application to start the procedure.
  • When in Quicken, click the Account name.
  • Next, click the Settings tab located at the bottom right to move ahead.
  • When the Settings window opens, click the Troubleshooting option.
  • Thereafter, click the Deactivate Downloads option.
  • In the end, click the Save option to implement the changes you have made.

Important: If your bank allows both the connection methods, Quicken Connect and Direct Connect, choose the Direct Connect option when enabling your account. However, if the bank supports only Quicken Connect, you will have to opt for this option only.

Step 2: Reactivate Your Account

Now that you have deactivated your account, you need to follow the below stated steps for account reactivation:

  • Open the Quicken application to initiate the process of reactivating the program.
  • After that, select the account you want to reactivate.
  • To do so, you need to select the Deactivated account.
  • Moving ahead, click on the Settings tab.
  • Thereafter, click on the Setup Transaction Download tab.
  • Next, type in the name of the bank in the area specified for it.
  • Here, you will be prompted to choose a connection type between the Quicken Connect and Direct Connect options (As instructed above).
  • Proceeding further with this procedure, enter the username and password for your bank.
  • Quicken will now show you your account information during the activation procedure here.
  • In the end, LINK your account in place of adding it again.
  • If this solution doesn’t resolve the Quicken script error, move to the next solution.

Troubleshooting Solutions Based On The Instance Of The Error

After discussing the general solution for the error, we can move ahead to instance-specific troubleshooting. The error can take place while opening the program or when utilizing it for an accounting task. Here, we will implement the solutions based on the instance when the error is taking place. Check them out:

Case 1: When Error Occurs While Opening Quicken

If the error takes place when opening the Quicken software, troubleshoot it by following the below-given steps:

  • Launch Quicken in the first place to start the error resolution procedure.
  • When the problem occurs, it shows an error message window with the message– “An error has occurred in the script on this page.” describing the issue.
  • Here, you need to close the script error or just hit on the Yes or No buttons given in the lower section of the window.
  • Proceeding further, unmark the checkbox for the “Remind me later” option.
  • Thereon, close the Quicken application to conclude this procedure.

Case 2: When the Error Occurs While Using The Program

After following the steps listed in the first case, you may get Quicken Tips and Tutorial screen, which is also an erroneous condition. To get an escape from this condition, you can implement the following steps:

  • Go to the Quicken’s Edit menu and then select Preferences.
  • After that, go to the Startup, which is located underneath Startup Location.
  • Now, for the On Startup open to option, you need to choose Tips and Tutorials from the given drop-down list.
  • Moving ahead changes it to any other location.
  • Change it to any other option, for example – Home.
  • Thereafter, you need to close Quicken and then reopen it.
  • Here, you will notice that the Quicken script error is eliminated.
Final Words!

If you are struggling with the Quicken script error, then this can be a useful post for you. However, if you want to cut down the troubleshooting time, get in touch with our trained Quicken Service phone number. They will guide you with the simple steps so that you may utilize the program without technical hindrances.

How To Fix TurboTax Error Code 02? (Effective Methods 2023)

Generally, the users might run into TurboTax Error 02 while connecting their device with a stable internet connection for updating or importing finance-related data. In other instances, it may pop up when you try to file or transfer it to the taxation authorities. 

When the error appears, it starts flashing the error message on the screen indicating:

TurboTax error 02 (Message)

Follow the complete blog to get the proper stepwise instructions to eliminate the TurboTax Error Code 02 easily. 

“Don’t want to take the risk to resolve TurboTax Error 02 on your own? Give us a call at @+1-844-508-2335 and let the support team handle it for you.”

The Top Reasons For TurboTax Error Code 02 

The users might confront TurboTax Error 02 while running the TurboTax application on the system. However, there are multiple other factors that lead to the error. Down below we have listed all the other reasons that might trigger the error. 

  1. It appears when TurboTax fails or starts crashing while running the application. 
  2. Sometimes, it might trigger while accessing the old graphics driver.
  3. Your system doesn’t have enough space to install the TurboTax application on your device. 
  4. A sudden drop in the internet connection may also result in TurboTax Error Code 02. 
  5. The possibility of a virus in the system hinders the TurboTax application from running on the system smoothly.  

Verified Solutions to Overcome TurboTax Error 02 Instantly 

Here we have discussed some of the simple DIY solutions, implementing which you can easily rectify TurboTax Error 02. Read all the solutions carefully and apply them according to the cause of the error to get better results. 

Solution 1: Close the interfering programs that are interrupting with an outgoing tasks

Usually, the users encounter TurboTax Error 02 when some programs are interrupted while updating. In that case, you must put a stop to the interfering programs. To complete the task, apply the stepwise instructions given below attentively. 

  1. Initially, you must launch the Task Manager on your Windows device. For that, press the Ctrl + Alt + Del keys together. 
  2. Consequently, this will allow you to review the lists of programs that are presently running.
  3. After this, move to the Processes tab. Then, put a stop to the programs by highlighting each one of the programs. 
  4. Proceed further by tapping on the End Process button. 
  5. Now, you must notice whether you receive the error message every time you stop a process. 
  6. Furthermore, once you identify which program is creating the issue, move ahead by reinstalling the application. 

Solution 2: Try Updating/ Reinstalling Interrupting Programs

Updating or reinstalling the conflicting program will allow you to get the latest updates of TurboTax software. For that, perform the instructions mentioned below carefully without missing any single step. 

Accessing the Control Panel

  1. For the users of Windows 7, press the Windows key, navigate to the Control Panel, and then pick Uninstall a Program option.
  2. Whereas, for Windows 8 users, tap on the Start menu and then scroll down to choose Settings > Control Panel > Uninstall a Program.
  3. On the other hand, Windows 10 users must enter the Control Panel within the search field and opt for Uninstall a Program.
  4. From the section of Programs and Features, select the Program Problems. Then hit the Update or Uninstall option.
  5. Now, if you want to update TurboTax, in such a scenario, you must act according to the instructions displayed on the screen.
  6. If you pick the Uninstall option, you must go ahead with the on-screen prompts for uninstalling the application. 
  7. Finally, you must remove the interrupting program and then install it again on your system.

Also Read – How to Change TurboTax Password

Solution 3: Clean The Junk Files through Disk Cleanup

You might end up with Runtime Error 02 in TurboTax due to a lack of storage space. Therefore, it is mandatory to run the Disk Clean up to free up some storage space. Accomplish this task by performing the step-by-step instructions given below.

  1. Begin the process by backing up your TurboTax-related files. Then, you must assign free space on your local hard drive to install the application smoothly.
  2. After this, clear your cache and temporary files stored on your local hard disk. 
  3. Once done, launch your system again and proceed to the next step.
  4. Then, move further by using Disk Clean up to open your Explorer window. Later on, right-click on your main directory.
  5. Afterwards, head toward the Properties tab and opt for Disk Clean up.

Solution 4: Rectify The Internet Explorer Runtime Issues  

If you find that TurboTax Error 02 is an Internet Explorer issue, you must perform the following steps.

Reset your Web Browser

  1. For the users accessing Windows 7, tap on Start menu > Control Panel > Internet Options > Advanced tab > Reset button
  2. On the other hand, Windows 8 and 10 users must hit the Start menu and then write Internet Options in the search field. 
  3. Further, move to the Advanced tab, followed by the Reset button.

Turn-Off Script Debugging and Error Notifications  

  1. You may opt for the Advanced tab from the Internet Options window and then search for Disable Script Debugging.
  2. Then, move further and verify that you have selected the checkbox next to the Radio button.
  3. Simultaneously, ensure that you have kept the “Display a notification about every script error” item. Later on, opt for the Apply option followed by OK and then relaunch your device. 

Also Read – Fix TurboTax Error 102345

Solution 5: Try to Install the Graphic Drivers Once Again 

Outdated or bad graphic drivers are also one of the reasons that might contribute to TurboTax Error 02. Therefore, to reinstall the graphic drivers, apply the steps mentioned below. 

  1. In the initial phase, you must open your Device Manager and search for the graphics drivers.
  2. Next, right-click on the video card drivers, hit the Uninstall option. Then, you must launch your computer again.

Solution 6: Install a Fresh Copy of Runtime Libraries 

If you haven’t installed the updates, such as the MS Visual C++ package, properly on your system, you might face the TurboTax error 02. Therefore, to overcome it, you must remove the current package and get the new one on your device using the following steps:

  1. First of all, uninstall the package by accessing the Programs and Features. 
  2. Locate and highlight the package of Microsoft Visual C++ Redistributable. 
  3. Now, move to the top of the list and opt for the Uninstall option. Once done, you need to start your system again.
  4. Finally, install the newly launched version of the redistributable package from Microsoft. 

Solution 7: Get the Updated Virus Protection Program 

If the above-listed solution doesn’t resolve the issue, try installing the newly launched updates of the virus protection program. After that, run the virus program on your computer. Otherwise, run the Windows Update to save your device from online threats and viruses. 

The Final Thoughts!!

So, now we conclude this explanatory guide on TurboTax Error 02 and hope the above solutions will help you deal with it. If the error still occurs, verify that your system is connected with a stable internet connection. However, for any further clarifications or queries, get in direct touch with our experts through live chat. By connecting with our TurboTax experts, you will obtain simple solutions to tackle the error asap.

How To Fix TurboTax Error 102345?

TurboTax Error 102345 can crop up when opening the program in Windows. The error code depicts that the user has opened a non-tax file. A misconfigured system file can be one of the most apparent reasons behind this error. These erroneous system files can create registry errors in your operating system.

TurboTax Error 102345

However, there are multiple factors that can give rise to TurboTax error code 102345 when running the program. To get rid of the error, you need to look for the possible causes and eradicate them one after the another. Navigate through this full post to get your error-related queries answered.

What Promotes Error 102345 in TurboTax?

TurboTax is an excellent accounting software that can streamline your tax filing tasks. However, there are multi-faceted issues that can take place when using the program. The TurboTax error 102345 is also one such issue in the program that can prevent you from running this tool. Check the below-given list:

  • When a user opens a non-tax file on TurboTax, the error code can come into the picture.
  • If you are opening a tax file from a previous version of the program, an error can take place.
  • Presence of corrupted files in the TurboTax.
  • Malicious viruses, malware, or adware threats also promote error 102345 when running the program.
  • A newly installed program over the old one.
  • An erroneous registry is also one of the apparent reasons that can lead to this annoying error code.
  • Make sure that the program is updated to the latest release, or be ready to face the error.

The persistence of any of these conditions can cause an error; therefore, you need to fix the issue by suppressing them.

Symptoms of TurboTax Error 102345

Knowing the possible reasons behind the error can certainly make troubleshooting easier for you. However, you need to ensure the particular error code by observing its possible symptoms. Check the below-given list:

  • You will get the error message on your screen with code 102345 while opening the tax file on Windows.
  • You may also get this error by opening a non-tax file in TurboTax.
  • When the error occurs, you may not be able to access your tax file from within the application.
  • It also implies that you might be using an outdated version of the TurboTax application.
  • The anomalous behaviour of the program can also be experience.

On experiencing these signs, you need to understand that it is high time to look for troubleshooting solutions for the error.

How To Fix Error Code 102345 – TurboTax?

Now that you know the possible reasons behind the error 102345 let’s dig further and check some of the most relevant solutions for it. In the first place, you need to make sure that the program is updated to the latest maintenance release. Follow the below-explained solutions with the utmost attention:

Solution 1: Check If An Update Is Available

First things first, you need to make sure that the program you are trying to open has the latest maintenance release installed on it. Below are the steps:

  • Launch the TurboTax application on your device to start the update check.
  • Now, log into your TurboTax account required to proceed further.
  • Here, you need to select the Help tab and use the menu option.
  • Moving ahead, navigate through the online menu.
  • In this menu, you have to choose the check for updates option.
  • Click OK to confirm and move to the next step.
  • In the end, finish the update procedure and click OK to relaunch the program.

If you are getting the TurboTax error 102345 even after updating the program, follow the next solution.

Solution 2: Utilize RegCure Pro For The Error Resolution

To put the tool to use, follow the below-given steps:

  • Pay a visit to the official website using your default browser.
  • Next, choose your operating system from the list of the latest downloaded files.
  • Thereafter, run the executable file and perform the on-screen instructions.
  • Here, you need to complete the RegCuro Pro installation before you proceed any further.
  • Once done, launch the application on your device.
  • Moving ahead, go to the scan menu and then hit the Scan button.
  • Now, wait until the scan gets completed.
  • After that, click on the fix errors button.
  • In the end, restart your device to conclude the procedure.

Now check if the error code 102345 is resolved or not. If there is no help with this solution, try the next one.

Solution 3: Optimize Your Machine Using Plumbites

To run Plumbites, you need to install it on your device in the first place. To complete the whole procedure, you need to follow the below-given steps:

  • Download the Plumbytes on your device and run the downloadable file.
  • Follow the on-screen instructions carefully by following the on-screen prompts.
  • Once installed, launch the program on your device to put it to use.
  • Moving ahead, click the Run A Scan option and wait for the scan process to finish.
  • Thereafter, choose the Select All option, and it will select all your issues.
  • After your selection, click on Remove Now option to solve the error.
  • Now restart your device after completing the procedure.

Now check the status of TurboTax error 102345.

Alternative Solutions To Eliminate Error Code 102345 in TurboTax

If the primary solutions explained above fail to resolve the error, here are some alternative solutions you may implement for the error resolution.

Reinstall TurboTax Application After Uninstalling

To uninstall:

  • First things first, open the Windows taskbar on your computer to start the procedure.
  • Next, type Uninstall in the area given for search.
  • After that, select add or remove the option to proceed further.
  • Once done, select the apps and features option from within the current window.
  • Your previous action will open a list of applications and programs.
  • Here, move down to find out the TurboTax option from the list of installed programs.
  • Once located, right-click on the TurboTax option and select Uninstall from the drop-down list.
  • Confirm your selection and follow the required steps.
  • Once uninstalled, restart your device and remove the cached files and folders from your machine.

To Reinstall

  • In the first place, you need to launch the web browser on your device.
  • Now using the browser, make a visit to the TurboTax official website.
  • After that, go to the downloads page.
  • Here, you need to download the file and run the installation.
  • Open the installer window on your screen and follow the on-screen prompts.
  • Now click the Next button and tap the install option on the “ready to install” window.
  • Once the installation process is completed, select the launch TurboTax option.
  • In the end, enter the license information in the specified text area.

After completing the reinstallation procedure, open the TurboTax application.

To Sum It Up!

This post elaborates on the possible reasons and troubleshooting solutions for TurboTax error 102345. Now that you are here, it implies that you resolved the error successfully. However, if you are unable to resolve the error due to some technical unease or other possible reasons, Contact TurboTax Support Phone Number. Describe your issues in detail, and they will offer you the best solution.