How to Change TurboTax Password (Simple and Easy Way 2022)

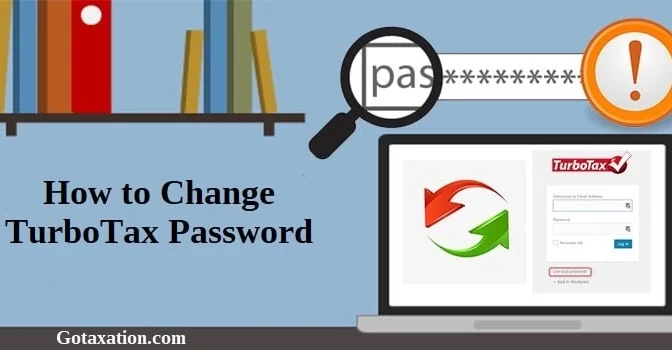
Nowadays, the need to strengthen and secure passwords is increasing with the advancement of technology. Considering TurboTax is a tax-preparation software, generating a unique and hard-to-crack password is mandatory. By creating a strong password, users can keep their data safe and secure from cyber threats and unauthorized access.

But, there might be certain instances when the users forgot their TurboTax password. As a result, they won’t be able to utilize this TurboTax taxation software to file taxes. In that scenario, it is necessary to change the TurboTax password so that they can resolve the issue and proceed with their ongoing work. This guide will give you complete information about how to reset TurboTax password.

Stepwise Instructions to Change TurboTax Password

Are you fed up of searching for the simple instructions to Reset TurboTax password? Well, don’t panic, as your search ends here. Below we have mentioned some of the simple steps using which you can easily recover your password.

Case 1: If you have forgotten or lost your TurboTax Password

For instance, if you need to change your old password but forgot or don’t remember it. In that scenario, the user can retrieve the password by following the steps listed below.

  1. Begin the process by visiting the Account Recovery Page of TurboTax.
  2. Afterwards, you are required to add any one of these following details:
    A. Phone Number (recommended)
    B. User ID
    C. Email Address
  3. Soon after this, do as per the instructions directed on the screen to reset your lost password. The TurboTax will customize them according to the information the users provide and whether they determine your device or not.
  4. Once the process is over, TurboTax will provide you with a code to recover your TurboTax password. Otherwise, it will provide you with a list of accounts linked with your information.

Even after performing the steps listed above you are unable to recover your TurboTax password, tap on “Verify my account a different way” from the Account Recovery Page. You will be asked some additional questions to authenticate your identity.

Case 2: If you want to Change TurboTax Password

For instance, if you remember your old password and want to change it for security purposes, follow the steps below.

  1. Start the process by signing into your TurboTax account using the correct login credentials.
  2. Following this, opt for the Intuit Account located at the lower-left corner of your screen.
  3. Now, click on the highlighted Sign In & Security option from the Manage your Account section.
  4. After this, choose your User ID or Password to make the relevant changes.
  5. Now, generate a new password for your account and then enter into the respective text field.
  6. Once all the information is entered into the required text fields, cross-check them.
  7. In the end, hit the Save button to save the desired changes to your TurboTax account.

Stepwise Instructions to Change TurboTax Password in your Mobile App

If you forgot or lost your TurboTax password and are unable to log in to your account in your mobile application, then change TurboTax password. Therefore, to change the TurboTax password on the mobile application, follow the steps listed below:

  1. Initially, you have to open the TurboTax mobile application on your device.
  2.  Then, add the email address, user ID, and password into their respective text fields. Then, hit the Sign In tab.
  3. For instance, if you have mentioned your phone number or email address, you have to add the verification code you received. Further, you must choose the ID you want to log into your TurboTax account.
  4. Now, click on the “Sign in a different way” option and then proceed further.
  5. After this, you will be provided with options depending upon the information provided by TurboTax. If you can get the verification code via email address and password associated with your account, you can easily login without a password.
  6. On the other hand, if you cannot use the email address or phone number linked with your account, click on the “Verify a different way” option. This will redirect you to the Accounts Recovery Request tool, where you can reset your TurboTax password.

How to get a verification code if the email address is incorrect?

If the user is unable to receive a verification code on their email address, then you won’t be able to receive your verification code. But the next alternative is that you can get the verification code on your mobile number.

Acquire the verification code via mobile number 

  1. Initially, you have to choose whether you want to get the verification code on the text message. Then, click on the Continue option.
  2. You mustn’t shut down the window until you receive your verification code. It might take some time to send the verification code.
  3. If you have opted for the text message, then add the verification code in the field represented by Enter 6-digit code. Ensure that you mustn’t add the confirmation code within the password field.
  4. Whereas, if you have opted for the email option, then the email confirmation doesn’t require the code. For that, click on the Verify button in the email, and it will eventually take you to the TurboTax page.
  5. Further, opt for the Continue option to log in to your account and continue further by completing your return.

If the texting feature isn’t available then you have to confirm your account using a different way.

Stepwise instructions to confirm your account in different way

  1. In the first step, if you are prompted click on Confirm my account in a different way and then the Continue option.
  2. Go through the on-screen prompts to add information from the previous year’s tax return. Here, you must ensure that you have added the taxpayer’s information.
  3. Proceed further by clicking on the Continue option.
  4. Whenever asked, you need to give answers to the TurboTax-generated security questions. These questions will completely depend on the information that only you should be aware of. If none of the answers applies from the list available, tap on “None of the above”.
  5. Once you have given all the answers, it will redirect you to the Welcome Back! Screen. You must add the email address and mobile number on this screen.
  6. In the end, once your identity is verified, it will take you to the TurboTax account. The total time taken to accomplish this entire process would be five minutes.

Final Thoughts!

We hope that now you have got all answers to your query regarding how to change TurboTax password. However, if the issue still continues you can have a one-to-one conversation with our TurboTax experts to clear all your doubts. You can connect with our experts via email or a live chat support facility.

How to fix Quicken Error CC-501

Generally, the users might have stumbled upon Quicken Error CC-501 while trying to update their bank account with the Quicken online services. In other instances, it may occur while downloading new transactions into Quicken software from your bank. 

On the occurrence of the error, the following alert message will be displayed on your screen indicating:

Quicken Error message cc-501

As a result, this error might obstruct the users from downloading the latest bank transactions in Quicken. Thus, it hampers bank-related tasks and stops ongoing work. Therefore, it is essential to resolve the issue asap using the resolution methods discussed in this post. 

“Stumbled upon Quicken CC-510 Error and don’t have know how to fix it ? Feel free to ring us at @ +1-844-508-2335 and obtain the best possible assistance from our professionals.”

Causes that Contribute to Quicken Error CC-501 

The users might come across Quicken CC 501 while trying to update their bank account in Quicken. Apart from this, multiple other factors might bring forth this error, and let’s explore them.

  • Sometimes, it may occur due to issues on your bank’s end. 
  • The version of Quicken you are presently using isn’t in use any more.
  • One of the reasons behind Quicken Error CC-501 is a corrupt or impartial download of the Quicken software. 
  • You may have added the incorrect bank login details while connecting to the bank account in Quicken.
  • The malware or viruses in your system might cause damage to your company file.

Key Points to Remember Before Resolving Quicken Error Message CC-501

There are certain points that you must keep in your mind before resolving Quicken Error CC 501. Therefore, we have specified some of the points below to inform you regarding them. Read the points carefully. 

1. Generate a Backup of the Quicken Data:-

Before proceeding Further, it is essential to establish the Backup of your Quicken file. Doing so will help keep your company data safe even if your original file gets damaged. And thus, you can restore this file to your preferred location. Apply the steps listed below to generate the Backup of the Quicken data properly.

  • In the beginning, open the Quicken application and then move to the Backup menu.
  • You are then required to select the Restore option and Backup Quicken file.
  • Finally, tap on the Backup Now option, and it will automatically generate the Backup of your Quicken file.

2. Don’t add the transactions into the register directly:-

Doing so will prevent you from generating duplicate copies of transactions within the accounts register. Perform the steps listed below to ensure that the transactions are not getting entered into the register directly. 

  • In the initial stage, open the Quicken software and select the Edit menu.
  • Following this, opt for the Preferences option. 
  • Furthermore, click on the drop-down menu to pick the Downloaded Transactions option. 
  • Now, you must verify that you have unmarked the Automatically add to the bank register checkbox.
  • Finally, tap on Ok to save the mandatory changes made in Quicken software.

Simple Tips to Overcome Quicken Error CC-501 Permanently 

Do you need help to get the proper solutions to resolve Quicken Error CC 510 instantly? If that’s the scenario, then don’t panic. Go through the below-listed solutions and apply them as per the cause of the error. Ensure that you apply the steps in the way listed below to avoid further discrepancies. 

Case 1: While Downloading New Transactions

For instance, if you are receiving Quicken Error CC-501 while updating the bank transaction or getting the new bank transactions with Citibank, the first financial bank. In that case, the users might come across Quicken Error CC-501 for multiple reasons. Therefore, we have listed some simple resolution methods below to eliminate the error. 

Solution 1: Update the account in which you are getting Quicken Error CC-501 

  • In the initial phase, open Quicken and then move to All Accounts that have encountered the error.
  • Then, you have to refresh your Bank Account Settings and pick the Account Name that has caused the error. 
  • Furthermore, tap on the Gear icon, which is represented as an icon with a downward arrow. 
  • After this, click on Update or press the Ctrl + Alt + U keys to refresh the accounts settings successfully. 
  • You are supposed to add the Quicken credentials when prompted. 
  • As a result, it will open a new window with a function of one-step update settings. From there, you have to choose the Update Now option. 
  • Now, it will ask you to modify your Quicken credentials. Once completed, hit the OK button.
  • Subsequently, go through the instructions on the screen, and your account will update. 
  • Finally, you have to apply the same procedure on all the accounts incurring this issue.

Also Read – Fix Quicken Download Error 102

Solution 2: Disconnect and Reconnect the Account Causing the Error 

Users might sometimes overcome Quicken Error CC-501 by deactivating and reactivating the bank account. For that, you have to apply the steps as listed below attentively.

Disconnect the Account
  • Initially, open the Quicken application and move to the Tools menu. From there, head towards the Accounts Lists option and then move ahead.
  • Following this, Edit the account that is creating the issue from the list of available accounts.
  • Move to the Online Services tab and then opt for the Deactivate option.
  • Now, in the Conformation window, tap on the Yes option to give consent to your action.
  • After deactivating the account, select the Set Up Now option.
  • Ultimately, click on the OK option and then hit Done.
Reconnect the Account 
  • In the first stage, move to the Tools option, followed by the Add Account option.
  • Then, you must pick the type of account, such as checking, Savings, etc. 
  • After this, choose Advanced Setup and then add the name of your bank account in the required text field. Move ahead by clicking on the Next button.
  • You are supposed to pick the appropriate connection method and then hit the Next button.
  • After this, add the bank login details and hit the option Connect.
  • Eventually, Quicken will begin looking for your bank account and represent all the accounts’ list. Further, you must tap on the Reactivate option beside the account you want to reconnect. 
  • In the end, tap on the Finish option to reconnect your bank account successfully.

Solution 3: Review Your Account Status 

  • The first and foremost step is to move to the Tools option and then Online Center.
  • After this, you will find the list of all the offending transactions mentioned below in the Transactions Lists.
  • Now, you must look for the listed transaction and remove it.
  • Next, update your account and then reconcile it once again. 
  • If you are not receiving the same error any more, it reflects that all the errors in your account have been removed successfully.

Solution 4: Install the Quicken software again

By uninstalling and reinstalling the Quicken software will help in resolving the Quicken error CC-501. 

  • Initially, press the Windows + R keys at the same time and insert “appwiz.cpl” in the search column. 
  • As a result, it will open the Quicken entry, right-click on it and then opt for the Uninstall option. You must be sure that you have successfully removed all the temporary files. 
  • Following this, you must download and install the Quicken software on your device. 
  • In the end, add the account details and then look for the error status. 

Also Read – Fix Quicken install error 1603

Case 2: While Setting Up or Updating Mobile Sync With Direct-Connect Activated 

Condition 1: Quicken Error 501 Due to Connection Time Out

Sometimes, your connection might take time out while trying to accomplish the setup of Mobile Sync. As a result, you won’t be able to wind up the connection. In that scenario, you are supposed to perform the steps listed below.

  • You may try contacting your bank account at different times of the day, avoiding peak traffic hours.
  • Also, you must ensure that you are not trying to connect or update other applications. Doing so might hamper your internet speed and thus leads to Quicken Error CC 501. 
  • Ensure that the firewall settings and your ISP don’t interrupt the “QW.exe” file from accessing the internet connection.
  • For instance, if you still receive the error on your first sync, try to add a single account at a time. 
    • Using Quicken Mobile Sync, you can only transfer the previous 365 days of data for any banking or credit card accounts. 
    • By “entering” the smallest amount, you can reduce the amount of data transferred on initial sync. Thus, it also creates the database and eliminates the chances of Time Out occurring again while connecting to the bank account in Quicken. Also, you may add the additional accounts after the initial sync by tapping on the Edit Accounts. 

Condition 2: Enrollment is Required By Your Financial Institution

There are a few banks that require enrollment so that they can easily determine which applications are compatible to connect with their servers.

  • Firstly, reach your bank website and verify whether it has a self-serve section. Using this section, you can access your accounts on their servers.
  • However, if you won’t get the self-serve solution and need help registering, you can reach out to Online Banking Support. 
  • On the other hand, if you don’t have any contact details regarding your bank, try the steps listed below.
    • Select the Tools option and tap on the Online Center to pick the bank name.
    • After this, you must hover your cursor over the Contact Info Link.

Conclusion!!

Here, we conclude this post and hope you can now easily connect your bank account with Quicken without getting Quicken Error CC-501. If you still find the same issue, you can consult with our Quicken Support number anytime via live chat. After this, our experts will do deep research and assist you in the best possible manner.

How to Change Phone Number on TurboTax accounts

TurboTax is a flawless tax-preparation software that provides easy tax calculation and smooth tax-filing features. However, to access the TurboTax on your system, it is essential to create an account. For that, you must add all the personal details like email address, phone number, password, and social security number.

At times, users feel the need to change phone number on TurboTax accounts due to several reasons. It might be possible that you have purchased a new number, and your old number is not in use anymore. In that case, updating the new one is mandatory so that you can receive useful notifications on that number.

This comprehensive post contains all the essential information required to change the phone number on TurboTax.

“Unable to change phone number on TurboTax and require instant help? Place a call at @+1-844-508-2335 and get all answers to your queries within no time.”

Steps to be Performed to Change Phone Number on TurboTax

Are you looking for detailed steps to change the contact number of TurboTax accounts? If yes, then have a glimpse of the instructions listed below thoroughly.

  • The first and foremost step is to log in to your TurboTax Online account using the correct login credentials.
  •  Now, you have to tap on the Intuit Account present at the lower left corner of the screen.
  • Soon after this, hover your cursor over the Edit option at the right of the phone line. Then, further move to the “Change next to your phone number” option.
  • Next, you are supposed to add the new phone number in the required text field. You must be very attentive while entering the wrong password. This is so because an incorrect phone number won’t allow you to get access to your TurboTax account. Thus, it might interrupt you from gaining access to your TurboTax account.
  •  Afterwards, you have to add the new password correctly.
  • Once you have added all the details, you must cross-check all the details for further discrepancies. You can only make the required changes if you find any issues.
  • On a final note, tap on the Save button to save the mandatory changes made to your TurboTax account.

With this, now your TurboTax account phone number has been changed successfully. Thus, you can now easily get a code on your number to recover your TurboTax account easily.

Steps to be performed when you can’t verify your number on TurboTax

In certain instances, the users might face difficulty sending or receiving SMS verification codes on the registered mobile number in TurboTax. For that, you have to apply the following instructions listed below.

Step 1: Verify Your Phone Number:-

While entering the phone number in your TurboTax accounts, you must check that you have entered the contact number correctly. Also, you have to check that you have selected the right country code.

Step 2: Look For a Good Wi-Fi Or Mobile Data Connection:-

  • To cross-check the internet settings, you must go to the Settings option.
  • After this, you must verify whether the Wi-Fi or Mobile data is switched on. Apart from this, you must ensure that the Airplane mode must be off.
  • Change your location if you are still waiting to receive the proper internet connection. Ensure you have shifted to the location where you are getting the high-speed internet connection network.
  • To test your internet network connection, you must try opening Google Chrome on your device. You must access a website and see whether it is loading or not.

Step 3: Verify whether you are receiving the SMS texts

Move to the Settings menu to check that you are getting the SMS on your registered mobile number. Then, proceed further by implementing the steps listed below.

  • Make sure that your mobile phone is receiving the proper network.
  • Also, you must verify that you have not enabled the Airplane mode.

Step 4: Request For a New Verification Code

After performing the above steps, you can look for the verification code and then ask for the code again.

  • For instance, opt for the Resend SMS option if you don’t receive a text message.
  • On the other hand, if you have only a mobile connection and cannot receive the SMS. In that case, you can request a call by clicking on the Call Me option.

Step 5: Try to Fix the Application

The users can fix the application through multiple devices like Android, Mac, and Windows devices. Follow the instructions described below thoroughly.

For Android Users

  • Firstly, access the Settings of your Andriod’s device.
  • After this, select Apps >> Duo>> Force Stop and then open Duo again.
  • Now, uninstall the Duo application and then download it once again.
  • Next, relaunch your device and then access the Duo application on your device.

Windows PC Users

  • Firstly, choose the Time option present at the bottom right corner of the screen.
  • Afterwards, go to Settings and pick the Google Play Store option.
  • Following this, click on Manage Android Preferences > Apps.
  • Now, you must pick the Duo option from the list of applications available.
  • Then, hover your cursor over the Force Stop option and access the Duo application again.
  • Try to uninstall and then install the Duo application on your Windows device.
  • In the end, switch off your device and then turn it on. Later on, open the Duo application.

For iPhone and iPad Users

  • Initially, you should double-tap on the Home button from your iPhone or iPad.
  • Then, swipe up on Duo and open the application on your device.
  • Furthermore, uninstall and install the Duo application on your system.
  • Later on, disable your device and then again turn it on. After this, you must open the Duo application on your Mac devices.

Drawing To a Conclusion!!

We assure you that the details mentioned above will provide you a better insight into how to change phone numbers on TurboTax accounts. You can reach out to our experts via live chat if you have any doubts or trouble changing the contact number. Once the query reaches our TurboTax experts, they will make all their efforts to provide you with all the necessary assistance.

How To Fix QuickBooks Unrecoverable Error?

QuickBooks unrecoverable error is a common issue in the program reported by users now and then. Despite being one of the best accounting applications, some issues can make it hard for you to resume an ongoing task. Unrecoverable error in QuickBooks can crop up abruptly when you are busy managing your business accounting with the tool.

QuickBooks unrecoverable error

This error can sound intimidating; however, you can resolve it by following a few simple solutions we are going to discuss in this article. Knowing the possible reasons behind the error can facilitate the error resolution process. Let’s take a tour!

Can’t run your accounting program due to QuickBooks unrecoverable error? Give us a call @ +1-844-508-2335 to get sure and certain error resolution.

What Does QuickBooks Desktop Unrecoverable Error Mean?

When the error occurs, you will notice a warning message on your screen – QuickBooks has encountered a problem and needs to close. The error typically occurs when opening a QuickBooks company file. In addition to the error message, you may also receive the related 10-digit error codes, such as 20888 41171 and 00551 46274.

The unrecoverable error depicts that there is a problem with the programs required for the smooth functioning of the QuickBooks application. You can get this error message in various instances, such as when opening the QuickBooks company file, when clicking the print or ship icon and when clicking the Save button.

What Are The Signs & Symptoms of QuickBooks Unrecoverable Error?

If you are still not sure if it is the unrecoverable error, which is hampering your workflow, then the below-given signs of the error can certainly give you some clarity:

  • QuickBooks software freezes, and you won’t be able to work with the program.
  • You may not be able to accomplish an update process due to the error.
  • When you try to open the program, it crashes in no time.
  • You may also experience the frequent crashing of the program.
  • Trouble finding the saved transactions in the QuickBooks company file.
  • You will see the updates getting installed, but it won’t actually end.

Now that the symptoms are not unknown, you know when to implement the troubleshooting solutions. However, what to fix is still unknown. We will discuss it in the next section of this post.

See Recent post – How To Fix QuickBooks Error H202

What Promotes The Unrecoverable Error Message in QuickBooks?

There is not one but many possible reasons that can bring forth unrecoverable error in QuickBooks. Check the below-given list:

  • When your computer is not functioning well, its impact can also be felt in QuickBooks.
  • QuickBooks has essential components missing or damaged.
  • Improperly installed QuickBooks updates can also be a possible reason behind the error.
  • Abrupt network issues when logging into the QuickBooks application.
  • Missing or damaged Windows updates.
  • A power outage can also promote QuickBooks unrecoverable error.
  • Data integrity issues in the QuickBooks company file.
  • Corruption in the data needs immediate attention for repair.

What Are The Various Instances When Unrecoverable Error Can Take Place?

QuickBooks unrecoverable error can take place in various conditions as stated in the below-given list:

  • When using direct deposit in order to send Payroll.
  • When a user tries to access the feature named Open Previous Company.
  • Creating a backup of the QB data file.
  • While running, verify or rebuild utility to find and fix data integrity issues.
  • During the Upgrade or update process of the payroll software.
  • While you try to import the Accountant’s changes in QuickBooks.
  • Closing any of the opened windows from within the QuickBooks data file.
  • When conducting or viewing the last reconciliation reports.
  • At the time of opening the QuickBooks desktop file on your workstation.
  • While you try to import the Accountant’s changes in QuickBooks.
  • Data damage can also evoke errors known to be unrecoverable in QuickBooks.
  • When you click any of the following options – email, print, save, in QuickBooks.
  • When you attempt to save a record of a transaction in the program.
  • If you are writing checks utilizing the QuickBooks Online Bill Pay.
  • When running the Rebuild utility to repair damaged data.

How To Resolve QuickBooks Unrecoverable Error?

Now that you have a bounty of knowledge on an unrecoverable error in QuickBooks, we can proceed further and start with the troubleshooting solutions. It is recommended that you keep a backup of your QuickBooks company file, as it will save your data from loss or damage. Now let’s start the troubleshooting:

Solution – 1: Fix the QuickBooks Desktop In The First Place

Before you start troubleshooting the error, you need to ensure that the QuickBooks Desktop is running in its optimal shape. If not, the error resolution process can take more time and effort. To repair the QuickBooks Desktop application, act according to the below-given steps:

  • First things first, re-register the QuickBooks Desktop in Windows OS.
  • To do so, you will need to open the reboot.exe file.
  • Thereafter, move to the installed Microsoft.net framework, where you can perform the repairing process.
  • Now, reinstall the QuickBooks desktop to proceed further.
  • Once reinstalled, go with the QuickBooks update process.
  • In the end, run QuickBooks Component Repair Tool to repair the damaged components and damaged files.
  • This procedure will help you in getting rid of the QuickBooks unrecoverable error. If it fails, simply move to the next solution.

Solution – 2: Put QuickBooks Component Repair Tool To Work

QuickBooks Component Repair Tool is an excellent utility in the program that can help users repair the damaged components in the QuickBooks application. If you are having trouble with the program, this tool can certainly help. Follow the below-given steps:

  • First things first, install the QuickBooks component repair tool on your system before you proceed any further with the troubleshooting.
  • Once the tool is installed, you can put it to use.
  • You need to run this tool in the first place.
  • Thereafter, you have to follow the on-screen instructions with full attention.
  • Now try to update your Windows and then restart the system.
  • Finally, open QuickBooks and try to identify and troubleshoot the issues with the help of the installed tool.

It is possible that it will eliminate the error. If not, you have to follow the next solution.

Solution 3: Create a New Windows Admin User To Gain Full Permissions

Sometimes, insufficient admin permissions to perform a crucial task, such as repairing damaged Windows or QuickBooks components, can cause the error. QuickBooks unrecoverable error can also be resulted due to the same reason. In such a case, you can follow the below-given steps to create a new Windows admin user in Windows 10:

  • First of all, you have to click on the Start menu.
  • Next, go to the Settings menu to move ahead.
  • Thereafter, choose Accounts, wherein you need to click on the Family and other users tab.
  • Now go to Add someone else to this computer, which is located underneath the other user’s icon.
  • Move to the tab labeled “I do not have this person’s sign-in info” and select it next.
  • After that, go to Add a user with Microsoft Account.
  • Once done, give a name to the new account and click the Finish tab to conclude the task.
  • Also, you need to assign a password to safeguard the user account.
  • After assigning, go to the recently produced account.
  • Choose the Account type tab, and after that, you can go to the administrator tab.
  • In the end, click the OK button, and this procedure is finished.

If QuickBooks unrecoverable error still continues, try the next solution.

Solution – 4: Run Quick Fix My Program Using QuickBooks Tool Hub 

Quick Fix My Program is an important tool that can fix the QuickBooks program in a few minutes. You can access this tool using QuickBooks Tool Hub; therefore, you need to download and install the tool hub in the first place. Below are the steps:

  • Go to Intuit’s official website and download the latest release for the QuickBooks Tool Hub.
  • Next, install it on your system by following the given instructions.
  • Once installed, put it to use by agreeing to the given terms and conditions.
  • When in the tool hub, you need to move down and select Program Issues.
  • By making your selection, you will get to access Quick Fix My Program.
  • Running this tool will resolve the issues related to the QuickBooks program.

Ending Words!

The solutions described in this post can help you troubleshoot the QuickBooks unrecoverable error so that you can proceed further with your day-to-day accounting tasks. However, if you are getting technical hiccups when error resolution, it is wise to Contact QuickBooks trained professionals. Our call or chat consultation will guide you with sure and certain error resolution.

QuickBooks Error H202 | Solve Quickly & Easily

Facing issues while trying to switch from QuickBooks single-user mode to multi-user mode? Well, the reason behind this hindrance is QuickBooks error H202. Many users also face this error when QuickBooks is unable to open a company data file saved on another system. By this, an error Window pops up on the user’s screen, indicating the blocked multi-user connection to the server.

At the time of this error, users notice a message on their screen stating, “You are trying to work with a company file that is located on another computer, and this copy of QuickBooks cannot reach the server on that computer. (H202)” and “QuickBooks could not open the file in multi-user mode. (H202).” Multiple factors are responsible for this issue, which we will talk about further in this blog.

Do you need professional help while dealing with this QuickBooks multi-user error code H202? We got you! Dial +1-844-508-2335. Our QuickBooks professionals are just a call away.

Primary Factors Responsible For QuickBooks Error Code H202

Users may encounter the error H202 due to the communication glitch between your QuickBooks Desktop and the server. Along with this, we have jotted down a few more common factors that are responsible for QuickBooks error code H202.

  1. Misconfigured or incorrect QuickBooks hosting settings can cause users to face the error code H202.
  2. Improper DNS configuration settings can also contribute to the occurrence of QuickBooks error message H202.
  3. You may receive the QuickBooks error message H202 due to the damaged or corrupted .ND network file.
  4. The missing IP address of the QuickBooks server and or the Host can also bring the error code H202 to your QuickBooks Desktop.
  5. Issues with your QuickBooks Database Server Manager are another factor responsible for H202 error QuickBooks.
  6. Users with Inactive or disabled QuickBooks services may face issues while switching from single-user mode to the QuickBooks multi-user mode.
  7. If QuickBooks services such as QuickBooksDBXX and QBCFMonitor are facing issues while running in the background, it may lead to the H202 error in QuickBooks.
  8. Any damage or corruption in your QuickBooks company data files (QBW files) can surely cause users to face different types of QuickBooks errors, including error code H202 in QuickBooks.

What Signs Can Help You Identify QuickBooks Error H202?

The following are the clues that will help you prominently identify the QuickBooks error H202. Also, when you know about such signs of error, you can be better prepared in advance to fix the issue.

  1. When your QuickBooks application frequently stops responding or turns black, it’s due to the presence of the error.
  2. As discussed above, the most obvious sign of the error code H202 is when you are unable to switch from the QuickBooks single-user mode to the multi-user mode.
  3. If you notice that your Windows automatically shuts down due to damage to the computer device, it’s also an indication of the QuickBooks H202 error.
  4. The blurred screen is also one of the major signs of QB error H202.
  5. Unresponsiveness of your keyboard tabs and mouse clicks can also alert you about the error presence.

Methods to Perform and Troubleshoot QuickBooks H202 Error

Carefully read this section to troubleshoot the QuickBooks error code H202. We have listed five easy methods to perform and get rid of this stubborn error that is hampering your productivity.

But, before this, make sure to create a backup of your company data file. During the troubleshooting procedures, your company data becomes vulnerable to loss and failure.

  1. First, move to the File menu and click the Backup data option.
  2. Select the location for your backup data. Either choose a Default location for default data backup or choose an Alternate location for external data backup.
  3. Click the Backup option and end the process by clicking the Finish button.

Troubleshooting Technique 1 – Verify the QuickBooks Services on your Host Computer

To work on QuickBooks without any interruption, your QuickBooks services must be free of any issues. You can verify this by performing the following steps:

  1. First of all, access your host computer by launching the Run Window. (Press Windows + R keys for this). In the Run Window, type “services.msc,” and enter the OK button.
  2. Now, you will get a Services window on your screen. Here, you are required to locate and select the version of your QuickBooks Desktop with the QuickBooksDBXX option.
  3. After this, ensure that your QuickBooks version’s Startup Type reflects the Automatic tab. Along with this, you need to check Service Status.
  4. Now, if the status is not displayed as Started or Running, you need to click the Start button and continue.
  5. In this step, click the Recovery button and select “Restart the Service” for the categories given below:
    • First Failure
    • Second Failure
  6. Subsequent Failure
  7. Continue to save all these changes by first clicking the Apply button, followed by hitting the OK button.
  8. After this, repeat the entire procedure for QBCFMonitorService. Continue to this and access all your QuickBooks workstations to turn ON the multi-user mode.

Troubleshooting Technique 2 – Repair the Network Problems with your QuickBooks Database Server Manager

This troubleshooting technique will fix the errors related to your QuickBooks multi-user mode. Thus, you can avoid facing H202 error QuickBooks.

  1. Initiate this procedure by first downloading and installing the latest QuickBooks Tool Hub version from the official Intuit website.
  2. In the next step, you need to double-click the downloaded QuickBooks Tool Hub file and begin with its installation.
  3. Now, the tool is ready to open. Open it and hit the Network Issues button, and continue to choose the QuickBooks Database Server Manager.
  4. Here, you will get the Start Scan option. Click this option and browse the company file having issues by clicking the Browse tab.
  5. After this, let the tool scan your file for issues but make sure you don’t close the Window till the scanning is done successfully.
  6. Now, you are required to close and open your QuickBooks application. After this, try to switch to the multi-user mode. If the error is still disturbing, move to the next method.

Troubleshooting Technique 3 – Create a New QuickBooks Company File Folder

You can easily rectify the QuickBooks error code H202 by moving your QuickBooks company files to the new folder.

  1. To begin with this, you need first to make a new file folder on your server computer and place this folder in a location that is easy to access.
  2. In the next step, provide the required permissions to the new file folder to transfer the QuickBooks files.
  3. Now, press the CTRL + C keys to copy the company files, followed by pressing the CTRL + V keys to paste them into the new file folder.
  4. After this, try to open your QuickBooks company file in multi-user mode.

Still, the error is creating problems while switching to the multi-user mode. Try the next method.

Troubleshooting Technique 4 – By Adding Server IP Address to your Windows Host File

The missing server on your Windows Host file is also responsible for the QuickBooks H202 error. So, let’s continue fixing this root cause by performing the steps mentioned below:

  1. First, make sure to close all the opened QuickBooks Windows and then navigate to the path C:\ Windows \ System32 \ Drivers \ Etc or C:\ Windows \ Syswow64 \ Drivers \ Etc on the QuickBooks server.
  2. In the next step, double-click the host file after being prompted for a program and open Notepad.
  3. In the Notepad, manually type the IP address along with your Computer’s name for the server. Make sure to use the Tab key on your keyboard rather than using the Spacebar to separate the IP address and the name of your Computer.
  4. After this, try to launch your QuickBooks Desktop in multi-user mode to verify whether the QuickBooks error H202 has been rectified or not.

Troubleshooting Technique 5 – Use QuickBooks File Doctor Tool to Eliminate Error H202

The effective and free QuickBooks File Doctor Tool is enough to resolve issues with your company files. When these internal issues get resolved, you can avoid facing error H202 in your QuickBooks software.

  1. Initiate fixing the issue with File Doctor Tool by first opening it and choosing the Company File Issues option from the File menu.
  2. Now, click the Company file having issues, and if you can’t find it, click the Browse button to find it.
  3. Choose the file from the list of files and hit the Continue button.
  4. Finally, enter the necessary admin credentials, including Username and password, in the given space.
  5. Hit the Next option, and you’re done with the procedure.
Finishing Thoughts..!

Hopefully, after performing the solutions mentioned above, you have rectified QuickBooks error H202. But, if nothing helps and you are unable to resolve this issue, call our professional QuickBooks team at +1-844-508-2335 or reach out to us via Live Chat Support. Our technicians will help you professionally and assist you with instant resolution strategies. Connect with us, resolve this error successfully, and return to your work with QuickBooks multi-user mode.

Delete TurboTax Account (Updated Method 2024)

Whenever you Google the best tax computing software programs, TurboTax will be on the top. Isn’t it? However, since we are discussing technology, errors, and glitches do occur while deleting such software accounts. So, if you’re also facing issues while removing your TurboTax account and searching for ways to Delete Accounts TurboTax, here’s your helping guide. Continue reading this post, apply the given instructions, and get the “Successfully deleted” message on your screen.

Looking for professionals to help you remove the TurboTax account and all the tax-related data? If yes, you can contact our certified team at +1-844-508-2335.

In this post, we will briefly talk about TurboTax, filing business tax returns, and how you can successfully delete TurboTax accounts. So, let’s begin!

What’s TurboTax – A Brief Discussion!

Intuit has introduced TurboTax for simplifying tax-related tasks and helping business accountants, taxpayers, or CPAs fill their tax returns in a more convenient and hassle-free manner. What makes the TurboTax unique and more productive than the other tax computing software is its clean and user-friendly interface. Its intuitive interface offers a simpler method for tax deductions along with add-on services and products essential for tax filings.

How Can Users Delete Accounts TurboTax?

Most probably, when you’ve searched “can I delete accounts TurboTax,” the search results would have appeared as “no, you can’t delete the TurboTax account, but only can deactivate your account. As long as you haven’t purchased the TurboTax Online application program (or activated a cost-free version), you can remove any data you’ve provided using the Clear and Start Over software feature.”

However, this is the truth, but you may delete your account using the ways given in the section below.

TurboTax Account Delete: 4 Easy Methods Users Must Apply

To find out what solutions can help users delete accounts TurboTax, you must follow and implement the procedures that are explained here. Continue performing the methods with the detailed instructions below:

Delete Procedure 1 – Manually Delete your TurboTax Account

Let’s manually execute the steps given below and try to remove the TurboTax account. Carefully follow each instruction.

  1. Firstly, to begin with this procedure, you must sign into your TurboTax account with the exact credentials, including username and password.
  2. In the next step, when you successfully log into the TurboTax account, hit the Take Me to Return option.
  3. After this, navigate to the top of the screen and hit the my available account option.
  4. Finally, click the Start over alternative and click the Yes button.

By this, you will be able to successfully delete accounts TurboTax. However, if the deletion is unsuccessful, continue with the next procedure.

Delete Procedure 2 – Take Help from the Control Panel to Delete your Intuit TurboTax Account

You must take a look at the following steps to apply the deletion procedure with the help of the control panel. Here’s how you must continue:

  1. Begin this procedure by first closing all the running application programs on your windows, including TurboTax. Also, make sure to close the related windows opened on the system.
  2. In the next step, navigate to the control panel on your computer system and move to the Programs and Features tab.
  3. Once you get the Programs and Features window, choose the uninstall program option.
  4. Here, you will get a list of applications installed on your system. From this list of applications, choose TurboTax.
  5. Now, hit the Uninstall button, and by this, you may delete your TurboTax account. In the end, if your account is still activated, move to the next procedure.

Delete Procedure 3 – By Starting Over and Deleting the TurboTax Account

You may find this procedure the same as the above ones and can be effective for those who have purchased the subscription TurboTax Desktop software version. Carry out the procedure as per the instructions below, and try to remove or deactivate your TurboTax account.

  1. Firstly, begin by signing into your TurboTax account by entering the exact login credentials, including password and user ID.
  2. Perform this procedure on TurboTax online and continue entering the TurboTax online ecosystem.
  3. Done up to this? Now, after successfully logging into the TurboTax online software, navigate to the Take Me to Return option and hit the same.
  4. In this step, you need to start over by navigating to the My Account option. Click this option, and move to the Start Over Option.
  5. Click this Start Over option, and the Start Over process will start. Here, you will get a window showing the notification of confirmation.
  6. Tap the Yes button, and now you’ll be asked to choose the TurboTax product you use.
  7. Select the product from the appearing list of product options, including mobile app, Online, CP/Download Mac, CD/Download Windows, and I don’t know.
  8. Now, your next step is to delete the account permanently, for which you must select the right option from the above ones.
  9. Following this, you’ll get a window stating, “I need to delete my account permanently.” Here, in this window, you must hit the Continue option from the very right corner of the screen.
  10. After this, you will be asked for verification. For this, you need to enter your name, email address, phone number, etc.
  11. Finally, after the verification, all your saved data in the TurboTax account will be removed permanently, along with the TurboTax account-related information as well. By this, you will remove everything related to your TurboTax account.

Delete Procedure 4 – Send an Email for Successful TurboTax Account Delete

By sending an email or submitting a request for your TurboTax Account Delete, you can remove or deactivate your TurboTax account that you no longer want to use. Follow the steps below, and continue deleting the account.

  1. Firstly, you must open your email ID registered with your TurboTax account.
  2. Now, send an email to “privacy@intuit.com” and continue putting a “request to delete my account” in the subject line of the mail.
  3. Here, in the email matter, you must describe the reason for deleting your TurboTax account. Once you’ve described the reliable reason, follow up with the next step.
  4. Finally, send the complete matter to end this procedure to delete accounts TurboTax successfully.

Still, your account is activated, and you’ve failed to delete it; let the next procedure help you deactivate or remove the account seamlessly.

Situations When Users Want to Delete Accounts TurboTax

There are times when you may wish to remove or deactivate your TurboTax account. The following can be one of the most prominent reasons for removing the TurboTax account. Take a look at the following potential causes:

  • When users wish to limit unused online accounts – Whatever the reason it may be, if users no longer wish to use their TurboTax account, eventually, they don’t want to keep critical business information online. It’s because there are many potential security threats and unauthorized access waiting to attack business confidential details.
  • If users are dissatisfied with services – If users have been using TurboTax for past tax returns and decided to use a different product, they may delete accounts TurboTax. Also, they may not want their sensitive tax details to stay saved on an unused account. In such circumstances, users wish to delete their accounts.
  • If users decide TurboTax isn’t right for them – Often, users sign up for TurboTax only to discover whether they require TurboTax or not for their tax preparation. And so, if users don’t want to continue the TurboTax services, they wish to delete the account.

Let’s Take Everything into An Account..!

Hopefully, by the end of this intuitive blog post, we hope you have learned how to delete accounts TurboTax. In case you still have any queries or failed to delete your TurboTax account, connect with us. You can reach out to our professionals via the available Live Chat Support option. Our certified team will help you deactivate your account professionally immediately after your approach..

Read also- installturbotax.com

How to Restore QuickBooks Company File from Local Backup?

Restore QuickBooks Company File – QuickBooks is quite an important software for users, and with the growing competition in the business arena, you may require it the most. Now you share a lot of data that help you complete the accounting and bookkeeping process a lot easier so you can’t afford these data missing. It will be a setback for you and your company, and it may destroy weeks of hard work. QuickBooks files may get corrupted due to some certain reasons, and you will not be able to access these data. So it is quite a wise step to restore QuickBooks files from the local backup. You can get the job done by following this blog until the end. But if you need additional support, you can call at QuickBooks support number and avail the expert guidance.

The process to restore QuickBooks company files:

  1. Open your QuickBooks and go to file menu where you need to select ‘Open or restore company.’
  2. Get the ‘restore a backup option’ and click on that to restore data from backup copy and proceed further by going next.
  3. In the next window, you will be asked to choose a location to restore the data. You can select ‘local backup‘ to restore it from the backup.
  4. Click on next to move further and continue by selecting any of the options from ‘Online backup’ and ‘local backup’ option.
  5. A dialog box will appear open named ‘open backup copy’ and navigate there to choose a local backup copy to restore.
  6. Next, you need to select ‘open’ tab in the same dialog box to go back to the ‘open or restore company’ tab.
  7. Now you will a get an option asking ‘where do you want to restore the file?’ Click next to respond.
  8. Then you can save the company file to a chosen location after clicking on ‘yes’ to overwrite the file.
  9. In the next box type ‘yes’ to delete the entire file followed by ‘OK’ to complete the overwrite process.
  10. You will be asked to enter your login credentials in the next dialog box but if you have not created username and password for administrator log in you need to go to the ‘sensitive data protection setup’ field and set a username and password.
  11. Confirm the password and click on to finish the process.
  12. Now you can enter all the transaction from a chosen date range to make it up-to-date and then you can close the window.

Also Read – Reset QuickBooks admin Password

Get customer support for further assistance: Since you have witnessed a lot of complexity while applying these steps, you may require expert support. So without any hesitation, you should promptly call at QuickBooks helpline number and avail the guidance and support from the QuickBooks professionals to get quality support.

How To Fix QuickBooks Error QBWC1085?

QuickBooks error QBWC1085 is an error that is related to an important utility known as QuickBooks Web Connector. This utility enables data sharing between QuickBooks Desktop and the online version of the program hosted on the web. Wen Connector is an efficient tool by Microsoft that can be integrated with any QuickBooks Desktop application which utilizes QuickBooks SKD or QB POS SDK.

You can download QuickBooks  Web Connector for free from Intuit’s official website and use it for connecting QuickBooks Desktop solutions with online services. However, when using QuickBooks Web Connector, you may experience various issues. One such issue is QuickBooks Error QBWC1085 we will discuss and troubleshoot in this post.

About QuickBooks Error QBWC1085

Before we hop into the troubleshooting solution, let’s under the error code QBWC1085 in the first place. The direct impact of error can be seen on Desktop version of QuickBooks Enterprise solution.

The error can prevent QuickBooks from exchanging data from any third-party web-based application. A damaged log file QWCLOG.TXT can be one of the main reasons behind the arrival of this error. When the error occurs, you will get to see an error message for the same on your screen, which states:

QuickBooks error QBWC1085 [Error Message]

“QBWC1085: QuickBooks was unable to write on the log file. QuickBooks will open without writing on the log file.

QBWC1085: There was a problem with the log file. QuickBooks Web Connector will continue without the log file.

Exception Type Error: Unknown name.”

When you see this error message on your screen, it is high time to start the troubleshooting procedures. However, it is crucial to understand its possible reasons in the first place.

What Reasons Can Evoke QuickBooks Error QBWC1085?

Some of the main reasons that can give rise to QuickBooks error message QBWC1085 are described in the below-given list:

  • The inability of the program to write to the web connector log file.
  • When the QuickBooks Web Connector-related TXT file becomes damaged or inaccessible.
  • You can make it work even with damaged components. You need to disable them during the startup.
  • When the web connector is trying to get information from a third-party web-based program.
  • You may see various other instances of the error 1005 to 1085 due to irregularities related to the log file.

Symptoms of Error Code QBWC1085 in QuickBooks

QuickBooks error QBWC1085 can be identified by various symptoms that it shows on the screen:

  • An error message appears on your screen, notifying you about the persisting issue.
  • Web Connector fails to perform an intended task.
  • Sluggish performance of the Windows.
  • A damaged QBWCLOG.TXT file.
  • Improperly working QuickBooks Web Connector components.

On noticing these symptoms, start working on the troubleshooting solutions without wasting your time.

How To Troubleshoot QuickBooks Error Message QBWC1085?

Now that we know the possible reasons behind the QuickBooks error QBWC1085, we can implement the right solutions to troubleshoot the problem. Below are some of the relevant solutions explained in simple language for you. Let’s start with the following:

Solution 1: Delete QuickBooks Web Connector

If you don’t run any third-party web-based application with QuickBooks, then you can simply disable/delete Web Connector by navigating through the list of automatic startup programs. It can help you avoid the QuickBooks Web Connector error QBWC1085. Follow the below-mentioned steps:

  • First things first, log into your Windows admin account.
  • Thereafter, open Windows File Manager and go to C:\ProgramData\ Microsoft\ Windows \Start Menu\ Programs\ Startup.
  • Moving ahead, you need to find and delete QuickBooks Web Connector from within the folder.
  • Restart Windows and now check if the QuickBooks online applications are working or not.

If the QuickBooks error QBWC1085 still persists, you need to perform the next solution.

Solution 2: Resolve QuickBooks Web Connector Error QBWC1085

Locate Web Connector from under the automatic startup programs list and make sure that it is running in the background. To enable the Web Connector, you need to perform the below-given steps:

  • Press Windows + R keys simultaneously on your keyboard and type MSConfig when the Run window opens.
  • Moving ahead, click OK and then click on the Startup tab.
  • Thereafter, locate and mark the checkbox for the QuickBooks Web Connector program in the list.
  • Now hit Apply button and then OK.
  • In the end, restart Windows and try to troubleshoot the damaged TXT file.

Solution 3: Rename QWCLOG.TXT File

As we have discussed, a corrupted QuickBooks Web Connector file (QBWCLOG.TXT) can give rise to QuickBooks error QBWC1085. In such a case, you need to rename the file to eradicate the existing issue. Below are the steps:

  • First of all, go to the QuickBooks Web Connector icon from the taskbar and right-click on it. After that, select Exit.
  • Next, launch Windows File Manager and go to C:\ ProgramData\ Intuit\ QBWebConnector \log folder.
  • Moving ahead, right-click the QWCLOG.TXT file and select Rename option from the drop-down menu.
  • Add .OLD at the end of the file name so that it looks like QWCLOGOLD.TXT and save it.
  • After renaming, restart the Web Connector application and move ahead.
  • Perform computer rebooting and open QuickBooks again.
  • Here, you may try using an online application integrated with QuickBooks and check if the QuickBooks Error QBWC1085 is resolved or not.

Solution 4: Connect The Company File To A Third-Party Program

Connect the company file to a third-party program by performing the below-given steps:

  • First, open the Run window (Windows + R) and once the run box opens, type in MSConfig and click the OK button.
  • Thereafter, click on the startup tab.
  • Checkmark the box for QuickBooks Web Connector.
  • Click Apply option and hit the OK tab.
  • In the end, conclude the process by resetting the system.
Ending Words!

Performing these solutions can help you get rid of the QuickBooks error QBWC1085. Get help from QuickBooks experienced professionals in troubleshooting the QuickBooks error code QBWC1085 and manage your business accounting with the utmost peace of mind.

How to Fix TurboTax not working 2024 (GoTaxation)

Are you unable to file your tax return due to the occurrence of the TurboTax Not Working issue? Well, don’t panic and go through this entire post. In this blog, you will get all answers to your queries so that you can tackle the issue without any inconvenience.

The users might encounter the TurboTax Not working issue while using the unsupported version of the TurboTax application. Apart from this, there are multiple other factors that may trigger the error. Therefore, we have discussed all such reasons along with the troubleshooting solutions in the further section of this post.

Reasons Why Users Come Across TurboTax Not working

It is essential to know the root causes that might trigger the TurboTax Not Responding issue so you can get rid of it instantly. Therefore, to update you regarding all such cases, we have listed some of them below;

  • You might experience this issue when the subscription of your TurboTax application expires.
  • Sometimes, it may trigger due to corrupt or damaged Windows Registry key permissions.
  • Another reason may be insufficient memory space on the hard disk.
  • The TurboTax not working issue may be caused by the interruption of the virus or other malicious activities.
  • Low memory space in the hard drive may also be responsible.
  • Corrupt Windows files might also give rise to the error.

Once you have cleared all your doubts regarding why you might end up with the TurboTax Not Responding issue, let’s move ahead on how to fix the issue.

Prerequisites Required Before you Troubleshoot TurboTax Not Working issue.

Before resolving the TurboTax not working issue, it is essential to remember a few points in your mind. Go through the points listed below attentively so that you can resolve the issue without any hassle.

  • You must ensure that your system fulfills the basic system requirements necessary to run the TurboTax software smoothly on your device.
  •  Also, you must ensure that you are using the latest version of the Microsoft .NETFrameowrk on your system. If you are accessing a version lower than 4.5.2 you are required to download and install Microsoft .NETFramework 4.5.2 on your system.
  • The users need to run the TurboTax application with the proper administrator rights. If you encounter the TurboTax Not Responding issue, you can resolve it by running the application with admin rights.
  • End all the background processes and try to run the TurboTax software so that you can use the application smoothly on your device.
  • Moreover, you must ensure that you are well-connected with a stable and good internet connection.

Steps to Troubleshoot TurboTax Not Responding on Windows 7

The users might encounter TurboTax not working due to issues with the  installer on your PC. Therefore, the best way to tackle the issue is to allow administrative rights to the TurboTax Setup file.

  • To initiate the process, look for the downloaded setup file “TurboTax.exe“.
  •  Once you get the downloaded setup file, right-click on it. Further, tap on the Properties option from the context menu.
  • Now, move to the Compatibility tab from the Properties window and then mark the “Run this software as an administrator” checkbox.
  • Also, ensure that you have marked the checkbox of “Run this program in compatibility mode”.
  • You must verify that you are accessing the newly launched version of Windows and exit after accepting the modifications.
  • The user is supposed to cross-check all the prompts that ask for the confirmation of your administrator access.
  • In the end, double-tap on the installer to start it and then verify whether the issue still persists.

Steps to Troubleshoot TurboTax Not Responding on Windows 10 issue

  • You must ensure that you are well-connected with a stable and high-speed internet connection.
  • After this, you have to ensure that your router is properly connected and the internet is of sufficient strength.
  • You are expected to get the most recently launched version to enjoy more features of the TurboTax software.
  • Don’t forget to remove the browser’s cache and cookies. Also, ensure that no background processes are running in the background.

Steps to Perform when TurboTax Not Responding on Mac devices

If you are having trouble while accessing the TurboTax software on your Mac device due to TurboTax Not Working issue; then follow the steps listed below:

  • Insert the TurboTax installation CD on your Mac device to initiate the process.
  • After this, hover your cursor over the “Show in Folder” option.
  • Once you open the folder, pick the required TurboTax version and then right-click on it.
  • Following this, tap on the Open option, and it will initiate the installation process.
  • Once the TurboTax software is installed, you can use the application to file federal or state taxes.

Steps  TurboTax Not Working on iPhone

  • Firstly, open your iPhone and then move to the Settings option.
  • After this, access the list of all the applications that is installed on your mobile phones.
  • Next, you must ensure that you have completely uninstalled the TurboTax application from your iPhone.
  • Once you have downloaded the software successfully, download the TurboTax application again and verify whether the issue is resolved.
    • Besides this, you must upgrade or InstallTurboTax application and then verify whether it works or not.

When TurboTax Not Responding on iPad

  • In the initial stage, ensure that your iPad is well-connected with a stable and high-speed internet connection network.
  • After this, you must make sure that the TurboTax 2020 is installed successfully on your device and is upgraded to the most currently launched version.
  • You must ensure that you have deleted all your browser’s cache and cookies.
  • Now, you must ensure that you have completely uninstalled all the unnecessary cookies and cache files from your system.

Steps TurboTax Not Working On Chrome

There might be certain instances when users encounter TurboTax Not working issue while working on the Chrome browser. However, if you are also encountering the same issue, follow the steps listed below to fix the issue.

  • In the first step, open the Google Chrome browser on your device.
  • Afterwards, tap on the three horizontally placed dots at the screen’s top-right corner.
  • Choose the Settings option from the extended list of options.
  • Now, opt for the “Privacy and Security” option on the screen’s left side.
  • After this, choose the “Privacy and Security” tab followed by the “Clear Browsing Data” option.
  • You are supposed to change the time range as “All Time” and then mark all of the checkboxes.
  • Finally, tap on the “Clear Browsing Data” option, which deletes all your unnecessary browsing data, files, cache, and cookies.
Final Thoughts!

Here, we have arrived at the end of this post and hope you can easily eliminate the TurboTax Not Responding issue by following the troubleshooting methods listed above. If you still have any doubts regarding this issue, you must contact our TurboTax professionals. Our professionals are ready to help you in the best possible manner as soon as possible. To consult our experts, you can use the email or live chat support facility and can get all answers to your queries.