All posts by admin

How to Fix QuickBooks Update Error 12038?

When you try to update your QuickBooks Desktop, sometimes, you might end up with QuickBooks Error 12038. This error is a part of the 12xxx series and arises mainly due to inappropriate date/ time or internet connection setting issues. There are different other reasons as well that provoke such errors in your System. If you are a QuickBooks user with Error 12038 in your System, you can fix it with the help of this Blog.

Get rid of QuickBooks Error 12038 right now by speaking to our experts On QuickBooks Support Phone Number.

What are the flaws that cause QuickBooks Error 12038?

Before moving ahead with the troubleshooting, we first need to understand the reasons that provoke the Error 12038 in QuickBooks.

  1. You might have set an incorrect date and time on your System.
  2. In case QuickBooks is not able to identify your Internet Services.
  3. If you are using an unstable internet connection.
  4. You might have set up multiple versions of QuickBooks in the same System.
  5. Presence of a Firewall might also restrict the server connection at the time of the Update.

What are the Facts to Consider while Fixing QuickBooks Error 12038?

In this section of the Blog, we have mentioned a few points that you must take care of while fixing QuickBooks Error Code 12038.

  1. The internet speed must be greater than or equal to 28.8 kilobits per second (KB/s).
  2. In case you have installed the Download Accelerator in your System, disable it before downloading QuickBooks Update.
  3. Turn off parental safety before updating QuickBooks.
    Generate a Company File Backup to safeguard your data while troubleshooting the error.
  • Launch the QuickBooks Software.
  • Navigate to the File option, and click on the Back Up Company button.
  • Next, head to the Create Local Backup, and follow the on-screen prompt to create the Company File Backup.

How to Fix QuickBooks Error 12038?

After all the above discussion, we hope that now you have enough knowledge of the QuickBooks Error 12038. So, now let’s head towards its solution.

Solution 1: Verify the System’s Date and Time

While configuring the System, in case you have set up an incorrect time zone, then you have to reset it by following the given steps:

  1. Select the Date and Time button, present at the corner of the screen, and check if it is correct or not.
  2. If not, then press the Windows + R keys together to open the Run box./
  3. In the Search field, enter Control or Control Panel.
  4. Thereafter, first select the Clock and then the Region.
  5. Choose a Date and Time.
  6. Hit the Change Date and Time button, and make modifications to the date and time according to your time zone.
  7. Tap on Ok, and select the Change Time Zone option.
  8. Now, close the QuickBooks software, relaunch it again, and try to install the updates.
    Note: This step is efficient for all Windows editions.

Solution 2: Reconfigure the Older QuickBooks Updates and Get the New One Downloaded

Alternatively, you can opt for the resetting of QuickBooks updates option and try to install new ones in your System.

  1. Initially, Launch the QuickBooks Desktop and head to the Help box.
  2.  Now, navigate to the Update QuickBooks Desktop, and select the Update Now button.
  3. Make sure that the Reset Update option is selected, then choose the Get Update tab.
  4. Now wait for sometime, and let the QuickBooks Desktop update properly.

Solution 3: Shut Down all the QuickBooks Processes and Services.

Moving ahead in the process, the next step you can follow is closing the QuickBooks Processes and Services.

  1. Launch the Task Manager by pressing the Clt+Alt+Delete key.
  2. Thereon, when the Task Manager Windows appears on the screen, click on the Processes tab followed by hitting the End all the QuickBooks-Related Processes.
  3. Next, you have to do the same after choosing the Services tab.
  4. Now, once the QuickBooks Processes and Services are closed, try again to update QuickBooks.

Solution 4: Disable the Unauthorized Third-party Programs in your System

Another major reason that provokes QuickBooks Error 12038 is the presence of a third-party program. The third-party programs present in your System may disturb the QuickBooks processes. Thus disable all of them while installing the QuickBooks updates.

  1. Begin the process by opening the Task Manager.
  2. Thereafter, select the Processes button.
  3. Turn off all the processes that are linked with unimportant programs.
  4. At the End, relaunch QuickBooks and complete the update process.

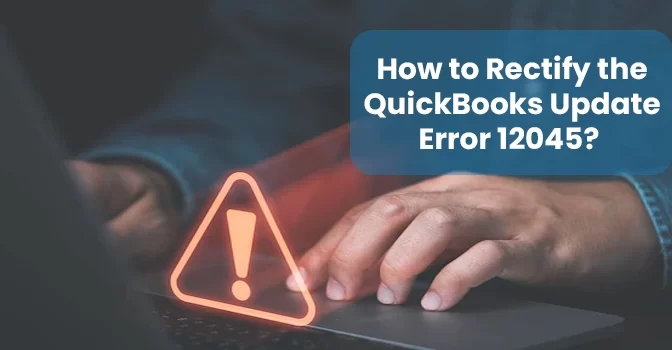
Read Also- How to Rectify QuickBooks Update Error 12045?

Solution 5: Rectify the Internet Settings.

Firstly you have to know if your Internet Connection is at fault or not.

  1. Launch any Web Browser and check the Bank’s official website, like chase.com and others. In case you can’t open that website, then you have to call your ISP (Internet Service Provider) and ask for his help.
  2. However, if you can open the Bank’s website easily, then check the below-given steps:
  • Launch QuickBooks Desktop, and head to the Help button.
  • Next, you have to click on the Internet Connection Setup and select My Computer’s Internet Connection Settings to Establish a Connection when this Application Accesses the Internet tab.
  • Moving ahead, tap on Next, followed by choosing the Advanced Connection Settings.
  • Select the Advanced tab, then hit on Restore Advanced Settings.
  • Tap on Apply and click on Ok.
  • Lastly, select Done, and turn off QuickBooks.

Relaunch the Software, and try to install the updates again.

Solution 6: Generate a New Rule for QuickBooks.exe Files

If you are facing this Error 12038 in QuickBooks due to the presence of a Firewall in your devices. Then resolve it by following the given steps:

  1. Start the process by pressing the Windows key.
  2. Now, in the search box, look for Firewall.
  3. Launch the Windows Firewall, and head towards the Advanced Settings.
  4. Next, you have to go to the inbound Rules button.
  5. Thereon, right-click on the Inbound Rule and select an option to generate New Rule.
  6. Select the Program and tap on Next.
  7. Hit the Browse option and select the following files that are linked with the QuickBooks program:

    AutoBackupExe.exe, Dbmlsync.exe, DBManagerExe.exe, FileManagement.exe, IntuitSyncManager.exe, QBCFMonitorService.exe, QBDBMgr.exe, QBLaunch.exe, etc.

  8. Moving ahead, hit on the All the Connection tab.
  9. Tap on the Next tab, create a new rule, and provide them with new names.
  10. The user will then perform the steps to create an Outbound Rules.

Solution 7: Delete the Duplicate Version of QuickBooks

If you have a duplicate version of QuickBooks software in your System, that might end you up with QuickBooks Update Error Code 12038. Thus delete them before reattempting the download.

  1. Click on the Start button and open the Control panel.
  2. Heads toward the Program and Features tab and look if there is any duplicate version of the QuickBooks Program available in the menu.
  3. In case you find any duplicate copy, uninstall it immediately by selecting its icon and hitting on Uninstall/ Change button.
  4. Thereafter, choose the Uninstall tab, and remove that copy of QuickBooks removed from your device.
  5. Next, launch QuickBooks and go to the Help button.
  6. Lastly, choose the option to Update QuickBooks Desktop.
Final Verdict!

Here we are concluding our Blog. We hope that you get the proper solution for QuickBooks error 12038. However, if you need any additional help, you can simply use the Live Chats option and consult our QuickBooks experts Team. These experts are available 24*7 to help you out.

How to Rectify QuickBooks Error 12045?

QuickBooks Error 12045 emerges when you try to update the QuickBooks application to the latest available version or update. The error usually appears because of the discrepancy in the date or time settings and Internet settings. To eradicate this issue, you first need to understand why this error occurs and then how to identify that there is the emergence of such an error. After all this, several troubleshooting methods came up. It is better to go in the flow without skipping any aspect to make things clear or vivid in the mind.

Scroll down till the end of the write-up to get introduced to every aspect of this error of QuickBooks. So, pay attention to each detail in this article without leaving any point.

Factors that trigger Update error 12045 of QuickBooks

This error of QuickBooks does emerge normally; hence it is understood that there isn’t a single reason for its presence. Therefore, to know about every reason that can give birth to error code 12045, you have to read all the listed points:

  •  When there occurs any damage or harm to the file of hosting configuration.
  • Due to the turning off of the Window User Account Control (UAC).
  • In case of several server connection problems.
  • Presence of an updated company file that is damaged.
  • Inaccurate and improper setting of the date and time and Internet as well.
  • Any unforeseen snag with the settings of Firewall.
  • While taking the usage of the outdated version of QuickBooks software.
  • In many instances, it pops up due to Antivirus software’s existence, which creates hurdles for QuickBooks to access the Internet.
  • Inaccuracy in the permission of the folder for storing the QuickBooks Installation directory.
  • Sometimes, when you have multiple versions of the QuickBooks program.

Indication of update error of QuickBooks

Some users might don’t know what happened when this 12045 error of QuickBooks appears, so a list of all possible scenarios is here.

  • You can witness a statement of the error, i.e., Error 12045; failed to download the update.
  • Whatever you are doing in your QuickBooks software will get stopped by a warning message appearing.
  • Anyone can’t update their QuickBooks application when this error comes up.
  • Restriction in getting access to the enhanced features of QuickBooks.

Procedures to eliminate QuickBooks Update error 12045

Now, it is true that you get fully aware of the error and its causes that are mainly responsible for that. It feels like the incomplete stage of knowing until you know about the troubleshooting process of this error 12045 because by applying these steps only, you can get rid of this error.

First Procedure: Ensure that the date and time of the system are right and fixed correctly

It is crucial and general to ensure that the date and time of the system are fixed correctly in the system. It is the prime reason many unknown issues arise in the system and errors in many applications. To make sure of this, refer to the steps:

  • To begin the procedure, visit the taskbar and right-click on the date and time option. This option is located at the bottom right-side.
  • After this, click on the option to adjust the date and time of the system.
  • Once you click on it, inspect whether the date is correct. If there is some flaw, fix it quickly.
  • Choose the Apply button, and after setting everything, hit on the “OK” tab.
  • Subsequently, close all the windows you opened for changing the date and time and open the window of QuickBooks Desktop by clicking on the icon.
  • To proceed further, click on the help option and then under it on the “Update QuickBooks Desktop” option.
  • When finished with the update, examine whether the issue gets resolved.

Second Procedure: Set the updates of QuickBooks again

If by applying the above-given method, you are still facing QuickBooks Update Error 12045; this is the apt time to check for the QuickBooks Updates.

  • Click on the icon of the QuickBooks Desktop to open it for the implementation of this procedure.
  • Next to this step, reach the assistance and click on Update QuickBooks Desktop.”
  •  Following this, you have to make the selection of Update Now.
  • After this, a drop-down list will come before you; choose the Reset Update option and then Get Updates.
  • The updating process will take some time, and you need to sit and relax until the process gets done without any disturbance.

Check your QuickBooks now; if the same error persists, don’t waste any time and jump on the step to rectify.

Third Procedure: Run an inspection for the settings of the Internet

Improper Internet settings sometimes become the reason behind the emergence of this stated error of QuickBooks. Thus, it becomes significant for users to check their internet settings. If you don’t know how to proceed, just walk by the guidance of the given steps.

  • Go to your Internet browser, open it, and reach your bank’s website.
  • In case of being unable to access that website, there arises an urgent need to reach the Internet service provider.
  • In contrast, if you can access your bank’s website, the below-listed steps are for you.
  • First, open the QuickBooks Desktop application and then visit the Help menu to select the option Internet connection setup.
  • “My Computer’s Internet computer connection” is the next option you need to click to build a relationship when the program tries to gain access to the Internet.
  • Tap on the “Perform” button right next to the above option.
  • After all, this, take your cursor with the help of the mouse to click on Advanced connection settings.
  • Now, you have to choose the restore advanced settings option after the previous one so that process will proceed.
  • In the end, click on Apply, OK, and at last, Done to conclude the process entirely.

12045 error of QuickBooks still appearing on the screen, the last troubleshooting method is the only alternative that is left behind for all of the users.

Read Also- How Fix QuickBooks Desktop Error Code 6190 and 816?

Fourth Procedure: Inspect to verify that there are no multiple instances of QuickBooks existed

In case of encountering the error till now, even after execution of this error given above, perform this last step. According to this method of rectifying the error, check that you don’t have several instances of QuickBooks in your system. If you have two software of QuickBooks in one system, it’ll clash, and an error will certainly come up in the middle of the update. To deal with this type of scenario, you need to cancel the installation of one of the QuickBooks instances that are existed on your system.
In Essence..!
We try our best to provide you with all the information related to Error 12045 of QuickBooks and its troubleshooting methods. Hoping that by applying these rectifying methods, you’ll eliminate this error. But if you need a faster solution or facing any uneasiness in implementing the given troubleshooting procedures, feel free to contact QuickBooks Enterprise Support Number. Two ways are open for you to connect, i.e., by calling on +1-844-508-2335 or sending a mail to info@gotaxation.com. Every expert on our team will cooperate with you and try to offer you the assistance you expect.

How Fix QuickBooks Error Code 6190 and 816?

In today’s era, where everything has gone digital, accounting professionals are highly dependent on the QuickBooks accounting application. However, just like every second software, QuickBooks is also prone to errors and bugs. Today, we are here to discuss one of these errors, which is QuickBooks error code 6190 and 816.
We understand how difficult and frustrating it is to find this desktop error issue while continuing your smooth and seamless access to the company file and its related operations. Therefore, we are here to help you eliminate all the issues related to the QuickBooks desktop error code 6190 and 816. But, first of all, let’s understand what this QuickBooks error messages 6190 and 816 mean.
Are you searching for professional approaches to manage QuickBooks error 6190 and 816? If yes, dial our helpline number @+1844-508-2335 and reach our experts today!

QuickBooks Error Message 6190 and 816: A Quick Look

The QuickBooks desktop error code 6190 and 816 knock on your desktop door when you are operating the application in its multi-user mode. This error may restrict you from accessing your QuickBooks company file, which is located on the server in the network. This QuickBooks error issue commonly occurs when one or more QuickBooks users are working on their QuickBooks application and that too in the multi-user mode.

Now, you must be having queries about why multi-user mode invites the QuickBooks error 6190 and 816. So, the multi-user mode is strictly supposed to be permitted on the server computer only, and if it’s not, then you will find an error message on your desktop screen. You can see an error message that states, “QuickBooks is unable to open the company file. It may have been opened by another user. You should ask that user to switch to multi-user mode so that you can both use the company file simultaneously. This file could also be located in a read-only network folder. Error Codes: (-6190, -816).”

Well, if you witness an error message with code “QuickBooks error 6190 83,” then don’t be perplexed! Both these errors are the same in the QuickBooks accounting application.

So, understood the meaning of QuickBooks error 6190 and 816? But how would you detect this error if it is there on your application? Have a look at the signs we have penned down to help you notice the presence of this QuickBooks desktop error.

Signs to Notice QuickBooks Error Code 6190 and 816

The following signs will help you confirm whether your QuickBooks application is triggered with the QuickBooks error code 6190 and 816 or not.

  • The first and the most prevalent sign for noticing the QuickBooks error 6190 is the frequent appearance of an error message reading, “QuickBooks is unable to open this company file 6190.”
  • Another sign of noticing the error code 6190 and 816 is the poor and slow running of your QuickBooks Desktop application. If your application has started performing dull and slow, then it can be a sign of this desktop error.
  • If your Windows PC is not responding to your mouse clicks and keyboard tabs, then it can be another sign of the QuickBooks error code 6190, 83.
  • Along with your QuickBooks application, if other programs also stop responding or perform slowly, then it’s an indication of the QuickBooks desktop error 6190, 83.

Prominent Reasons to Know Behind QuickBooks Desktop Error 6190, 83

We hope you got all the mentioned above signs to notice this frustrating QuickBooks desktop error. Now, let’s continue further and cast light on the potential reasons behind this QuickBooks desktop error.

  • One of the most common factors that trigger the QuickBooks error code 6190 and 816 is the failure or corruption of your QuickBooks company file.
  • There are many general internal bugs and errors which can also give rise to the QuickBooks desktop error code 6190 and 816.
  • The QuickBooks desktop application uses the .ND and .TLG program files to run and function properly. In case these files are corrupted or damaged, then you may fall into the error situation with codes 6190 and 816.
  • You may find this QuickBooks desktop error in between your smooth operations if you have kept the QuickBooks company files on the server. These files won’t open if there is any connection issue with the workstation.
  • If you’re attempting to open or access the QuickBooks company file from an external storage drive or device, then this desktop error issue will surely occur.
  • You need to update the transaction log file before you update your company file. If you don’t, an update issue occurs and leads you to encounter the QuickBooks error code 6190 and 816.
  • Another reason to know behind the QuickBooks desktop error is the attempt to open or access the company file by another user in the single-user mode.
  • One more obvious factor that urges the QuickBooks desktop error 6190 and 816 is the infection by malware or any other malicious virus.

Stepwise Methods to Settle the QuickBooks Desktop Error 6190 and 816

Before moving towards the troubleshooting approaches to solving the QuickBooks desktop error code 6190 and 816, you need to log in as an administrator on your system. Now, continue reading and try to get rid of this stubborn QuickBooks desktop error issue.

Solution Strategy 1 – Name Again QuickBooks .ND and .TLG Files

Generic errors or damages in the .ND and .TLG are the potential reasons responsible for the QuickBooks desktop errors. So, follow these steps and figure out this error.

  • To begin with this strategy, you need to first open your Windows File Manager and then move to the QuickBooks installation directory. QuickBooks desktop application is usually installed in C: \ Users\ Public\ Public Documents\Intuit\ QuickBooks\.
  • In the second step, you need to look for the files in this drive location with the same name extension .ND and .TLG as your company data file.
  • After this, right-click each of these files and select the Rename option to begin the renaming procedure. While renaming, add .OLDFILE at the file name’s end.
  • Now, try to open your QuickBooks application and the company data file that you wanted to access.
  • Check whether the error is still preventing you from accessing the file; if yes, try the next troubleshooting strategy and solve the error.

Read Also- How To Fix QuickBooks error 3371 status code 11118?

Solution Strategy 2 – Restart all the Network Computers along with the Server

You never know when a simple restart works miracles! Therefore, follow the steps jotted down below and try to solve this QuickBooks desktop error code 6190 and 816.

  • First, you need to go to the server which hosts the company file. After this, you need to restart it.
  • In this step, restart each network-connected workstation and then open your QuickBooks on the server before you run the same on the workstations.
  • Now, check whether the error is still in existence or not. If you still find the error, then continue solving the error issue with the help of the next troubleshooting strategy.

Solution Strategy 3 – Shift your QuickBooks Company Data File to the Local Storage 

This solution strategy will help you access the company file without any further turbulence. It’s because accessing the file, which is saved on the device’s local storage, is way easier than the server cloud. Follow the steps given below to shift your QuickBooks company file.

  • Start this solution strategy by first copying your QuickBooks company data file from the server to a USB storage device.
  • After this, move the company file to the workstation on which you wish to open it. Now, open your QuickBooks desktop application and continue to access your company data file from the device’s local storage.
  • You can also fix this QuickBooks error code 6190 and 816 with the next troubleshooting strategy. Continue reading!

Solution Strategy 4 – Operate Quick Fix My Program Tool 

Quick Fix My Program is an effective tool to operate whenever one faces errors and bugs. So, try to use this tool in case of the QuickBooks desktop error 6190 and 816.

  • You will get this tool from the QuickBooks Tool Hub. First of all, install and download this tool hub. Now, go to the downloads section of your computer and double-click the downloaded QuickiBooksToolHub.exe file.
  • You will see some on-screen prompts, follow them respectively, and begin the installation procedure of the QuickBooks tool hub.
  • Once you have installed the QuickBooks tool hub, shut down all the running programs, including the QuickBooks application.
  • Now, use the desktop icon and run the QuickBooks tool hub, followed by moving it to the Program Problem tab.
  • You need to click on the QuickBooks Fix My Program to refresh your QuickBooks application and try to open the company file again.

Solution Strategy 5 – Check Your QuickBooks Single-User Mode 

Opening or accessing a company data file already in use by another QB user in single-user mode can trigger QB error 6190 83. That’s why fix it now with the following steps:

  • Start this solution approach by first restarting your system. Once your system is started, copy the QuickBooks company data file from its source, followed by pasting the same to the desktop.
  • In this step, repeat the procedure but paste the file to its original location.
  • Finally, log in to your QuickBooks desktop application using your relevant credentials.
On the Whole!

Finally, yet importantly, if the QuickBooks error code 6190 and 816 are still bothering you even after attempting the solutions given above, get help from us! Reach out to our experts through our Live Chat facility or you can directly call at QuickBooks support number.

How to Install TurboTax in OS? – GoTaxation

TurboTax is a software by Intuit used for income tax returns. It is one of the leading tax-preparing Software that even provides you assistance during tax filing. However, to utilize the Software, you have to InstallTurboTax in OS. Thus, we have prepared this blog for you to Install TurboTax properly on your OS.

Encountering issues while installing TurboTax Software in OS? Ring us on +1-844-508-2335 and get help from experts immediately.

What are the System Requirements to InstallTurboTax.com in OS?

Before moving ahead with the  installation, you first have to understand the basic system specification that must be fulfilled to Download the TurboTax Software:

  • You must have Windows or Mac Operating System.
  • For installing the latest version of the TurboTax software, there must be at least 1 GB of Hard Disk Space. While if you are trying for TurboTax 2019 edition, you have to provide 2 GB of Storage Space.
  • Internet Connection should be active and stable.
  • Make sure that the System has Pentium 5 or Athlon Processor.
  • RAM Space must be 2 GB or more.
  • Screen Resolution required to install the TurboTax in OS is 1024 X 768.

Once you are sure about the fulfillment of the System requirement, Purchase the TurboTax.

How To Purchase TurboTax?

Users can buy the TurboTax software online or at a physical store as well. Decide the edition on the basis of your requirements, as there are different versions of the Software like Deluxe, Premier, and Home & Business. You can choose any of them as per your budget.

How to Download TurboTax in OS?

If you purchased TurboTax online, you have to download it using the Official website installturbotax.com.

  • Begin the process by launching your browser and navigating to the TurboTax official website.
  • Thereafter, log in to your Account, and click on the Downloads button to download the installation file.
  • Now, once the download is completed, you have to double-click on the file and move to the installation process.

What are the Steps to InstallTurboTax in OS?

Installation of TurboTax on your OS is a very easy process, but you need to know the exact steps to eliminate any errors. Once you have downloaded the file, then only you can proceed further with the installation and activation of the Software in OS.

  • Initially, you have to double-click on the installation file; this will start the installation process in OS.
  • Now, follow the on-screen prompt to installTurboTax in OS.

Note: You might have to provide a few of your Personal information, like your Name and Address.

  • Moving ahead, read the accept the overall end-user license agreement.
  •  Decide the destination folder in which you want to install the TurboTax.
  •  Finally, let the installation process complete.

Note: Installation can take a few minutes.

How to Activate TurboTax in OS?

You are not done by just installing the Software; you also have to activate it in your System. To do so, check the given steps:

  • Open TurboTax software.
  • Select the Activate Button, & provide the Activation code that you receive while purchasing the Software.
  • Now follow on-screen prompts to complete the overall process.

How to Update TurboTax?

To access the Software without any trouble, it is essential to keep it up-to-date. Thus you have to update the TurboTax software on a regular intervals of time to use its feature in a beneficial way.

  • Launch TurboTax, and look for Check For Updates tab.
  • Once you find click on the Check for Update button.
  • Now, if you find any update available, follow the on-screen instruction to download and install the updates.
Wrapping it Up!

Installing TurboTax is a simple and straightforward process that can be completed by following a few steps. However, if you are facing any difficulties while doing it, our experts are just a text away from you. Use the live chat option present at the bottom of this page, and grab help from TurboTax professionals. Else you can even mail us your Queries anytime to get the answer immediately.

Learn How to File Taxes with Last Pay Stub on TurboTax

The annual tax season is always a challenging one for the business professionals. Fortunately, some technologies like TurboTax have arrived and started saving professionals from such challenging tax-related operations. Well, recently, a lot of queries have been heard about whether it is possible to How to file taxes with the last pay stub on TurboTax. So yes, it’s possible. And if you’re searching for how to do it, continue reading this post carefully.

Do you need professional support while filing the taxes on TurboTax? If so, you are free to contact us at +1-844-508-2335. Our TurboTax expert’s team is available to help you.

Mandatory Information for Filing Taxes on TurboTax

Before you move to file taxes with last pay stub on TurboTax, we suggest you consider the following points. The information below is essential to note for filing taxes on the TurboTax software.

  • You must get information related to the local income tax withheld, state income tax withheld, and federal income tax withheld.
  • TurboTax will need your details, including your official name, residential address, and social security number.
  • Your company’s name, address, and Zip code, plus TIN (Tax Identification Number).
  • Provide the exact and correct details of your salary or W-2 wages (gross pay, net pay)

Once you’re ready with this information, now continue filing the taxes with your last pay stubs on the TurboTax software.

Stepwise Method to File Taxes with Last Pay Stub on TurboTax

In the section below, we’ve explained an easy stepwise method to help you file taxes with last pay stub on TurboTax. Carefully undertake the penned-down instructions:

  1. Begin this procedure by first visiting the official site TurboTax. Here, you can find three alternatives to opt for filing taxes on TurboTax, including,
    • Expert’s advice to fill out the IRS forms.
    • Let the experts only handle the complete tax filing process. For this, you can choose any one of the four TurboTax software service packages, including Deluxe, Premier, basic, and Self-employed.
    • Another option is DIY (Do it by Yourself). Just proceed with the TurboTax guidance and file taxes with last pay stub on TurboTax.
  2. Now, one of the TurboTax tax experts will connect with you based on the service package you’ve chosen from the above ones.
  3. However, if you have opted for an expert to file your taxes, they will use your last pay stubs to provide personal, company, and tax-related details while filing tax returns.

Now, if you’re filing taxes with the last pay stub on your TurboTax software by yourself, continue following the instructions below accordingly.

  •  You must file Internal Revenue Service Form 4852 online. For this, first access Form 4852 by navigating to the official site of the Internal Revenue Service Form.
  • Now, in the bottom half of the form, you must enter information including your official name, social security number, residential address, employer’s identification number, and taxable wages.
  • All this data must be contained in your paycheck stub. These paycheck stubs with complete and correct information will further help you estimate paycheck taxes.
  • Make sure you fill these forms without any mistakes, inaccurate information, or errors.

What’s the Form 4852 All About? A Brief Explanation.

Form 4852 is basically an alternative that comes into play when one doesn’t have the W-2 forms to file taxes with last pay stub on TurboTax. These 4852 forms are excellent for filing taxes with pay stubs. Often, a taxpayer may receive an incorrect W2 form or even don’t receive it; at such times, Form 4852 is an official choice by the IRS that helps the taxpayer while filing taxes with paystub. Well, this valid alternative or substitute helps business taxpayers continue to file taxes and refunds smoothly. Moreover, with the help of these forms, taxpayers easily file their taxes on time.

Completing Form 4852 when you file taxes with last pay stub on TurboTax must be done carefully. So don’t worry! In the next section, we will teach you how to fill out these forms.

How to Fill Form 4852 While Filing Taxes with Pay Stubs?

Below, we have mentioned all the necessary conditions, considerations, and instructions to fill out Form 4852 while filing taxes with paycheck stubs. Pay attention, and continue performing accordingly:

  •  First, get all the mandatory information you need to complete Form 4852. It includes your personal information like social security number, official name, and full address.
  • You must be asked in the form about “Why form 4852?” Here, briefly explain the reason for selecting this 4852 form. For example, filing the taxes for the last year, receiving the wrong W-
  • form, or not receiving the W-2 form from the employer or financial institution.
  • Here, make sure that your reason for filing Form 4852 must be certified to submit this form to the IRS.
  • After this, in the end section of the form, you must enter the information, including name, tax ID number, employer address, and further details from your last paycheck stub.
  • Now, when you are filing the taxes with the last paycheck stub, input the mandatory details like Wages, compensation, tips, Social Security tax, Federal income tax, Local income tax, Medicare tax, and State income tax withheld.
  • Remember to certify all these details mentioned in the Form 4852.
  • Another point to keep in mind, and which is compulsory, is you must manually fill out form 4852 and mail it with other tax documents. It must not be filled out online.

Read also- InstallTurbotax.com

Explained all the Available TurboTax Service Packages!

As we’ve talked about above, taxpayers can select any of the TurboTax service packages to file taxes with last pay stub on TurboTax. Below, we have listed these available packages. Learn about them in brief.

Assisted Basic Package

TurboTax Assisted Basic is a complete software service package with expert knowledge and help. So, if a taxpayer chooses to seek professional help while filing their taxes, they can opt for this package for filing taxes 100% free with expert assistance. In this, the Live Assisted Basic experts help taxpayers and ensure they file taxes accurately and get maximum refunds.

TurboTax Assisted Deluxe

If you’re looking for an upper hand to help you file taxes with maximum deductions and credits, opt for TurboTax Assisted Deluxe. You get unlimited expert assistance and professional advice by choosing this service package. Also, before you file the taxes, it will be the TurboTax expert’s responsibility to review tax forms and taxes finally. The Live Assisted Deluxe expert will make sure you’re moving ahead accurately while filing taxes.

Assisted Premium TurboTax

Tax filing season can be distressing. Right? But, when you decide to take an expert’s help by choosing the TurboTax Assisted Premium service package, then most of the tasks can be a breeze. With this package, you get unlimited professional advice and assistance to explore maximum tax deductions for your investment. Also, with this, you can uncover tax deductions on self-employed income as well.

Contact Our Experts for More..!

We understand filing taxes is quite challenging, and a single mistake may lead to costly losses. However, with the advent of TurboTax, filing taxes is quite exciting and easy. Still, we suggest you follow the instructions and information given above when you file taxes with last pay stubs on TurboTax. But, if you face any issues while filing taxes, want to know more about the available packages, or need further help, just contact us via Live Chat Support.

How do I get my old tax returns from TurboTax?

Whether you want assistance in filling out the tax or just need a copy of the previous tax, TurboTax offers a much more convenient way. You can e-file your tax returns either from a computer or from a mobile device. You have already filed the tax but forgot to save the tax return copy. Now, you need the old tax return copy and wondering How do I get my old tax returns from TurboTax. If so, then you are not the only one who needs a copy of your prior tax return.

Have you got stuck while getting old tax returns from TurboTax? Don’t Panic. Call us Today @1844-508-2335 and get an expert advice.

This blog will try to explain the step-by-step procedure of how to get old tax returns from TurboTax. Stay tuned till the last.

Ways to Get Old Tax Returns From TurboTax

The tax return copies are free, and you do not need to pay anything to Turbo tax in order to get old tax returns from TurboTax. Read out the below-mentioned methods in order to receive the old tax return copy from Turbo Tax.

How to Get the ITR Copy Online?

The below-mentioned steps will help you in obtaining the old tax return copies of a prior tax that you filed online.

  • The user must sign-in into his TurboTax account.
  • Go to the My TurboTax and click on the My Tax Timeline available in the drop-down menu.
  • Now, find the “Prior Year’s Return” and tap on the Load My Tax Timeline.
  • The Tax TimeLine window will appear on the screen. Now, choose the tax year you need.
  • The tax return of the desired timeline will appear on the screen. You can download or print the return as per your wish.

ITR Copies Offline

However, if you have downloaded the product or you used the CD, your tax return copies have already got stored in the computer you have used for filing the tax.

How to Get the Tax Return Copies from IRS

IRS, or Internal Revenue System, is a government agency that helps people in filing taxes. It enforces and administrates tax laws within the country. If the taxpayer is not able to obtain the tax return copy of the previous year, they can ask the IRS to provide one. However, the copies are not free, and you have to pay a fee of $ 43 for each copy.

Get A Tax Transcript

If you cannot find the previous year’s tax return copy, you can get a tax transcript from the IRS. The tax transcripts are free and are available for the most current tax year. These copies are available once the IRS has processed the return. The transcripts are much quicker as compared to the transcripts. You can receive the desired information within five to 10 days from the time of order.

Three ways to get tax transcript copies from IRS are as follows:

Way 1: Online

You can get a copy of transcripts online by using the Get Transcript Online. In order to view or download the transcripts, you must verify your identity.

Way 2: By Mail

In order to receive the copy, the taxpayer must fill out Form 4506-T or Form 4506-T-EZ. Once the forms are filled with the correct details, the IRS will mail the documents.

Way 3: By Phone

You can also ask for a transcript copy on the phone. The taxpayer must call on their official phone number, and the copy will be mailed to the taxpayer.

Get old tax return copies from the IRS.

You may also ask for the complete tax documents in comparison to the transcript. However, the tax return copies are not free, and you have to pay a small fee in order to receive the tax copies from IRS. You can get tax return tax copies for six last years as, according to the law, the IRS must destroy the majority of return copies after seven years. Also, if you need the copies quickly, you might face a problem. In order to get the copies, you have to wait for 75 days so that the IRS can mail the documents to you.

To obtain the copies, the taxpayers must fill the FORM 4506. You can also send the copies directly to third parties. All you need to do is to provide the contact and the mailing address when requesting the old tax return copies from IRS.

It is important to note that if you are asking for a joint tax return copy, then you must provide the spouse’s name and the social security number in Form 4506.

Why are Tax Copies Important?

The ITR or the previous year’s tax copies are important financial documents that act as proof of income in various places. It is always beneficial to have an ITR copy. Some of the benefits of having the ITR are mentioned below:

  • You can get the loan easily.
  • They act as genuine proof of income and are valuable for insurance policies.
  • It helps in visa applications.
  • It helps in setting down the IT department dues.

How to Access Turbo Tax?

TurboTax is a user-friendly software that helps you in filing your tax. Whether you are new or experienced, TurboTax makes tax filing easy for everyone. All you need is to set up an account in the software by entering the phone number or email id and go through the verification process. The best part is that you can opt for live or on-screen support.

Whether you are filing your tax for the first time or for the 100th time, TurboTax makes tax filing easier, more convenient, and quicker. You can file the tax either through the e-filing process or through the mail.

Regardless of your filing process and the type of tax preference, the basic procedure for tax filing is the same. Before filing the tax, keep in mind the below-mentioned points:

  • Pile up all your documents required at the time of filing tax.
  • Calculate your taxable income from your gross income.
  • Look out for tax deductions or credits.
  • Claim them.
  • File your tax.
Winding Up

Tax return copies are highly valuable financial documents, and therefore, it is very much crucial to have one. However, if you have forgotten to save the old tax return copy or lost it, do not worry. We have mentioned all the possible methods. We hope the above-cited methods clear your query about How do I get my old tax returns from TurboTax. If you are looking for more such blogs, read our other blogs.

Read Also- Installturbotax com

How To InstallTurboTax.com On Windows OS?

TurboTax is an incredible tax preparation software that is highly preferred among business owners and accountants for year-end tax preparation and filing. By opting for installturbotax.com, you can make this software handle your tax filing and management. After the installation, you can set up the program to meet your needs and reap its incredible benefits. If the unfamiliarity with the procedure on how to installturbotax.com on Windows OS is stopping you, this friendly post is here to help. Here, you will learn different methods for installing the Intuit application on your Windows operating system.

Install TurboTax on Windows quickly via InstallTurboTax.com. For setup assistance and troubleshooting, call +1-844-269-7070. Get expert support for a smooth and hassle-free installation.

A Brief Explanation Of InstallTurboTax.com

Intuit developed the TurboTax application for the US and Canadian users to facilitate them with their tax preparation, filing, and annual returns. The software has a user-friendly interface, which allows users to navigate through the important sections to accomplish a crucial task. Also, it lets users chat with the tax preparer and get assistance with their unique tax situations.

Thus, you can remain compliant with the latest tax laws and standard regulations when filing your annual taxes. You can choose the right solution from the installturbotax.com product page and install it by implementing the relevant procedures.

Read More: How To Install TurboTax For Mac 2021?

System Requirements For InstallTurboTax.com on Windows

It is important to fulfill the system requirements for installturbotax.com to ensure efficient utilization of the program. Check the list before moving ahead with the installation procedure:

These are the minimum system requirements for TurboTax Desktop software for Windows 2021–2024.

Operating System:

TurboTax application is the best compatible with Windows 8, Windows 8.1, and Windows 10 operating systems. The latest TurboTax 2024 runs best on Windows 10 (64-bit) or later.

Hard Drive Space:

1 GB of hard drive space is a must for a seamless Installturbotax.com, in addition to 4.5 GB space for installing MS .NET 4.8.

Screen Resolution:

We recommend you have a minimum screen resolution of 1024×768 or higher to get the best experience of using your Tax preparation software.

RAM:

The requirement for the RAM is a minimum of 2GB, so examine and confirm before moving ahead with the Installturbotax.com procedure.

Internet Speed:

The download, install, and setup procedures of the application can sometimes be demanding, so you need to establish a minimum of 1MBPS speed for your Internet connection.

A Compatible Printer:

Printing tax forms and tax returns will require a Windows-compatible laser or inkjet printer, so you can have one as per the requirements.

Note: The admin privileges are crucial for installing the TurboTax software, so make sure that you have it handy before you proceed further.

Read Also: How to Install TurboTax in OS? 

How To InstallTurboTax.com On Windows 10/11? Step-By-Step Method

Now that the system requirements for the TurboTax application are fulfilled, you can move ahead with the installation procedure. First of all, you need to download a TurboTax product of your choice on your system.

Download TurboTax on Windows 10:

  • First things first, you need to make sure that no programs are running on your system. Therefore, you need to close the active programs that might interfere with the program download.
  • Thereafter, close your Firewall or antivirus application as it can hinder the process, considering it a threat to the security.
  • Visit the installturbotax.com official portal on your Internet browser and choose an appropriate version of TurboTax software. You can compare the available solutions to make the best decision for your business.
  • Log into your Intuit account using the relevant credentials (username and password). If you have forgotten your password, you need to reset your Intuit password to move ahead.
  • Now, click on the Download option, wait for the process to be completed, and save the installer file to an easily accessible location on your system.

You May Also Read: How to InstallTurboTax.com in Mac

InstallTurboTax com on Windows 10:

  • Navigate to the download folder that contains your TurboTax installer file.
  • Now, double-click on the TurboTax Installer file, which you can locate with the file name and tax year.
  • Next, you are supposed to click the Install tab to initiate the installation.
  • Wait for some time until the installation completes, and then click the Finish button.
  • Moving ahead, enter the installation key and click the Next button to move ahead with the activation process.
  • Select a suitable activation method to get the product ready for you.

How To InstallTurboTax.com On Windows 11 Using CD or DVD Drive?

If you want to opt for installturbotax com on your Windows computer using the CD or DVD drive, then the below-given steps can help:

  • Close all the active programs that are currently running on your Windows system in order to prevent a possible interruption.
  • Subsequently, disable your Windows Firewall, as it can also obstruct the installation process.
  • You are now supposed to insert the TurboTax CD into the system’s DVD drive.
  • When it opens the executable file (setup.exe), make double-click on it.
  • Follow the on-screen instructions and select “I Agree” to accept the terms and conditions of the program.
  • Thereafter, click the Change option if you want to alter the location of the software installation.
  • At this point, you can deny sending the performance report to Intuit. You need to uncheck the box against – “Sure, you can count me in” option.
  • In the end, click the Install button and wait for the process to accomplish.

Read Here: How to Install TurboTax Without CD Drive

Summary

This post elaborates on how to installturbotax.com on your Windows operating system. After the successful installation of your preferred TurboTax version, you can reap its incredible benefits in your tax preparation, filing, and returns. It not only boosts the speed of your filing but also alleviates the scope of error in your taxation processes. If you need more help with the process, you can navigate through the TurboTax Knowledge Center to access useful resources.

How to InstallTurboTax.com in Mac – GoTaxation

TurboTax is the American tax filing software that helps the user to pay the taxes on time without any further delays. Also, it makes the process of tax calculations much easier than earlier.
Therefore, to get the TurboTax software on your Mac device, you must download and install it. In this blog, we have elaborated all the steps you must perform to TurboTax download mac device. Also, we have listed the basic system requirements to install the software smoothly on your device.

Need technical assistance to install TurboTax on a Mac device? Call us at @ +1-844-508-2335 and have a conversation with our professionals to get instant help. 

System Specifications to Install TurboTax on Mac

Before proceeding further with installing TurboTax software on your Mac device, it is necessary to fulfill the basic system requirements to run the application. Read the below-listed pointers carefully for a proper understanding of the system requirements for the TurboTax installation.

1. Operating System:-

  • The TurboTax 2023 version is compatible with the macOS Big Sur 11 or the version higher than this.
  • For the 2022 edition of the TurboTax software works best with the macOS Catalina 10.15 or the upper versions.
  • On the other hand, the 2021 edition works well with the macOS High Sierra 10.13 or the higher versions.
  • It is also compatible with the 2020 edition of macOS High Sierra 10.13 or the higher versions of the operating systems.

2. Processor:-

Make sure that you must have a multi-core intel processor with 64-bit of the storage space.

3. Hard-Drive Space:-

Check that your system must have at least 1 GB of hard disk space to install the TurboTax on a Mac device.

4. CD/DVD:-

The users might require the installation CD/DVD drive to install the TurboTax software via CD.

5. Internet Connection:-

You must ensure that you have 1 MBPS of modem and a good internet connection. An internet connection is required for product activation, software updates, and online features.

6. Screen Resolution:-

One must ensure that the screen resolution must be 1024 X 768 or higher than this.

7. Mac-Compatible Printer:-

You must have a Mac-compatible printer for printing the tax return or any other tax forms.

Stepwise Instructions To Install TurboTax on Mac With CD Drive

  1. Here, we have described some simple instructions to install TurboTax on a Mac device.
  2. Initially, put the TurboTax CD or DVD drive within the assigned slot of your device.
  3. Now, you have to wait until the device reads the contents present within the CD.
  4. After this, from the list of all the files, search for the .dmg file. The .dmg file is the main file that is required at the time of installation.
  5. Soon after this, put the tick mark beside the TurboTax and then drag it to the application folder.
  6. Later on, move to the Application folder and launch the TurboTax file on your Mac device.

Procedure to Install TurboTax on Mac Without Using CD Drive

If you wish to install the TurboTax software on the Mac device without accessing the CD drive? Don’t panic. Instead, go through the stepwise instructions given below.

  1. If you wish to install the TurboTax software smoothly on your device, shut down the security software installed on your Mac device.
  2. Launch Safari or any other web browser and access the TurboTax official website.
  3. Now, you are supposed to pick the TurboTax version you desire to download on your device.
  4. After picking the appropriate version of TurboTax, tap on the highlighted Download button.
  5. Once the file has been downloaded successfully, open it and launch the TurboTax setup file to install on the Mac device.
  6. Later on, go through the instructions on the screen to proceed further.

Simple Steps to Install TurboTax on MacBook Pro

Go through the proper stepwise instructions written below to install TurboTax on MacBook Pro.

  1. In the initial stage, put the installation CD into the optical drive of the MacBook Pro.
  2. You are supposed to wait for some time so that you can successfully install the CD.
  3. Thereon, to run the entire setup process, launch the program files of the TurboTax CD.
  4. Later on, act as per the instructions displayed on the screen to begin the installation of the TurboTax on the MacBook Pro software.
  5. Afterwards, tap on the Finish option on your screen to end up with the installation process.
  6. Relaunch your MacBook Pro, and it will end the installation of the TurboTax software.
Wrapping It Up!!

Hopefully, we assure you that the steps described above in this post will guide you to install TurboTax on Mac device. However, if you are still struggling while installing the application, talk to our professionals through the live chat facility for quick assistance.

How to Remove TurboTax Deluxe from your Windows or Mac?

Most of the time, users need to remove TurboTax Deluxe if they don’t wish to use the software anymore. But, they find the process of uninstalling the Program a little tricky. So, to make it easier for them, we have elaborated the proper setup of instructions to remove the TurboTax Deluxe. Go through this entire post, and you will gather all the essential details required.

Note: The user can easily uninstall the software using the Control panel, but at times, the supporting files of the app will remain in the System. These files can damage your System and reduce its performance. Thus, you must have to remove these files as well.

Want to Remove the TurboTax Deluxe immediately from your Device? Call on @1844-508-2335 and get instant help from a TurboTax expert.

How to Remove TurboTax Deluxe for Windows?

No matter whatever reason is behind the uninstallation of the TurboTax software. You can go through this blog section to learn the procedure of removing TurboTax Deluxe from your Windows device.

Step 1: Remove TurboTax Deluxe with the help of the Control Panel

The process to uninstall the TurboTax Deluxe software differs according to the Windows version you are using.

Steps for Windows 8

  • Begin the process by pressing the Start icon.
  • Now navigate to the Control Panel and select the Programs and Features tab.
  • Thereafter, check the list of options, then right-click on TurboTax and uninstall it.
  • Wait for some time so that the uninstallation of the Program will be complete.
  • Lastly, reboot your Device.

Steps for Windows 10

  • Start the process by hitting the System.
  • Moving ahead, select the Apps and Features tab.
  • Now, select TurboTax, and hit the Uninstall button.
  • Reboot your System.

After restarting the System, check if the TurboTax Program has been removed from your Device. In addition to that, you have to check the installation folder as well. You can find it in the C drive program File.

Here in the Program File, look for a file named uninstall.exe. In case you find it, double-click on it to start the default Uninstaller and delete the TurboTax Software from your Windows Device.

Step 2: Delete all the Leftover files and folders related to the Program

The above steps will help you uninstall the TurboTax software from the Control panel, but this doesn’t end your job. Now, you have to remove all the temporary files, cache folders, setup files, and registry entries that are related to TurboTax software.

i) Remove the Registry entries

The first thing you need to do is delete the Windows Registry entry. You can do so by following the given instructions:

  • Begin the process by right-clicking on the Start icon.
  • Thereafter click on the Run tab.
  • Write down “Regedit” in the required field and hit Enter to start the Registry Editor.
  • Choose the Edit menu and look for the Find Button at the Bottom.
  • Write down the keyword of the TurboTax in the required Box, then select the Find Next tab.
  • Remove all unwanted and incorrect data.

Note: Be careful while deleting the Windows Registry, as it is a database that has collected all the important configuration files.

ii) Remove all the Hidden Files and Folders

Now, lastly, you have to delete all the Hidden Files and Folders that are linked with TurboTax Software.

  • Start the process by right-clicking on the Start Button.
  • Choose Control Panel, and go to Appearance and Personalization.
  • Tap on the Folder tab, and click on the View button.
  • Select the Show Hidden Files folder and drives section.
  • Move ahead by right-clicking on all the files in this folder.
  • Thereafter, tap on Uninstall button and immediately navigate to the C drive.
  • In the C Drive, follow the path as Program Files\  Document\Settings\All Users\Application Data\ Documents\Settings\%USER%\Application Data\.
  • Now, find all the files that are linked with TurboTax and delete it one by one.
  • Once you have deleted all the items, go to the Trash Folder.
    Note: Make sure the Trash folder has nothing left related to TurboTax.
  • Lastly, restart your System to refresh it completely.

How to Remove TurboTax Deluxe from Mac Devices?

In the case of Mac devices, the uninstallation process is a little easier if compared to Windows. However, new Mac users may not agree with this. Thus if you are a newbie, check the steps discussed below to remove TurboTax Deluxe from your Mac device.

Step 1: Delete TurboTax Deluxe Software from Mac

  • Initiate the process by selecting the Finder option.
  • Thereon, look for Applications and choose TurboTax Deluxe and swipe its icon to the Trash icon.

Note: You can also do the same by right-clicking on the TurboTax program, then clicking on the Move to Trash option.

  • Now, you have to enter the Administrative Security pin.
  • Lastly, choose the Finder and Clear Trash using the Menu bar.

Note: The Program can also be removed using the Launchpad interface.

Step 2: Remove supporting files of TurboTax from the Mac device

Now, to delete all the TurboTax supporting files to protect your Mac from any harm, you can check the information given below:

  • Tap on Finder and click on the Go tab.
  • Enter /Library in the Go folder box.
  • Thereafter Hit the Enter button.
  • When the /Library folder appears on your screen, look for the Search box and enter the keywords related to TurboTax in it.
  • Now, click on Library present next to the Search option.
  • Here, a list of all the files and directories will appear on your screen; review and pick those that match your keyword.
  • Now, choose the Move to Trash button.
  • You have to do the same process repeatedly to remove all the TurboTax leftovers on the ~/Library files or directory.
  • Once you delete all the supporting files of TurboTax Deluxe from your Mac, empty the Trash folder as well, and restart your Device.

Conclusive Note!

At this point of the Article, we hope that you will now remove the TurboTax Deluxe program easily from your Device. However, if you find difficulties while following any step, reach out to GoTaxation professional using the Live Chat option (Help Box) given at the Bottom of the page. You can even mail us your Query and get a step-by-step solution.

QuickBooks Error Code 195 : Quick Tips to Fix

QuickBooks Error 195 is a common technical error that occurs due to misconfigured Operating System Files and various other causes. Based on the different causes, you need to take separate measures. For that, we are here going to discuss all the possible causes due to which QuickBooks errors occur and how we can resolve them. Read the article further to know more about QuickBooks Error Code 195.

Constantly Receiving Error Code 195 while using QuickBooks? Call us at @+1844-508-2335 and get an instant solution for any problem you are getting while using QuickBooks. 

What are the primary causes of Trigger QuickBooks Error Code 195?

Various reasons why you are receiving QuickBooks Error Code 195 are listed below:

  • Improper installation or downloading of the QuickBooks application leads to the formation of corrupted files and also affects the functionality of the program.
  • Window Registry files are corrupted.
  • QuickBooks application might be damaged by any virus file or malware.
  • You have improperly shut down the QuickBooks application without saving any data, which might create corrupted files in the system, thus instigating QuickBooks Error Code 195.

How to Fix QuickBooks Error Code 195?

Based on the given cause above, various measures can be taken in order to fix Error code 195. Some of them are listed below:

Use Window Repair Utility Tool

One of the primary methods to repair QuickBooks Error Code 195 is to run a Troubleshooter/Repair Utility Tool on your device. Following are the steps for using Repair Utility Tools:

  • Open Settings and then select “Update & Security” from the left-hand side of the page.
  • Choose “Troubleshoot” and then “Run the Troubleshooter.”
  • Once the process is completed, run QuickBooks again to check if you are still receiving QuickBooks Error Code 195.

Reinstall the QuickBooks application in your system.

You need to uninstall the QuickBooks program from your system and, after that, download and install it again. Make sure that you have a stable internet connection while you download the program.
Uninstall QuickBooks

  • Open the control panel and then navigate to the section “Program and Features.”
  • Under that, select the option “Uninstall a program,” after which a list of programs will appear on the screen.
  • Select QuickBooks, right-click on it, and then choose Uninstall.

Reinstall QuickBooks

Once you have downloaded the QuickBooks Installation, locate the file in your download folder and follow the given steps:

  • Double-click on the file, which will start the installation process.
  • Agree to all the terms and conditions and allow the QuickBooks application to make changes to your system.
  • Wait for the installation to complete, and after that, launch the QuickBooks application again.

Run an Antivirus Scan on your system.

Before you uninstall the QuickBooks from your system, run an Antivirus scan in order to check for any malware files or Viruses in your system. In case the Antivirus detects any corrupt or suspicious file, then you need to remove it and then open QuickBooks again to check for Error Code 195

Update your QuickBooks application to the latest version to Fix Error Code 195

If you are using the QuickBooks Desktop application, then you need to check for any pending updates and downloads. Follow the given steps in order to update the QuickBooks application:

  • Open QuickBooks and then navigate to the Help option from the top of the screen.
  • Click on the help option and then select Update QuickBooks Desktop.
  • Select Update Now and then Get Updates in order to start downloading the updates.
  • Close the QuickBooks and Reopen it again.

Verify and Rebuild QuickBooks Company Data Files

Any damaged data file can also trigger QuickBooks Error Code 195. Thus, you need to check out for them and if necessary, Rebuild Data Files in QuickBooks. Follow the given steps in order to Verify and Rebuild Company Data Files:

Verify Company Data Files

  • Open QuickBooks and go to the Window option. There, select Close All.
  • Now, go to the File option and select Utilities.
  • Click on Verify Data in case you see any error message or “Your Data has Lost Integrity.”

Rebuild Your Company Data

In order to Rebuild company data files in  QuickBooks follow the given steps:

  • On QuickBooks select Files, and choose the option “Utilities”,
  • From the Utilities, select “Rebuild Data”.
  • Before you proceed to Rebuild, QuickBooks will ask you to create a Backup of your files, for which you need to click on OK. Make sure that you have created a backup in a new folder.
  • Enter a new file name and select Save. Once a backup folder has been created, QuickBooks will start rebuilding data.
  • Once the process has been completed, you will receive a message, “Rebuild has been completed.”
  • Now to need to verify the rebuild data again for any error or additional damage.
Restore your System to the Previous Version

Any recent update or changes in the system might have triggered QuickBooks Error Code 195. To fix that, you need to restore your system to the previous version step, which is listed below:

  • Open the system properties. For that, you can either type “Restore” in the start menu or right-click on the “My Computer” folder and then select Properties.
  • There, you can find the option “System Restore,” right-click on it and then select “Run as Administrator.”
  • Now the system restores window will pop up with the list of recent updates. You need to select the most recent point.
  • Click on Next and follow further instructions. Once restored, you need to restart your system.
Connect with QuickBooks Technical Support

In case you are still unable to resolve QuickBooks Error Code 195, then you need to connect with the QuickBooks help services for which we have given the below steps to reach them:

  • Open QuickBooks and then navigate to the option Help and then choose QuickBooks Desktop Help. You can directly press F1.
  • Now click on “Contact Us” and submit your query related to Error Code 195. After that, click on “Search.”
  • Now, two options will be available: Call Us or Message Us.
Winding Up

In this blog, we have mentioned all the effective measures to fix QuickBooks Error Code 195. But, if you are still receiving the same error code again and again, then click on the “Help” option below to use the live chat facility and get an instant solution to any QuickBooks error.

Simplified Methods to Resolve QuickBooks Error PS032

Payroll is one of the most important features of QuickBooks that enables users to pay their employees on time. To enhance the better experience of QuickBooks Payroll, it is advised to update it timely. But, at times, the users might strike with QuickBooks Error PS032 while downloading the latest QuickBooks Desktop or payroll. The following error message comes into view on the occurrence of the error:

“[PS032] QuickBooks can’t read your payroll setup files. Note the message number at the beginning of this message, click Help for troubleshooting tips to resolve this problem.” 

However, it is essential to figure out the QuickBooks Error Code PS032 to continue your payroll-related tasks without further delays. Read the entire blog attentively to get in-depth information on how to overcome the error.

Unable to process the payroll due to QuickBooks Error PS032? If yes, don’t panic and dial @1844-508-2335 to connect with our professionals for instant resolution. 

Reasons Why You End Up With QuickBooks Error Code PS032

We understand that it gets quite annoying for the users when they come across QuickBooks Error PS032 while accessing the payroll. Therefore, to fix the issue, it is essential to know the root causes of the error, which are as follows;

  1. Inappropriate billing information is one of the reasons that might lead to Error PS032 in QuickBooks.
  2. Another reason may be damage or corruption in the QuickBooks company file.
  3. There might be the possibility that you haven’t registered your QuickBooks Desktop software.
  4. A firewall or third-party security application interrupts QuickBooks from getting the latest updates.

Key Points You Must Know Before Fixing QuickBooks Error PS032

Here, we have mentioned some essential key points using which you can easily resolve QuickBooks Error PS032.

  1. Check that you are utilizing the active QuickBooks Payroll subscription.
  2. Always keep a copy of the QuickBooks company file so that you can use the backup file if the original file gets damaged.
  3. To receive the latest security updates, you must update the QuickBooks Desktop to the currently available version.
  4. Verify that you have installed only one version of the QuickBooks software on your device.

Verified Solutions to Rectify QuickBooks Payroll Error PS032

Here, we have described some tried and tested solutions using which you can easily handle QuickBooks Error PS032. Ensure you apply the steps in the same order as written below.

Troubleshooting Method 1: Examine Your Billing Details

As stated above, the users might end up with QuickBooks Error PS032 while adding the wrong billing information. Therefore, it is best to check the billing information by applying the steps below to avoid this issue.

  1. In the initial stage, press the F2 key to bring up the Product Information window on your screen.
  2. From the following screen, note down the QuickBooks License number displayed on the screen and check it twice for further discrepancies.
  3. After this, tap the OK button and shut down the Product Information window.

Troubleshooting Method 2: Utilize the Verify and Rebuild Data Tool

Sometimes the users might get QuickBooks Payroll Error PS032 due to the damaged company file. So, to repair the damaged data file, make use of the Verify and Rebuild data tool by following the instructions below.

  1. Begin the process by clicking on the File tab followed by Utilities option.
  2. Soon after this, choose Verify Data and wait for the application to wind up the process.
  3. Suppose if you receive the message stating, ‘Your data has lost integrity you need to rebuild your data”. In such a scenario, return to the File menu and opt for Utilities.
  4. Proceed further by choosing the Rebuild Data option and clicking OK when prompted to open the data file.
  5. Next, tap OK when you get the message on your screen stating: “Rebuild has completed.”
  6. End the process by running the Verify Data Utility by using the above two steps.

Troubleshooting Method 3: Turn Off the User Account Control

  1. Primarily, open the Run command window by typing Run into the search column of the Windows Start menu.
  2. In the upcoming screen, write “Control Panel” within the search field and click the OK button to move further.
  3. Consequently, it will take you to the new screen where you must type User Accounts into the Search column of the Control Panel.
  4. Navigate to the Change User Account Control Settings and click the Yes button.
  5. Later, you must move your slider towards the “Never Notify” option to switch off the User Account Control Settings.
  6. At last, restart your computer and try downloading the updated QuickBooks Payroll version.

Troubleshooting Method 4: Assign a Different Name to CPS Folder

  1. To begin with, launch File Explorer using the shortcut keys i.e, Windows + E, from your keyboard.
  2. After that, tap on the drop-down menu to choose “This PC” option.
  3. Move to the local C: drive and proceed to the next step.
  4. You can also search for the program files by accessing the Program Files folder if you cannot locate them.
  5. Look for the QuickBooks Desktop folder where you saved the file you are presently using.
  6. Thereafter, access the components and move to the payroll folder.
  7. You must pick the renamed folder by right-clicking on the CPS folder.
  8. Next, try to change the name of the CPS folder by adding CPSOLD and hitting the Enter key from your keyboard.
  9. Now, launch the QuickBooks Desktop application and generate a new CPS folder.
  10. Finally, begin using the payroll tax table update just after downloading it and check whether the issue is resolved or not.
Ending Words!!

This is all about QuickBooks Error PS032, and we hope the solutions listed above will help you deal with this error. However, if you are still stuck with the same error and need expert’s help, then consult with GoTaxation professionals through the live chat facility.

QuickBooks Desktop Payroll Error PS107: Troubleshoot Easily and Fast

Many times, users might come across QuickBooks Desktop Payroll Error PS107 due to the damaged file in the QuickBooks application. Sometimes, it might also be caused while utilizing an obsolete version of the payroll tax table. On the occurrence of this error, the following error message pops up on the screen stating:

“An internal file in QuickBooks has become unreadable [PS107]”. 

As a consequence of this error, it affects the process of downloading the latest QuickBooks payroll. Thus, it is crucial to overcome this error asap with the correct measures explained further in this blog.

Didn’t have any clue on how to resolve QuickBooks Desktop Payroll Error PS107? Call us at @+1844-508-2335 and get all answers to your queries within the least time applicable. 

What are the reasons that instigate QuickBooks Payroll Error PS107?

Here, we have described some of the root causes that are responsible for the occurrence of Error PS107 in QuickBooks.

  1. You haven’t installed the QuickBooks Desktop properly on your device.
  2. Sometimes, it might evoke if you haven’t updated the QuickBooks Payroll subscription.
  3. Accessing the obsolete version of QuickBooks is one reason for this error.
  4. Moreover, it might trigger when your system is attached to a low or unstable interrupted internet connection.

Simplified Solutions to Rectify QuickBooks Desktop Error PS107

In this blog’s section, we have described some instant ways to overcome QuickBooks Error Code PS107.

First Solution: Download the Latest Version of QuickBooks Desktop

Using the obsolete version of QuickBooks might interrupt the users from getting the latest QuickBooks payroll updates. So, to fix the issue, check that you are operating the most upgraded version of the QuickBooks.

  1. Exit from your company file and launch the QuickBooks application on your device.
  2. After this, press the Windows key, look for the QuickBooks Desktop icon, and right-click on it.
  3. Now, choose the highlighted Run as Administrator option.
  4. From the No Company Open window, select the Help menu followed by Update QuickBooks Desktop.
  5. Afterwards, hit the Options tab, opt for Mark All, and click the Save button.
  6. Moving further, head towards the Update Now tab and mark the Reset Update checkbox.
  7. Next, choose the highlighted Get Updates option and close the QuickBooks application once the update is finished.
  8. Click on the Yes option to install the latest updates of the QuickBooks Desktop.

Second Solution: Get the Latest Version of the Tax Table Download

At times, users might encounter QuickBooks Error PS07 while using an older tax table version. So, upgrading your tax table whenever you must pay your employees is recommended to avoid further discrepancies. Below we have listed some of the simple steps to update your tax tables.

  1. Initially, choose the highlighted Employees tab and tap on the Get Payroll Updates.
  2. Afterwards, you must mark the checkbox “Download Entire Update.”
  3. At last, hit the highlighted Download Latest Update option.

Third Solution:- Clean Install QuickBooks in Selective Startup Mode

Sometimes, the background running processes might lead to QuickBooks Desktop Payroll Error PS107. Clean installing the QuickBooks by selective startup mode will ensure that no background processes will intervene with the QuickBooks application.

Follow the steps described below to accomplish the process. 

  1. Firstly, launch the Run command window by pressing the Windows + R keys together.
  2. In the Run window, insert “MSConfig” within the required text field and opt for the OK button.
  3. From the System Configuration window, navigate to the Selective Startup and Load System Services in the General tab.
  4. Now, mark the checkbox beside “Hide All Microsoft Services” from the Services tab.
  5. Furthermore, opt for the Disable All button and see that the “Hide All Microsoft Services” checkbox is unmarked.
  6. Moreover, you must verify that the Windows Installer checkbox is marked and hit the OK button.
  7. Afterwards, tap on the Restart option from the System Configuration window.
  8. After that, clean install QuickBooks Desktop, and launch the Run window once again.
  9. Insert “MSConfig” within the search column and hit OK > Normal Startup > OK.
  10. Finally, you must tap on the Restart option from the System Configuration window.

Fourth Solution: Close QuickBooks and then Relaunch it.

There are multiple things that are set as default when you relaunch your application and this is the best way to resolve QuickBooks Error Code PS107. Go through the instructions below to shut down your application and start it again.

  1. In the initial stage, hit the Alt + Ctrl + Del keys altogether and hit the Start Task Manager option.
  2. Afterwards, move to the Processes tab within the Task Manager window.
  3. Now, you must highlight all of the applications that start with QuickBooks.
  4. Finally, choose the End Task/End Process option to complete the entire process.
Fifth Solution: Examine your Payroll Service Subscription

An inactive QuickBooks Payroll subscription is also one of the reasons that might trigger QuickBooks Error Code PS107. So, checking that you are using the updated payroll subscription is necessary. Go through the stepwise instructions given below to check your payroll service subscription.

  1. Before proceeding further, exit from all your company files and relaunch your system.
  2. After this, launch QuickBooks, select the Employees tab > My Payroll Service > Manage Service key.
  3. Ensure that the Service Name and Status mentioned is correct and will display the status as Active.
  4. Furthermore, tap on the Edit option and check the service key number. If you find the service key number inappropriate, add the correct one.
  5. You are supposed to tap on the Next button and unmark the Open Payroll Setup box, followed by the Finish option.

Final Thoughts!!

So, here we end this entire post and hope you might find it beneficial in resolving QuickBooks Desktop Payroll Error PS107. However, if you still need help fixing the error, consult our experts through the live chat facility for instant help.