How To Fix TurboTax error 0510?

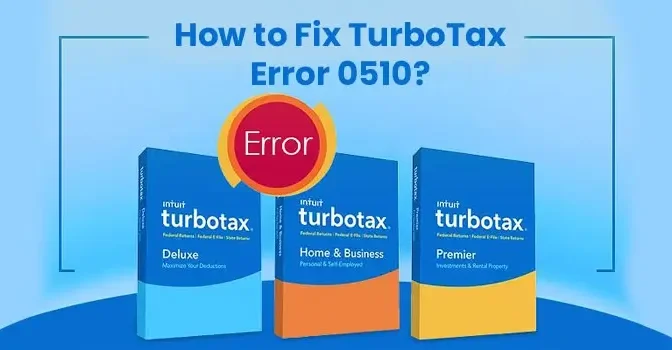
TurboTax error 0510 is prominent software among taxpayers as it reduces the task of every taxpayer and analyses all major and minor details of our tax structure. It computes tax quickly and easily and also practices the positive effect of regular new updates in the software. The update gives new, unique, and specific features to the software which can attract more users towards TurboTax.

No doubt it is a handy and popular software but it is no strong immune to different codes and faults and commonly gets infected by runtime Error. But this blog reads symptoms, causes, troubleshooting steps to resolve runtime TurboTax error 510. For any kind of technical, users must call TurboTax helpline number and talk to IT experts and get the resolution of the error in the quickest and best possible way.

What is TurboTax Error 0510?

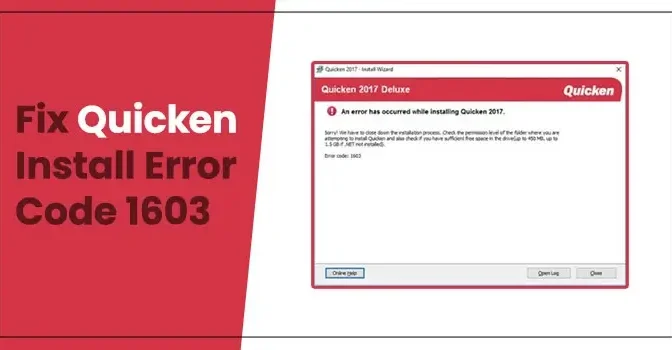
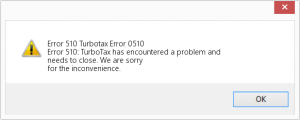
A runtime error can cause a crash of the TurboTax interface while running. It causes hindrance while working with an irritating error message pop up on screen unless it is resolved or handled properly.

The root of TurboTax Error 0510

Damaged and corrupted code can cause this type of error. It gives a continuous notification about the error and won’t stop until the error is resolved properly. This type of error can catch problems anytime while running and one of the major problems is running incompatible programs at the same time.

Symptoms of TurboTax Error 510

TurboTax Error 510

  • Window crashes while running
  • Pop up of notification which indicates an error message
  • Automatic deletion of old files
  • Addition of unwanted new files
  • Sudden connectivity error with effect on speed

Different troubleshooting ways for TurboTax Error 0510

Solution 1:Shut down all conflicting program
The first exercise, if you encounter runtime error is to shut down all the conflicting programs on PC. Because the running of the conflicting files is the source of these kinds of runtime errors.

Solution 2:Reinstall and update all conflicting program
Adding new updates with quick fixes for conflicting errors is the best solution for runtime errors. As the updates are designed to solve many errors within the software without showing the notification about the same.

Solution 3:Download and install latest Window update features
Sometimes users face this type of issue due to the old version of the software. So keeping runtime error and facing many other issues of the same kind, makes it essential to download and install the latest window update to enjoy the smooth function of TurboTax software.

Solution 4:Update Virus protection program
Infectious viruses can cause runtime errors in computers and be eliminated by scanning the computer. It is very important to update the virus protection program regularly to avoid these kinds of glitches in the software with the latest virus definition and fix.

Solution 5:Re-install Runtime Libraries
This problem can also arise due to the incomplete installation of packages like MS Visual C++. The best solution is to uninstall the current package and install the new package by following proper instructions to download the complete and fresh package.

However, if you find that the error persists you will need to implement a more advanced troubleshooting solution to fix the problem. You can call the TurboTax customer care number and speak to a certified expert to learn the different solutions you can use to fix error 0510.

Related Information:
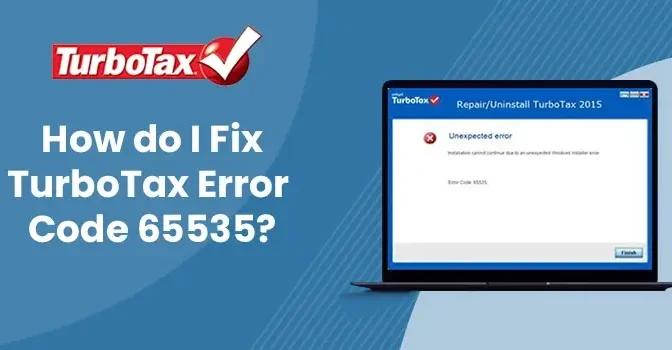
1. How to Fix TurboTax error 65535
2. How to Install TurboTax 2021 on Mac

How do I Fix TurboTax Error Code 65535?

Are you confronting Error Code 65535 TurboTax? If yes, you must know that this error arises when downloading and installing TurboTax on your Windows. It does not depend on whether you are using Windows 7, 8, 10 or any other Windows Operating System to witness this error.

There could be multiple reasons behind the occurrence of this error, and we have listed some of them below. Also, we have listed the troubleshooting solutions to fix them. You can even call the TurboTax helpline to speak with the experts to help resolve this issue.

Error 65535 TurboTax : Unexpected Error

Error 65535 occurs when you try to install TurboTax on Windows devices. The error code 65535 appears abruptly on your screen and hinders the installation process. It can evoke several other issues in your device running the program.

Error 65535 TurboTax

Regardless of what version of the Windows OS you are using, you may get this on your Windows 7, 8, 10, Vista and XP. Fret not! Whenever you encounter this error message, you can perform a few simple troubleshooting solutions to resolve the QuickBooks error 65535. Knowing the possible reasons behind the error is the first step toward the solution. Let’s check in the next section.

Why Does Error 65535 TurboTax Occur?

Numerous factors may cause error code 65535 in TurboTax. We have discussed some of them below to let you know about some of them. Check them out.

  • It may take place when you have installed corrupted software on your system.
  • Sometimes corrupted Windows registry files can be one of the reasons behind this error.
  • Another reason may be incomplete or failed installation of TurboTax software.
  • Attack of malware and viruses on your system.
  • Some infected file is corrupting the entire TurboTax software or your OS.

Symptoms of Runtime Error 65535 TurboTax

When running the program, TurboTax error 65535 occurs suddenly without any prior indication. The error warning indicates instances of file deletion or the appearance of a new file. Besides, virus infection is also one of the apparent causes behind this symptom. As a sign of the error, you may experience a sudden drop in the Internet connection speed. Besides, the installation process gets stopped, and you may not be able to proceed any further with the ongoing task.

Do I Fix Error Code 65535?

Perform the troubleshooting solution mentioned below to resolve TurboTax error code 65535:

Fix TurboTax Error 65535 on Windows XP and Vista

The troubleshooting steps for Windows XP and Vista will follow as mentioned below:

  • In the first place, ensure that you have opened Windows XP.
  • If the online backup runs on your Window XP or Window Vista, you have to disable it first.
  • Even disable antivirus software and firewall of your system.
  • Now you can implement the steps of installation or update the TurboTax software.
  • At last, re-enable the antivirus software or firewalls.

Fix TurboTax Error 65535 on Windows 7

If you are getting the error 65535 on Windows 7, the below-given steps can help in the error resolution:

  • Log into your Windows 7 computer as an administrator.
  • Now disable all the security software and any third-party software.
  • Now you can install or update the TurboTax software and then re-enable all the security software.

Fix TurboTax Error 65535 on Windows 8

To fix the installation error 65535 on Windows 8, you need to perform the below-stated steps with the utmost care and attention:

  • Click on the Taskbar > Task Manager > More Details > Service.
  • If you see the status of the MIS server showing “running,” then you need to wait Windows 8 completes the installation of another software or file.
  • Once the installation process is over, you can re-install or install the TurboTax on your system.

Fix TurboTax Error 65535 on Windows 10

If you are unable to install the program on your Windows 10 due to error code 65535, below are the steps to troubleshoot the problem:

  • You need to first click on the Taskbar > Task Manager.
  • Then search for “Intuit update service” and then click on the “end process” tab.
  • Next, you have to click on the details and search for the “exe” file.
  • After that, close the Taskbar.
  • Finally, update or reinstall the TurboTax software.

Long Story Short!

TurboTax error 65535 is an annoying error code in the program that hampers the installation process and affects the system’s performance. Hopefully, the above troubleshooting steps will help you resolve the Runtime Code 65535.

However, if the problem persists, you may take help from experts. Dial the TurboTax customer support number to speak with the technicians who will assist you in eradicating this error from the roots. Go Taxation is an eminent firm engaged in offering reliable accounting services, along with the troubleshooting solutions you may get when running your taxation program.

Related Information:
1. Install TurboTax on Mac
2. How to Fix 1098-T Error in TurboTax?

How to Fix TurboTax Error 1603?

The TurboTax Runtime error can be quite frustrating for users because it can occur without any warning. TurboTax Error 1603  usually indicates as a notification with a message that reads “Windows Installer error 1603.” The most annoying thing and this kind of error are that it will keep appearing unless you address the problem.

If you are not sure how to resolve the runtime error you can call the TurboTax customer service number and reach out to a software expert who will give you the quickest solution to the problem. You can also go through this article to learn more about what causes TurboTax Runtime Error 1603 and find out what you can do to troubleshoot the issues yourself.

What causes TurboTax Error 1603?

TurboTax has decades of experience in software design that help them anticipate possible software errors users may encounter. However, even the most perfect design will never be error-free because more often than not it is a combination of factors that cause these issues like TurboTax Error Code 1603.

For example, it could be that there is a compatibility issue between TurboTax and some other program that is running on your computer at the same time. You could also encounter the runtime error 1603 if your computer does not meet the basic system requirements needed to run TurboTax. Regardless of the cause, it is important to address the runtime error as soon as possible so that you can continue using TurboTax.

How to Fix Error 1603 TurboTax?

Issues like TurboTax Error 1603 can be persistent, you does not have to be hopeless. You can follow the given instructions and fix it easily.

Method 1: Update Windows to its newest Version

It might be possible that you are facing Error 1603 in TurboTax due to the presence of an Outdated Version of Windows.

  1. Begin the process by pressing the Windows+R key; this will open the Run box.
  2. In the Run box, enter ms-settings: and hit the ok button.
  3. Now, you can access the Windows Settings option.
    Important: In case UAC prompts you to the admin permission, select Yes.
  4. Now, on the Settings Screen, look for Windows Update, and select it.
  5. Moving ahead, tap on the Check for Updates button to verify if there is any update that you have to install.
  6. In case the driver is ready for installation, hit on the Download & Install All button.
  7. Now, wait for sometimes, until all the important updates have been downloaded.
  8. Now, rest your System to save the Modification you just made.
  9. Finally, Open TurboTax again and check if the issue is resolved now.

Method 2: Utilize the Turbotax as an Administrator

Another solution that has helped multiple TurboTAX User is the use of the Software as an Admin. It is simple; if you are an Admin, you have access to all the aspects of the Program. To create an Admin account, check the instructions below:

  1. Firstly, open the Run box, and enter ms-settings:
  2. Hit Ok, and a Setting box will appear in front of you; from that, choose Accounts, and then Family and other users or Family.
  3. Choose the User Account, and tap on the Change Account Type button.
  4. Now open TurboTax, and complete its update to get rid of Error 1603 permanently.

Method 3: Download the missing .NET framework Dependencies

You might don’t know this, but TurboTax was basically made for Windows 7 only. This means if you are using the software in Windows 11 or any other OS, there might be some missing dependencies. Thus you have to install the .NET framework Packages manually.

In such a case, you can run the DISM command from your compatible Windows Installation media.

  1. Put the relevant installation media in your DVD Drive or flash Drive, or mount it, in case you are employing an ISO File.
  2. Hit the Windows +R keys to open the Run box, and type cmd in the text field.
  3. Tap Ctrl+Shift+Enter to open the Command Prompt. Now, when the UAC box opens, choose Yes, to provide Admin access.
  4. Now, once you are at the elevated CMD Prompt, run the given command.
    Dism /online /enable-feature /featurename:NetFX3 /All /Source:XXX:\sources\sxs /LimitAccess
    Note: Replace XXX with the letter of your installation media.
  5. Next, to initiate the installation of the missing .NET Dependencies, hit enter and wait for some time for the operation to get finished.
  6. Once the installation is complete, reboot the System, and try to install the pending TurboTax update again.

Method 4: Turn Off all the Antivirus or Firewall

Alternatively, Error 1603 also appears in TurboTax due to the presence of a Firewall or any other security software. Thus you have to disable such software from your System by following the given steps:

  1. Initially, launch the search box of the TaskBar, and type Windows Defender Firewall.
  2. Now, hit the Enter button, and select the link of Turn Windows Defender Firewall on or Off.
  3. Next, you have to Disable the Windows Defender Firewall for Private and Public both network settings.
  4. Moving ahead, hit ok, followed by closing the tab.
  5. Now go to the taskbar’s search box again, and do another search for Windows Security.
  6. Now, when you find the app, open it, and from the Windows Security list, choose Virus & Threat Protection, and hit on the Manage Settings option.
  7. Thereafter, toggle the slider to off to simply disable Real-Time protection of your System.
  8. UAC will then ask you to confirm the Modification, hit on Yes, and restart your System.

Note: Don’t forget to turn on the Security Software after some time.

Method 5: Turn Off the VPN Connection

In case you have created the VPN connection using the VPN connection tab, you can turn off this feature using Network & Internet Connection menu.

  1. Launch the VPN Tab in the Windows Settings, and in the search box, type ms-settings: network-VPN, then hit the enter button.
  2. In case the UAC screen appears on your System, hit on Yes, to give Admin Access.
  3. In the VPN Tab, check the right side of the screen, and choose VPN connections.
  4. Moving ahead, hit the arrow near the Current VPN connection, and hit Ok to Disconnect it.
  5. Now, verify that you want to end the connection by clicking on the Remove button.
  6. Lastly, restart the System, and try to update the Proxy app, to check if the error is fixed now.
Conclusive Note!

We hope that the above-mentioned steps helped you in resolving your concerns about TurboTax Error 1603. If not, then you are advised to get in touch with a dedicated TurboTax customer Service expert who can help you in fixing all your issues immediately.

How to Contact Live Person at TurboTax ?

Filing taxes has never been an easy or fun task for any business person. Don’t you agree? But, the advent of TurboTax has made all business tax-related operations and tasks as easy as a breeze. Well, on one side, millions of users appreciate TurboTax; on the other side, users do have complaints about the program as well. At such times, only the experts can help users immediately and professionally. If you’re also looking to Contact a live person at TurboTax, here’s the simple procedure in this post.

Continue reading, and contact professionals to get rid of the technical issues that you’re facing with the TurboTax software program.

Dial +1-844-508-2335 for professional help and more details. We have a team of certified and proficient technicians to assist you.

Different Procedures to Contact a Live Person at TurboTax

Whatever technical glitches or confusion regarding the software you’re facing, the expert TurboTax team will help you. Here are some simple procedures that you must follow to have a direct conversation with a live person at TurboTax.

  • Firstly, you must visit the official TurboTax website, which is www.installturbotaxturbotax.com. Here, you must make sure that you’ve visited the website based on your correct location.
  • After this, directly go to the Help or Support page of the website and start looking for the Help or Support button. You may find such an option on the top or bottom of the website’s main page.
  • Once you find the button, hit the Help or Support option to begin. Continue exploring the online resources from the TurboTax main page. You can find an extensive collection of online resources on this page. These resources are relevant to help TurboTax daily users.
  • Now, move to the FAQ section, which is a TurboTax customer service. Here, search for relevant answers to the most commonly asked questions. For this, you must provide relevant keywords related to your issue. After this, the system will automatically display articles and information that will prominently answer your query.
  • You can also opt for another option, which is the TurboTax community, to get help if you didn’t get the answers from the FAQ section. The active TurboTax online community of experts and other users will immediately join and share their TurboTax knowledge to help you. For this option, you must search for a Community or Forum link, click the same, and access the community platform to get your issues resolved.
  • To get in touch with an expert on the TurboTax support system, you must dial the TurboTax customer support number. Also, you can approach the professionals via internet calling service. Now, depending on your location, the customer service numbers of the TurboTax support team may vary.
  • You may have to wait for a while to have words with the live person at TurboTax. It’s due to the availability of the live representatives or the call volume. At such times, you may be placed on hold. Thus, you have to hold some patience and wait for the live person to connect with you.
  • Another way to connect with the expert TurboTax team is via phone. You can speak to a live representative of TurboTax using different phone numbers as per your location.
  • Once you’re connected to TurboTax’s phone system, your next step is to follow the recorded phone prompts. These recorded prompts include instructions, such as a selection of options related to your issue and based on your TurboTax account.
  • Here, after this, while speaking to a live person at TurboTax, you must explain your exact TurboTax-related issue to the live representative. Once you’ve discussed everything about what’s wrong with your TurboTax software, now give all the relevant and required details to get your issue solved seamlessly.
  • In case the representative asks you for any documents or files to share, you must do so to get immediate solutions over the call.
  • The live representative of the TurboTax support system will also ask you to follow some instructions. So, carefully listen to the live person and perform according to the instructions. For more convenience, we suggest you keep taking notes during the conversation about the solutions given by the representative.
  • Also, during the phone call, if you need further assistance or want to transfer your call to any other live person from the support team, you are free to do so.
  • Once your problem is solved by the TurboTax customer service, you must provide the necessary feedback to the representative. It will be more than helpful for future customers seeking professional support.

Quick Steps to Have Words with the TurboTax Customer Service Team

Carry out the quick steps given below and have words directly with a live representative of the TurboTax support team:

  1. Firstly, ring the customer service number at +1-844-508-2335, and after getting connected, you must follow the IVR instructions.
  2. Now, start following the instructions and choosing options related to your query. These options are:
    • You need to Press 1 to get knowledge about your TurboTax profile.
    • It’s recommended to Press 2 to know about the TurboTax services and subscriptions.
    • Press 3 to terminate the auto-renewal facility.
    • You must Press 4 to pay for future TurboTax subscriptions and continue the services.
    • Continue pressing 9 to get in touch with the live representative at TurboTax customer service for professional help and immediate assistance.

When You Can Connect With a Live Person at TurboTax?

If you are deciding to get in contact with the expert TurboTax support team, you need to understand that the customer service team is available during specific hours. We have listed the timings in the section below when you can connect with the live person at TurboTax. Have a look, and contact us accordingly:

  1. From Monday to Friday, the timings to get in touch with the customer support team of the TurboTax experts are 5:00 AM to 5:00 PM PT.
  2. If you’re looking for professional assistance on weekends, then the timings for Saturday and Sunday are 5:00 AM to 9:00 PM PT.

How Does the TurboTax Customer Service Team Help Daily Users?

The professional TurboTax customer support team has certified technicians with enough technical wisdom about tax updates and trends. For users facing either software-related issues or confusion regarding tax compliance, the support team can help them professionally. Below, we have listed all the issues that the team can address and assist users with:

  • TurboTax Error 70001 – This issue occurs when users download the software with a corrupted installation.
  • TurboTax Error 2329 – Users face this problem when they are running a corrupted Windows Operating System.
  • Error Code 1603 in TurboTax – It’s an issue that occurs due to a corrupted Microsoft component, .NET Framework.
  • 1719 Error in TurboTax – This error in the TurboTax software denotes the installation issue.
  • TurboTax error code 2 – It’s one of the internet connectivity errors that TurboTax users face when their internet is having issues.
  • TurboTax update error – Well, software update errors are common among tech-savvy users. Similarly, TurboTax users also face update errors due to internal technical glitches.
  • TurboTax error code 65535 – The incomplete or corrupted software installation is one of the major reasons for facing this 65535 issue in TurboTax.

And the list goes on! Apart from the errors listed above, there are many more technical bugs and errors that TurboTax users may face. However, when you contact the TurboTax customer service team, your issues can be resolved immediately.

Let’s Take Everything into an Account..!

Hopefully, this comprehensive blog post has informed you about how to reach out and talk to the live person at TurboTax for professional assistance. Thus, whether you encounter any technical error in the software or have any issues regarding tax preparation using TurboTax, reach out to the TurboTax team. The support team will answer you then and there. For further information, connect with us via the available Live Chat Support option.

How To Fix If TurboTax Not Working On Mac?

TurboTax is software that is used by most businesses for tax management. It is an efficient software as it fulfills all the basic needs required to prepare a tax structure analytically. There are several versions of TurboTax that is available, and each one of them has its own advantage and drawback. Once you find out which would be the definitive version of TurboTax for your business, you will get to know the benefits of using it.

Sometimes, the users might come across TurboTax Not working on Mac error while working the tax-filing software on the Mac device. However, it is crucial to get rid of this error as using the correct techniques explained in this post.

Why is TurboTax not Working on Mac?

There are numerous ways to resolve the issue of TurboTax software not functioning on your Mac device. To solve any problem you encounter, you must understand the root cause of the issue.

There are several ways to tackle a specific issue; it becomes essential to determine which method would act as the most effective way out. Some steps that you can take up to resolve this issue are given below:

  • First of all, check whether you are using the TurboTax software through the application folder. You must use the program from the application folder.
  • It is also seen that wireless connections also tend to create problems in the functioning of the software. Always ensure you are accessing a reliable and uninterrupted internet connection. You might encounter issues while updating the TurboTax software if you don’t have an uninterrupted internet connection.
  • Then, check whether you have cleared your trash folder. It is seen that doing so might help you in resolving the issue several times, as deleting temporary files from the system is helpful.
  • Check the TurboTax Menu. In the menu, press and hold the option key. This would change the option of ‘Check for updates to download the latest updates.’ After this change occurs, download and install the TurboTax update forcefully.
  • If the above steps don’t solve your issue, try restarting your system and router. Once the restart is complete, redo the update process.

How To Keep TurboTax Not Working on Mac Issue At Bay?

It is always good to consider the troubleshooting steps before an error occurs. In case the TurboTax 2021 not opening on Mac issue appears, considering the below-given preventing steps can keep the error at bay:

1: Install The Currently Launched Version of the Programs

When installing the TurboTax application, ensure it is the program’s latest version. It ensures that the app will not malfunction and that all the bugs and glitches are resolved.

2: Configure Permission to Open Identified Developers App

After installing the program on Mac, you may see an error message: “TurboTax 2021 can’t be opened because Apple cannot check it for malefic applications.” This error message depicts that your MacBook cannot check the applications that can cause severe damage to your device. To resolve this, follow the below-given steps:

  • Whenever the error message pops up on your screen, hit the “show in finder” option located on the error box.
  • Once you click, it will open up. You must right-click on the TurboTax product and click on the open button.
  • You will again see a similar message that says TurboTax can’t be opened because Apple cannot check it for malicious software.
  • In the end, open TurboTax on your Mac from the error box.

After allowing the permission to open identified developer’s application, check if the TurboTax won’t open Windows 10 error is resolved or not.

3: Make Sure That The Standard System Requirement Is Fulfilled

Ensuring that the system requirement on your Mac device for TurboTax is fulfilled, you can keep TurboTax 2021 won’t open on Mac at bay. Check below:

Operating System

The below-listed operating systems work best with the TurboTax application:

  • TurboTax 2021: macOS Catalina 10.15 or later.
  • TurboTax 2020: macOS Mojave 10.14 or later.
  • TurboTax 2019: macOS High Sierra 10.13 or later.
  • TurboTax 2018: macOS X v.10.12 or later (64-bit required).

Processor

The program supports the “Multi-core Intel processor with 64-bit support” and above processors to ensure smooth functionality.

Hard Drive Space

For the hard driver, consider:

  • 2019 – 2021 version of the TurboTax: 1 GB.
  • For the 2018 version of the program: 650 MB.

RAM

2 GB or more RAM ensures the smooth operation of the program.

CD/DVD drive

CD/DVD drive is required when installing the software using the CD.

On A Final Note!

Once you have tried all the above-given methods and if you are still experiencing the TurboTax cannot open tax return issue, it is obvious that you would require technical assistance to overcome it. In such a situation, GoTaxation can offer you the ideal solution with a TurboTax support number. This would provide you with expert advice on how to overcome the issue.

They would understand the issue thoroughly and find the most appropriate solution to help you out of the malfunction. This service can be availed on a 24×7 hour basis and is free.

How To Fix TurboTax Error Code 190?

TurboTax is a tax-filing software that helps millions of taxpayers file their State and Federal taxes while eliminating the need for paperwork. However, being software, it is not devoid of technical glitches. One such error in TurboTax error 190, which occurs when a user tries to open the file. Whenever the user strikes the error, they won’t be able to file their taxes. However, if you are looking for the proper guide to troubleshooting the error, then go through this guide.

What Do You Mean By TurboTax Error 190?

Before moving toward troubleshooting, you must be aware of the TurboTax error code 190. Usually, this error occurs while opening a company file or filing the tax. Malicious viruses or malware infections are the main reasons behind this error, and multiple other factors can promote error 190 in TurboTax. When this TurboTax error takes place, it reflects an error message on your screen stating:

TurboTax Error 190

What Causes The TurboTax Error 190 To Take Place?

TurboTax error 190 can take place due to numerous reasons; we have listed some of them below:

  • The error mainly occurs when a user tries to open the company file.
  • A harmful virus or malware attack can also give rise to the TurboTax error code 190.
  • Incorrect graphics drivers are one of the prominent reasons behind the error.
  • The TurboTax program is running on a system that is not compatible with the program.
  • After knowing the possible reasons behind the error, you can take the right course of action for the error resolution.

What Signs Does The Error 190 Give In TurboTax Program?

When the error occurs, you may experience the following symptoms on your screen:

  • The error throws a warning message on your screen representing the error code 190 in TurboTax.
  • The TurboTax window you are trying to process crashes.
  • It may also arise due to the sluggish performance of the PC.
  • You may not be able to introduce the product on your framework.
  • Framework freezes now and then.
  • Sometimes, the error can delete a portion of your TurboTax documents from your TurboTax framework and make new ones.
  • When these signs show up, it is high time to determine the possible reasons behind TurboTax error 190 and fix them using the appropriate steps.

How do I fix Error 190 on TurboTax?

Once you know the possible causes that may trigger the TurboTax Error Code 190, you can fix it easily by following the solutions listed below.

Solution 1: Relaunch The TurboTax Software

When you face an error in the TurboTax application while opening it, try relaunching the program and check if it resolves the error.

  • To start the procedure, click the Start a New Return button.
  • Thereon, select the Taxes tab of the report to proceed further.
  • Now save the reports by downloading them on your device.
  • Thereafter, shut down your TurboTax program before you proceed further.
  • Now, relaunch your TurboTax software.
  • Finally, try to open the file to check if you can open it without getting an error.
  • If the error persists while opening the company file, move ahead toward the next solution to fix the error.

Solution 2: Perform Disk Cleanup

Running a disk cleanup will free up space on your hard drive and help the error resolution. Follow the below-listed steps:

Note: Create a back of your data file to clean some space in your hard drive until the error is resolved.

  • Clear the cache and start your computer.
  • After restarting the computer, perform a Disk Cleanup, and it will clean the space on the computer used in opening the company file.
  • To do so, make right-click on the disk in the first place.
  • Now select Properties from the drop-down list.
  • You will now see a different Window on your computer.
  • Here, select the Disk Cleanup option. Wait for a few seconds until the procedure completes.

Solution 3: Close The Programs Interfering With the Process

Sometimes, the programs running in the background may interfere with an ongoing task. To fix this, you must terminate all such programs hindering an ongoing TurboTax task and promoting error 190. Below are the steps:

  • Press CTRL + Alt + Del keys simultaneously on your screen to open the Task Manager.
  • Now, from under the Processes tab, stop running projects individually one after the other by pressing the End Task or its alternatives.

Solution 4: Download The State Forms

TurboTax error 190 depicts that you are trying to open a .tax2018 file with one or more tax returns. Yet, your TurboTax version does not have the essential state module installed. If this is the case, you need to start a mock return to download and install the required state module. You may not be able to open any tax return in it until you have installed the state modules for the correct states included in the .tax2018 file.

Solution 5: Perform A Reinstall Procedure of The TurboTax

If none of the solutions listed-above help in the error resolution, reinstall TurboTax software by following the below-given steps:

  • First thing, click on the Start New Return option you may locate on the system.
  • Next, tap on the Taxes tab when your report prompts on your screen.
  • Thereafter, you need to download the reports.
  • After the completion of the download procedure, close the TurboTax application.
  • Now, reopen the TurboTax application and open the file that gave an error earlier.
  • If the error still exists, move down and try the next solution.

Solution 6: Make Sure That The Drivers Are Updated

Sometimes, the error may pop up in the TurboTax program while using an outdated driver. The below-described steps will help you to ensure that your drivers are updated:

  • Initially, get the currently launched version of the drivers downloaded through the official website of the printer manufacturer.
  • Thereafter, locate the “My Computer” icon and right-click on it.
    Once done, you need to click on Manage the proceed further by selecting Device Manager.
  • Next, have a look at the various hardware component listings.
  • Locate the driver that needs to get updated and select it.
  • Right-click on the driver and select the Update driver option from the drop-down list.
  • Wait for the update process to complete, and then restart your PC.
  • Verify if the TurboTax error 190 is resolved or not. If the answer is negative, try out the next method.

Solution 7: Update Your Antivirus Program

It is crucial to update your antivirus application regularly, as it keeps the security threats and detrimental effects of the virus and malware away. It can also resolve multi-faceted issues, such as TurboTax error 190. If not, update your antivirus application and scan your system files regularly. It helps you determine the issues that can lead to a problem in your TurboTax software so that you can reap its benefits with the utmost peace of mind.

Solution 8: Try Installing A Fresh Copy of the Windows Operating System

Installing a new copy of the Windows OS can also be an effective solution in resolving the error code 190 in TurboTax. You can use this solution when no solution works as the last fix. Installing a fresh copy of Windows removes all the old data stored on the computer, including the junk files piled up on your computer lately.

To Summarize The Above!

With the help of this post, you can easily get rid of Error 190 on TurboTax and can file taxes on time without any technical glitches.. However, you can Call our TurboTax Support phone Number if you are still struggling to troubleshoot the problem even after implementing all the solutions mentioned above. Getting professional help can save you in such an adverse situation. Supported by its experienced TurboTax professionals, Go Taxation can help you in your hours of need. Just report your issue and get the best solution for a given situation.

You may also read: How To Fix Or Resolve TurboTax Error 42015?

Quicken Help Number To Fix Quicken Error 163

Quicken software is a personal financial management tool developed and managed by Intuit. Quicken is helping the users manage and handle all of their accounting tasks and a complete picture of the finance. Although Quicken has gained so much popularity, users still face many Quicken error codes while using the software. One of the most commonly faced errors is Quicken Error code 163. This blog might be important for you if you are also facing an error. In this blog post, we will provide you with all the information about how to resolve the error.

What is Quicken Error Code 163?

Quicken error code 163 mainly arises when the user tries to process a print command, adding new accounts, syncing, opening, deleting, or exporting the account details. This error can also occur when the user tries to deactivate the accounts area unit. In that case, users have to access the duplicate files or restore the file backup so they can reactivate. Apart from that, let’s have a look at the reasons behind the occurrence of the error.

Possible Reasons Behind Quicken Error Code 163

Before following the procedure to fix Quicken error 163, let’s understand the possible reasons behind this error so that you can prevent the error from occurring again in the future.

  • When the internet connection is working slow, or the connection is poor.
  • A general issue with the PC’s hardware.
  • The Quicken error 163 can also arise when the Quicken software has not been installed properly.
  • When you are using an outdated version of the PC’s window.
  • The background running antivirus software is not permitting the Quicken software to perform smoothly.

How to Identify Quicken Error Code 163?

In case your system is affected by the Quicken error code 163, then you will be able to notice the below-mentioned symptoms while operating the software.

  • When you are facing challenges while importing and exporting the company’s files.
  • Facing problems while creating a backup of the data of Quicken online.
  • Not able to launch or use the Quicken software.
  • Facing problems while creating a new user account in the Quicken software.
  • The active running program is frequently crashing.


How to Fix Quicken Error Code 163

Let’s look at the solutions you can easily follow to resolve Quicken error code 163.

Step 1. Create New Folders in Program Files

The first step for troubleshooting Quicken Error 163 code is to create the new folders in the program files. For getting that done, below listed are the steps that you can follow to get it done.

  • Firstly, open the Quicken software.
  • Thereon, click on the Quicken setup or quicken.exe option.
  • After that, click on the “Accept” option on the license agreement pop-up window.
  • Click on the “Next” option and select the installation location option.
  • Here, you may alter the location by selecting the “Change Install Location” option.
  • Then change the location to C:\Program Files (x86)\Quicken 1.
  • At last, complete this step by clicking on the “OK” option.

Step 2. Change Windows Permissions

The next step is to change the windows permissions on your PC. For that, below are the steps you can easily follow to complete the task.

For Windows 8 and 10

  • Firstly, open the windows file explorer by pressing the “Windows + E” keys together.
  • Then right, click on the local disk C option.
  • Now, click on the “Properties” option, followed by a click on the “Security” tab option.
  • Moving ahead, click on the “Administrator” option.
  • Then set the permissions level to the max, followed by a click on the “Advances” > “Change Permissions”.
  • After that, select all the child object permissions entries and tap on the “Apply to save changes” option.
  • At last, end this process with a click on the “OK” option.

For Windows 7

  • Go to windows explorer and right-click on the local disk C option.
  • Then click on the “Properties and Security” tab.
  • Now, click on the “Administrator” option and check to mark the “Full Control” box to permit complete control.
  • Click on the “Owner” tab and the “Edit” option.
  • Then select the “Administrator” option.
  • After that, mark the checkbox for the “Replace Owner on sub containers and objects” option.
  • The next step is to save the updated changes by clicking on the “Apply Changes” option, followed by a click on the “OK” option.
  • Again right, click on the “Local Disk C” icon and then click on the “Properties” option.
  • Following the above steps, then navigate to the “Program Data” > “Security Tab” > “Advanced” option.
  • At last, save the updated changes by clicking on the “Apply” option, followed by a click on the “OK” option.

Step 3. Make Necessary Permission Changes in Windows Run Command

The last step for solving the Quicken error code 163 is making necessary changes in the windows run command. For that, below are the steps you can easily follow to accomplish the process.

  • Firstly, open the windows run command by pressing the “Windows + R” keys together.
  • In the insert box, type “CMD” in the search box and hit the enter button.
  • Now, under the command prompt window, type icacls “C:\ Program Data” \T \ C? GRANT Administrator:
  • At last, end this complete process by hitting the enter button.

Once you are done with the above steps, run the Quicken software and examine the presence of the Quicken error 163. After performing the above steps, the error must get resolved.

Suggestion Reading:

How To Resolve Quicken Error 1310 Or 1303?

How To Fix Quicken Error 101 Or 103?

Summary

We hope you find this blog informative. Above, we have tried our best to provide you with authentic and useful information about how you can resolve the Quicken error code 163. In case you face any challenge while performing the steps mentioned above, or if you have any other query related to the topic, then you can reach out to us through the chat box. You can write us a mail at info@gotaxation.com. We at Go Taxation are a team of experienced and professional software experts available 24×7 at the help desk to attend to your query.

For More Information Or help Contact Our Quicken Customer Service Number

How To Fix Quicken Install Error Code 1603?

In case Quicken has not been successfully installed or properly positioned, then it is much more likely that you can experience Quicken install error 1603. This particular error code points toward the fact that the software has not been properly installed on your system. Before you go ahead and fix this error, it is almost imperative that you understand all about this error, what exactly is this error, why it occurs and how it can be successfully resolved. In this blog, we are going to help you with understanding all about this error and then enable you to resolve the same in easy steps. Read this article till the end, so you do not miss anything and navigate through this error quickly.

quicken install error 1603

Signs that signal a Quicken Install Error 1603 scenario:

If you are following one of the following issues, then it would mean that you are encountering Quicken Error Code 1603:

  • The dynamic program window crashes frequently.
  • When running a similar program, the system crashes repeatedly.
  • Windows runs nonchalantly and responds slowly.
  • At regular intervals, your PC freezes for some moments.

Causes of Quicken Install Error 1603

There could be multiple reasons why you might encounter Quicken Error 1603. You must look into the plausible causes for this particular error code. Here are some of those reasons:

  • You might be encountering the error because of the corruption in the desktop windows registry from any Quicken-related software.
  • It might also occur in the case your Windows Registry does not have a valid entry.
  • It might also occur because of the possibility that a different program deleted the Quicken-related documents by mistake.
  • It is also possible that a malicious virus or malware threat could be causing this issue.

Solutions to Troubleshoot Quicken Error 1603

Quicken Error Code 1603 is caused by a wrongful installation, an improper internet connection and similar errors. It is because of these reasons that the software ceases to function normally.

In order to fix Quicken Error Code 1603, you must follow these below-given steps:

(a) Download and Run QcleanUI

  • Firstly, you need to create a backup of the Quicken data.
  • Thereafter, you need to click on the Uninstall Quicken option.
  • Next, go to your Desktop and then create a new folder.
  • Subsequently, save exe and MSICLEAN.exe in the newly created folder.
  • Consequently, click on exe and then clean all the versions of the Quicken software.
  • Furthermore, you need to click on the Clean option.
  • You will get an error message on your screen.
  • Lastly, click on the Exit option.

(b) Close Conflicting Programs

Whenever you get the runtime error, you must keep in mind that this could be happening because of the conflicting programs. Multiple Incompatible programs could be interfering with each other and this might be causing the problem. The one thing that you can do while resolving this issue is to stop these conflicting programs. Here are the steps following which you can do that:

  • Click Ctrl, Alt, and Del at the same time. This will open up the Task Manager for you. Task Manager allows you to view the list of programs that are currently running on the system.
  • Thereafter, you need to go to the Processes tab and click on the End Process button for every program by highlighting them.
  • You must check if the error resolves itself after you end each process.
  • After you have identified the program which is causing the error, you might want to go ahead with the next troubleshooting step which is to reinstall the application.

(c) Update your Virus Protection Program

A malicious virus could be causing the run-time error on your computer. This must immediately be quarantined or deleted from the system. You need to ensure that you update the virus program and run a thorough scan of your computer or run the Windows Update program so that you get the latest virus definition and solution.

(d) Re-Install Runtime Libraries

An update like the MS Visual C++ package which is not properly installed could be causing this particular error. In such a case, you should uninstall the current version of the package and install a new one. Consider the following steps to re-install runtime libraries:

  • Go to Programs and Features. Thereafter, highlight the Microsoft Visual C++ Redistributable Package.
  • Consequently, click on the Uninstall option. Once you are done, you should restart the computer.
  • Lastly, you need to download the latest redistributable package from Microsoft and then you need to install it.

(e) Renaming Quicken Shared Folders

  • Firstly, follow the steps to show hidden files and folders. Even after choosing the option to show the hidden files and folders, some of the folders do not appear. In such cases, you should follow the given below steps and then you should rename the folders.
  • Next, you need to right-click on the Quicken folder. Thereafter, you need to rename the folder and then tap on the ENTER button.
  • Consequently, you need to repeat this step so that you rename the folder for every user on your PC.
  • Furthermore, you need to right-click on the Quicken installation. Then, click on the rename option and then you need to rename the folder.
  • Thereafter, click on the Enter button.
  • Lastly, reboot your PC and re-install the software again.
Conclusion

Hopefully, we have managed to provide you with the answer to resolve Quicken Error 1603. We have tried to cover the symptoms, causes and solutions to fix Quicken error code 1603. Using these above-mentioned steps, you can very easily navigate through the Quicken Error Code 1603. However, if you are still not able to understand or if you find yourself in a situation wherein even after following these steps, the issue is not resolved, then you must contact our team of Quicken Customer Service experts who are ready to resolve any sort of issue. Visit our website gotaxation.com or send us a mail at info@gotaxation.com.

You may also read:

A Complete Guide To Fix Quicken Error 28

In today’s era, there are a lot of challenges and difficulties in growing any online business. Well, a lot of financial software is helping businesses grow and manage their business activities. Quicken is among these top-rated and most used software by many small and medium-sized businesses. While Quicken provides many advanced features to its users, they also face many errors while using the software. The most commonly faced error is Quicken install  Error 28. If you are also facing this error, this blog can help you fix Quicken error 28 on your PC.

What is Quicken Error 28?

Quicken Error 28 generally arises when the user tries to download the bank transactions from the bank’s server through the one-step update service. There can be many reasons behind this error, and as a user, it’s important to understand the possible reasons to prevent this error from occurring again.

Well, let’s look at the possible reasons behind this error.

You can also read: Quicken script error

Possible Reasons Behind Quicken Error 28

Here is the list of the possible reasons why the Quicken error 28 arises.

  • When the Quicken files are damaged or corrupted.
  • Quicken files are missing from the PC.
  • When you are using an outdated version of the Quicken software.
  • A compatibility issue between the Quicken software and the bank server can also lead to the occurrence of the Quicken download error 28.

How to Resolve Quicken Error Code 28?

Let’s move on to the different methods you can easily follow to fix the Quicken error code 28.

Method 1. Update the Quicken Software to Latest Release

The first initial method you can follow to Troubleshoot Quicken Error 28 is downloading the new updates for the Quicken software. So, below listed are the steps that you can follow to update Quicken to the latest release.

  • Firstly, launch the Quicken software on the host PC.
  • Then click on the “Quicken” option, and under the drop-down list, click on the “Check for Updates” option.
  • If you find any updates, click on the “Install” option to update the software.
  • You can easily follow the on-screen instructions to complete the installation process of new updates.

Once you have updated Quicken to the latest release, try downloading the bank transactions again, and if you are still facing the problem, try the next method.

Method 2. Connect the Bank Account with Quicken

The next method for solving the Quicken error is to connect the bank account to Quicken software. Here are the tried and tested steps you can easily follow to complete the process.

  • At initial, open the Quicken application.
  • Then, under the home page of the application, click on the “Add Account” icon.
  • It will ask you to provide a bank name in the insert field.
  • After that, click on your bank name and provide the user ID and password in the designated insert boxes.
  • Thereon, click on the “Connect” option.
  • Now, you can see the accounts linked with that bank.
  • After that, link the bank accounts instead of adding them.
  • At last, end this process by clicking on the “Continue” option.

Method 3. Reactivate the Account and Change the Connection Type

The last and final method that can be followed to resolve the Quicken error 28 is to reactivate or deactivate the account. Here are the steps that you can follow to reactivate the account and for changing the connection type.

  • Initially, click on the “Accounts List” option.
  • Now, select the account which is in the query.
  • Then, click on the settings gear icon available at the bottom right side of the screen.
  • After that, click on the “Troubleshooting” option, followed by a click on the “Deactivate Downloads” option.
  • Repeat the above steps for the other accounts, which need to be connected with similar banks.
  • Click on the Settings option, and select the configure transaction download.
  • Moving ahead, enter the name of the bank.
  • After that, provide the user id and the password in the insert fields.
  • Now, it will ask you to select one of the connection methods to connect to the bank. There, select the direct connect method.
  • Thereon, Quicken will search for the accounts with the bank.
  • At last, make sure to link these bank accounts and then click on the “Continue” option to complete the process.

Summary

We hope you find this blog well. In this blog, we have tried our best to provide you with authentic and useful information about how to fix the Quicken error 28. If you have any other queries related to the topic, you can reach out to us through the chat box. You can also write us your query through mail at info@gotaxation.com. We at Go Taxation are a team of Quicken Customer Service Number  who are available 24×7 at the desk to provide the best feasible solution for your query.

How To Fix Quicken Error 101 And 103?

Quicken is a software that is perfect for individuals who want to keep a check on their finances and manage everything in one place. You can perform all your accounting functions, such as taking note of the balance and transactions, planning a budget, and a lot more. Just like any other software, this one has its issues too. If you use Quicken and want to know how you can troubleshoot Quicken Download error 101 and 103, keep reading.

While reading this blog, you will come across what this error is about, what causes it, and how you can resolve it and resume your operations. So without further ado, let’s get into it!

Quicken Download Error 101 And 103

Quicken Error 101 or 103 occurs while downloading the software from a CD. In addition to that, a user can also get an error message while downloading bank transactions using a one-advanced update service to add to the software. However, it is not really difficult to fix Quicken Error 101 or 103. Just follow the solutions mentioned further in the blog, and you will be able to resume your work again.

Following are the errors that you might encounter here:

  • Error 101 Connect
  • Error 101 Add
  • Error 103
  • Ccscrape 101
  • Ccscrape 103

Causes of Quicken Download Error 101 And 103? 

There are a few things that can trigger Quicken error 101 or 103. Let’s see what they are.

  • The error can occur if you are using an outdated password to enter Quicken.
  • Also, you might get the error when updating accounts because of an expired password in keychain access.

For Troubleshoot Quicken Error 101 or 103

Follow the steps mentioned under the fixes provided below to resolve the issue.

Fix 1: Deactivate the Accounts Facing These Issues

The first way is to delete the accounts that display any of the 101 or 103 error codes.

  • To initiate, open Quicken on your PC.
  • Next, go to the Accounts option and select Hide and Show Accounts.
  • Furthermore, remove the tick-marks from the accounts that you need to deactivate.
  • Once that is done, go to Settings and open the Financial Institution section.
  • Thereafter, select Troubleshooting and select Deactivate Downloads and save the changes.
  • Repeat the same steps on every account that require you to troubleshoot Quicken error 101 or 103 and then close Quicken.

Fix 2: Remove Keychain Access Password

Removing the password for keychain access might also help you with the process.

  • Go to the Finder menu, and with the help of the search bar, look for Application and Utilities.
  • Once the window opens, create a keychain. This will help you in logging in.
  • Next, locate the Quicken cloud that is showing the error and delete all the existing entries.
  • Finally, close the keychain access application and check if the error still persists.

Fix 3: Update your Bank List

If you still get an error code, try updating the bank list.

  • Head to Quicken’s application to start the process.
  • Now, open a new account from the Accounts section.
  • Next, click on the accounts with the errors and tap on the question mark.
  • The question mark here means My Bank is Not Listed.
  • After that, select the Show List and add the bank server name in the provided space.
  • Now, put in your login credentials and hit the Continue button.
  • Once you follow the steps correctly, you will see your bank details on the screen.

Fix 4: Reinstall Your Quicken Accounts

Try to reinstall the accounts if you still face Quicken Error 101 or 103.

  • Initially, go to the application and make a separate section under your bank’s name.
  • Next, enter your login information and hit the Continue button.
  • Once that is done, Quicken will detect your current accounts and show the details of your bank on your screen.
  • Remember that you need to link your accounts instead of adding them.
Information Quicken Error 103

Quicken Error 103 is also referred to as Runtime error in the program. This is an infuriating error and can take you to your wit’s end. Therefore, you need to troubleshoot it as soon as possible. This bug in the program can be fixed by repairing the erroneous code base. When you get this error as a Quicken user, you may inform professionals to fix the error for you. Besides, if you are prompted to update the software, it can be a part of the QuickBooks error 103 troubleshooting. Let’s dig deeper into the possible causes and other important aspects of the error.

Error Information

Quicken is an Intuit Inc. product that can give the following error:

Error name: Quicken Error 103

Error number: Code 103

Description: Error 103: Quicken has encountered a problem and needs to close. We are sorry for the inconvenience.

What Evokes Runtime Error Code 103 in Quicken?

Now that you have a fair idea about Quicken error code 103, it is crucial to understand the possible reasons behind the error. A problematic source code during the startup phase is one of the most apparent reasons behind the error. However, there are multiple other factors that can promote this problem. Check below:

1. Error 103 Crashing The Program

Quicken Crash error terminates the program completely when it takes place. This error crops up when the software fails to recognize that the input provided to it is incorrect. Besides, it also doesn’t understand what it will yield as output.

2. Memory Leak Error 103 in Quicken

The memory leak issue 103 can cause Quicken to utilize more memory, which leads to sluggish performance of the system during startups or when yielding outputs. A misconfigured software by Intuit Inc. can be a possible reason behind the error. Besides, when a command starts a loop that can’t be ended, a memory leak error can take place.

3. Logic Error 103 – Program Producing Wrong Outputs

This error occurs when Quicken gives wrong outputs, even after providing the right inputs. When Intuit’s source code induces vulnerability in the information process, Quicken error 103 can come into the picture.

Other possible reasons behind the error:

• When an essential file is missing or corrupt in the program.

• If the program is infected by a virus or malware attack.

• Invalid or corrupt Quicken registry entry.

• Accidental deletion of an essential Quicken-related file by a third-party application.

• Conflict between Quicken and other applications.

• Partial installation or corrupt download of the Quicken application.

Symptoms Of Runtime Error Code 103

Runtime error 301 in Quicken can abruptly appear on your screen without any prior warning. However, when the error occurs, it throws an error message. The error message can show up every now and then until fixed. You may see instances of file deletion or new files appearing on your screen. Weak or unstable Internet connection is also one of the main symptoms of the Quicken error 103 you may experience when using the program.

Read Also:  Quicken Error 1310 Or 1303

Final Statement

Quicken might face some issues at the time of downloading the application as well as when downloading bank entries. This blog has 4 solutions that can help you resolve Quicken error 101 or 103. Just follow the steps correctly, and you will be able to resume working on the application. If you have any other Quicken issues and are looking for solutions, we are here for you. Visit our website, Go Taxation, and you will find the answer to all your questions there.

How To Resolve Quicken Error 1310 Or 1303?

Quicken is the number one budgeting software used by small and medium-sized businesses across the globe. Besides, each version of the Quicken Budgeting software provides enough features to help many businesses and individuals. Although, Quicken users encounter many glitches while using the software, and Quicken error 1310 or 1303 is among them. In this blog post, we are going to take you with all the information about how you can troubleshoot Quicken Error 1310 or 1303. So, if you want to learn how to get this error resolved, stay tuned till the end of this blog post.

What is Quicken Error 1310 or 1303?

Quicken Error 1310 or 1303 is one of the common Quicken issues. Quicken Error Code 1310 or 1303 mainly arises when the user tries to install the software from pirated software, i.e., CD ROM or an unauthenticated website. Now, let’s understand the reasons due to why this error occurs.

Reasons Behind Quicken Error 1310 or 1303

Before we directly jump on to the procedure for getting the error resolved, it is important for the users to understand the reasons why the error arises. It can help you in preventing the error from occurring again in the future. Below mentioned are some of the possible reasons that can promote Quicken Error 1310 or 1303:

  • When the Windows registry is corrupt or damaged.
  • An issue with the Quicken files.
  • A malicious attack from a virus or malware infects your system.
  • When the user has downloaded the corrupted Quicken software folder.

How to Identify Quicken Error 1310 or 1303?

Let’s look at the list of possible symptoms through which you can easily identify the Quicken Error 1310 or 1303.

  • When your PC is frequently crashing.
  • A pop-up display message on the screen is “Quicken Error 1310 or 1303”.
  • Your PC is not responding to the commands of the mouse and keyboard.

How to Fix Quicken Error 1310 or 1303?

Once you are cleared with all the information about what is Quicken error 1310 or 1303 and the reasons and symptoms of the error, let’s understand how to solve this error. Below listed are the steps that you can follow one by one to resolve the Quicken error 1310 or 1303.

Step 1. Add New Folders in the Program Files

The first step in solving the Quicken error 1310 or 1303 is to add a new folder in the program files. Below mentioned are the steps that you can follow to create a new folder in the program files.

  • First, launch the Quicken software and click on the “Quicken Setup” or “Quicken.exe” option.
  • After that, click on the “Accept” option to accept all the terms and conditions and the license agreement.
  • Then, click on the “next” option and select the installation location.
  • Here, choose the “Change Install Location” option, and select a different location.
  • Change the location from C:\ Program Files (x86)\ Quicken to C:\ Program Files (x86)\ Quicken1.
  • Then, at last, click on the “OK” option.

Once you have created a new folder in the program files, then follow the next step.

Step 2. Verify and Change the Permissions

  • For Windows 10 and 8

For verifying and changing the permission settings in windows 10 and 8 PC, below listed are the steps that you can easily follow to get it done.

  • At first, open the file explorer on your PC by pressing the “Windows + E” keys together.
  • Now, navigate and right-click on the local disk C:\ and click on the “Properties” option.
  • There click on the “Security” tab option.
  • Thereon, click on the “Administrator” option.
  • Next, click on the “Enable Full Control” option in order to gain full access.
  • Now, click on the “Full Control” option.
  • Moving ahead, click on the “Advances” option, followed by a click on the “Change Permissions” option.
  • After that, click on the “Disable Inherited Permissions” option and replace the inherited permissions with the explicit permissions.
  • At last, click on the “Apply”> “OK” option to save the updated changes.

For Windows 7

In case you are using windows 7 on your PC, then you can follow the below-mentioned steps for verifying and changing permission settings on your PC.

  • First, navigate the Windows file explorer and right-click on the local disk C.
  • Then click on the “Security” > “Administrator” > “Full Control” option.
  • Now, click on the “Owner” tab option.
  • After that, click on the “Edit” option, followed by a click on the “Administrators” option.
  • Then check mark for the option “replace owner on sub containers and objects.”
  • Now click on the “Apply Changes” button followed by the “OK” option.
  • Afterwards, go to the properties page of Windows local disk C again.
  • Then click on the “Security” tab option, followed by a click on the “Advanced” option.
  • Select the permissions option and click on the “Edit” option.
  • Then allow full control and permissions to the system and administrator.
  • After that, click on an object’s “disable inherited permissions” and replace the inherited permissions with the explicit permissions.
  • At last, click on the “Apply” option and then hit the “OK” option to save the updated changes.

Step 3. Correct Permission Settings from Command Prompt

Here are the steps you can follow to correct the permission settings from the windows run command.

  • First, go to the windows run command by pressing the “Windows +R” keys together.
  • Afterwards, type “cmd” in the search box and hit the enter button.
  • Enter this code in the windows prompt command “a cod “c:\ProgramData”/T /C /grant administrators:F”.
  • At last, click on the “Enter” option.

Once you perform the above-mentioned steps, then try to use the Quicken software and check for the presence of the Quicken error 1310 or 1303.

What Are The Main Reasons Behind Quicken Error Code 1310

When error code 1310 occurs in Quicken, you may see various instances of the error messages, such as “Cannot write to file” or “error writing to file.” This error can take place due to several reasons, which you can find in the below-given list:

  • A corrupt installed file is one of the foremost reasons behind the error.
  • Insufficient admin privileges on Windows can also give the error when installing or updating the Quicken application.

If any of the issues persist, you may get error 1310 in the program.

How To Troubleshoot Error Code 1310 When Installing Quicken?

Knowing the possible reasons behind the error can make troubleshooting easier for you. Follow the below-given solutions carefully:

Solution 1: Use A Fresh Installer File To Fix Exit Code Error 1310

As we have discussed above that, a damaged file installer can promote error 1310 in Quicken software. To fix it, install the Quicken application using a fresh installer file. Below are the steps:

  • Go to the installer file that gives an error when installing Quicken and delete it.
  • Thereafter, visit Quicken’s official website and download the latest version of the program installed.
  • Now run the executable file from the download location and check if it installs the Quicken application or not.
  • If the error persists, go to the next troubleshooting solution to get rid of this technical annoyance.

Solution 2: Switch To The Administrator Account

Insufficient admin permission is also one of the main reasons behind the error. To fix:

  • If a user is logged into Windows, log him/her out in the first place.
  • Thereafter, log in to the administrator account with the right credentials.
  • Moving ahead, run the Installer file and press and hold CTRL + Shift keys together.
  • Now click on the Next button without releasing the keys and click OK when the installer prompt appears.
  • Now choose the option to create a new folder using the Browse option.
  • Here, you need to choose “Quicken New” as a folder name and click Select Folder.
  • Proceeding further, click Install and choose a suitable option to install the program.
  • In the end, hit Done, and it will install the application without any hurdles.

Quicken Error 1303

Quicken Error 1303 is an installation error. This occurs if you do not completely download the application. Also, if you go ahead with a corrupt download. Yet, you can easily overcome the issue with just some simple, easy-to-perform troubleshoots. Let us take a look at its causes and solutions here.

Causes of Quicken Error 1303

Below are some of the core reasons why Quicken users encounter this problem:

  1. An incomplete or corrupt download of the software file.
  2. Also, a virus or malware attack on your system.
  3. Corrupt Windows due to the latest Quicken update.
  4. Additionally, missing Quicken files in your system.
Troubleshooting Solutions For Quicken Runtime Error Code 1303

Solution 1: Reinstall Conflicting Programs

Use Control Panel to perform this Quicken Runtime Error Code 1303:

  • Go to the Control Panel and then to Uninstall a Program.
  • Thereafter, choose Programs and Features.
  • Next, locate the program with the issue, and uninstall the same.
  • Finally, you can follow the instructions on your screen to reinstall it.

Solution 2: Uninstall and Reinstall Runtime Libraries

Fix the issue in the libraries with the following steps:

  • Again go to Programs and Features on your Control Panel.
  • Thereafter, locate the libraries and uninstall them.
  • Furthermore, reboot your system and reinstall it back to your system from the exe file.

Solution 3: Use Disk Cleanup

Make space in your system to resolve the problem.

  • Make a back up of files first.
  • Clear the browser cache.
  • Thereafter, run Disk Cleanup from the main directory under Properties.

Solution 4: Uninstall Graphic Drivers

Try reinstalling the graphic driver:

  • Initially, head to Device Manager and search for graphic drivers.
  • On the video card driver, make a right-click and hit Uninstall.
  • Finally, restart your PC.

Follow these solutions and get in touch with us for further help.

You may also read: – Quicken Error 101 Or 103

Conclusion

We hope you find this blog helpful. This blog post has covered all the steps you can easily follow to resolve the Quicken error 1301 or 1303. If you face any challenge or problem while performing the steps, you can reach out to our professional Quicken Customer service NumberWe at Go Taxation are a team of experts who are available 24*7 at the help desk to attend to all your queries related to the accounting and budgeting software.